

In today\'s interconnected world, the importance of securely emptying the trash on your Mac cannot be overstated. Simply deleting files through the conventional method doesn’t erase them completely; traces can linger on your hard drive, leaving your sensitive data vulnerable to unauthorized access. Whether you\'re disposing of personal documents, financial records, or even corporate files, ensuring they are irrecoverably deleted is crucial for maintaining privacy and security.
This article explores five effective ways to achieve Empty Trash on Mac Securely and Permanently. From utilizing built-in macOS features to employing third-party software solutions, each method is designed to go beyond basic deletion, employing advanced techniques that overwrite data and prevent recovery attempts. By implementing these strategies, you can confidently manage your digital footprint, safeguarding your information and minimizing the risk of data breaches or identity theft.
Does Emptying Trash Permanently Delete?
When you delete files on a Mac and then empty the Trash, the files are not immediately removed from your storage. Instead, macOS marks the space they occupy as available for new data. Until that space is overwritten by new files, the deleted data remains intact on the disk and can potentially be recovered using data recovery software. This means that simply emptying the Trash does not guarantee the permanent deletion of your files.
For users concerned about data security, especially when dealing with sensitive or confidential information, securely deleting files involves overwriting the data multiple times to ensure it cannot be recovered. This is where specialized tools like Macube Cleaner come into play.
How Do You Permanently Delete Trash on a Mac: 5 Ways
Way 1. Macube Cleaner
Macube Cleaner is a comprehensive utility designed specifically for Mac users to optimize system performance, manage storage efficiently, and enhance data security. Beyond basic file management, Macube Cleaner offers robust features tailored to Mac environments, including secure file deletion to prevent unauthorized data recovery.
Key Features of Macube Cleaner:
- System Junk Cleanup: Identifies and removes unnecessary system files, caches, and logs that accumulate over time, thereby improving system performance.
- Large & Old Files Finder: Scans for large files and outdated data, helping users reclaim valuable disk space.
- Duplicate Finder: Detects and deletes duplicate files, reducing redundancy and optimizing storage usage.
- Privacy Cleaner: Safely erase browsing history, cookies, and other sensitive data to protect user privacy.
- File Shredder: Securely deletes files by overwriting them multiple times, ensuring they are irrecoverable by data recovery software.
- Scheduled Secure Deletion: Allows users to automate the process of securely deleting files at specified intervals, maintaining system cleanliness and data security.
How To Use:
Step 1: Get Macube Cleaner
First, download Macube Cleaner, a dedicated tool designed to remove unnecessary files from your Mac. This application is tailored to pinpoint and delete redundant files, which can help free up space and enhance your system\'s speed.
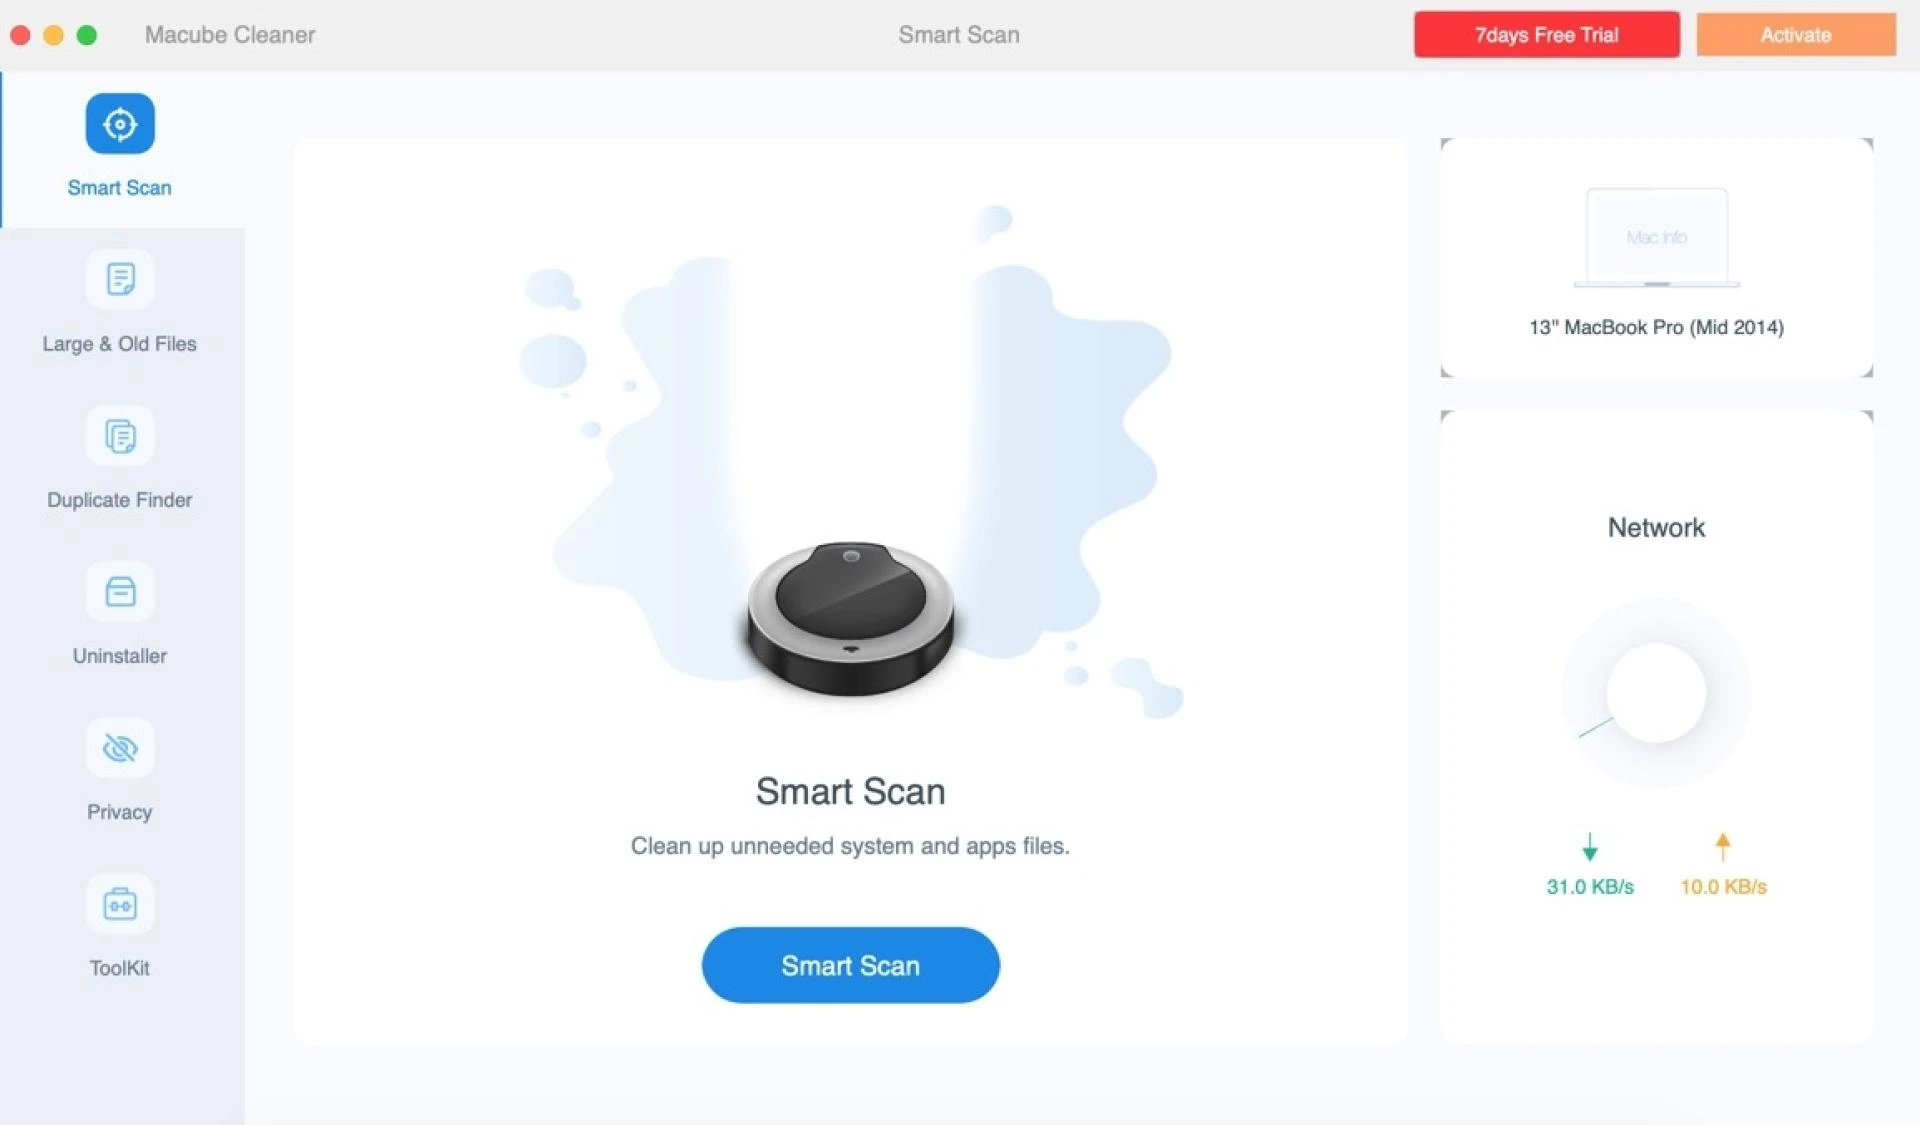
Step 2: Run a Smart Scan
Once Macube Cleaner is launched, initiate a Smart Scan. This powerful feature comprehensively examines your Mac, detecting and listing cache, temporary files, and other data that can be safely deleted. By removing these files, you\'ll effectively boost your Mac\'s overall performance.
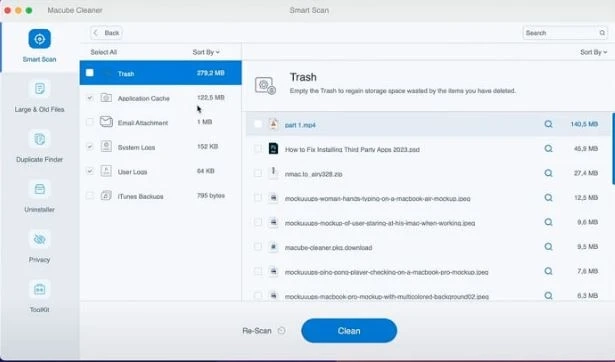
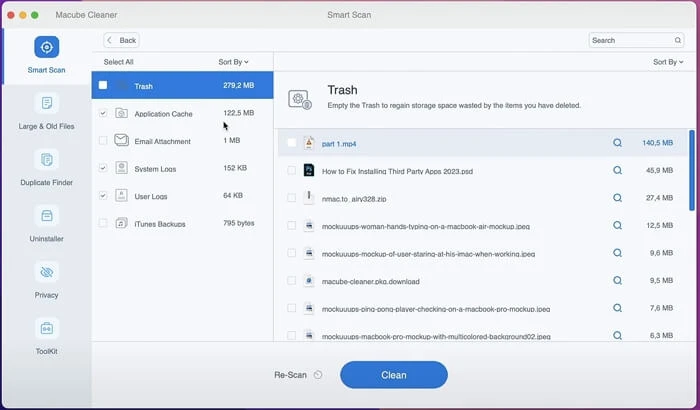
Step 3: Emptying the Trash
After completing the scan, navigate to the Trash section within Macube Cleaner. Here, you\'ll find a list of items identified during the scan. To permanently remove these items, simply click on "Clean". If you wish to selectively delete certain files instead, you can choose those specific items before initiating the cleaning process. This ensures that your system remains clutter-free and optimized for better performance.
Pros and Cons
Pros
- Enhanced Data Security: Macube Cleaner ensures that deleted files are thoroughly overwritten and cannot be recovered, enhancing overall data security.
- Intuitive Interface: It features a user-friendly design that simplifies navigation and usability, making it accessible for all users.
- Comprehensive Functionality: In addition to file deletion, Macube Cleaner offers a range of tools for optimizing and maintaining system performance.
- Customizable Options: Users have the flexibility to configure shredding passes according to their security needs, providing tailored protection for sensitive data.
- Efficiency Boost: By swiftly and effectively removing unnecessary files, Macube Cleaner helps improve system speed and performance.
Cons
- Cost Consideration: Macube Cleaner is a paid utility, which may be a factor for users looking for free alternatives.
Way 2: Using Safe Mode on a Mac
Deleting unwanted files from a Mac can sometimes be difficult, especially when certain files resist deletion. Safe Mode provides an effective solution by temporarily disabling software and processes that could prevent file removal.
How to Use
Step 1: Restart in Safe Mode
- Shut Down Your Mac: Click on the Apple menu and choose "Shut Down".
- Start in Safe Mode: Press the power button, then immediately hold down the Shift key until the login window appears with "Safe Boot" shown in the top-right corner.
Step 2: Empty the Trash
- Open the Trash: Click on the Trash icon in the Dock.
- Empty the Trash: Right-click on the Trash window and select "Empty Trash". Confirm your decision when prompted.
Step 3: Restart Normally
- Restart Your Mac: Click on the Apple menu and select "Restart" to exit Safe Mode and return your Mac to its normal operating mode.
Pros and Cons:
Pros:
- Effective Deletion: Safe Mode can successfully delete files that are difficult to remove due to active system processes or applications.
- Enhanced Safety: By disabling unnecessary processes, Safe Mode reduces the risk of software conflicts during file deletion.
Cons:
- Performance Impact: Safe Mode may cause your Mac to run slower temporarily as it limits certain drivers and functionalities.
- Accessibility Issues: Some users may find entering Safe Mode inconvenient, especially if it needs to be done frequently.
Way 3: Utilizing Finder Preferences to Manage Your Trash
Maintaining a tidy Mac and optimizing disk space are essential for ensuring smooth performance. One efficient method to manage your Trash is by using Finder Preferences, which offers an automated solution for emptying the Trash after 30 days. This approach helps keep your Trash clear without the need for manual intervention.
How to Use
Step 1: Access Finder Preferences
- Open Finder from your Dock or by clicking on your desktop.
- Navigate to the top menu bar, click on "Finder," and select "Preferences" from the dropdown menu.
Step 2: Enable Automatic Trash Removal
- In the Finder Preferences window, go to the "Advanced" tab.
- Check the box labeled "Remove items from the Trash after 30 days."
Pros and Cons
Pros:
- Automated Maintenance: Keeps your Trash clear without any manual effort.
- Space Optimization: Regularly deletes old files, helping to manage disk space efficiently.
- Ease of Use: Simple setup with no ongoing maintenance required.
Cons:
- Delayed Deletion: Files remain in the Trash for 30 days before being removed.
- Limited Control: Reduced ability to control the timing of individual item deletion since the process is automated.
Method 4: Utilizing the Terminal
Clearing the Trash on a Mac via the Terminal is a swift and efficient way to delete stubborn files that might not be removable through the Finder. This method is especially helpful for resolving Trash-related issues.
How to use::
Step 1: Open Terminal
Begin by launching the Terminal application. You can locate it in the Utilities folder within Applications, or use Spotlight (Cmd + Space) and type "Terminal" to find it quickly.
Step 2: Run Commands
Navigate to the Trash directory by entering cd ~/.Trash in the Terminal. To remove all items in the Trash, type rm -rf *. This command will delete all files and folders in the Trash directory.
Step 3: Confirmation and Administrative Access
Ensure the deletion process completes without errors. If any issues occur, you can use sudo rm -rf ~/.Trash/* and provide your administrator password when prompted.
Pros:
- Efficiency: Instantly clears the Trash, bypassing the graphical user interface.
- Effectiveness: Can delete files that Finder cannot remove.
Cons:
- Risk of Data Loss: Files deleted through the Terminal cannot be recovered from the Trash.
- Caution Needed: Incorrect use of commands can lead to accidental deletion of important files.
Way 5. Simple Empty Method:
Emptying the Trash on a Mac is crucial for reclaiming storage space and ensuring that deleted files are permanently erased. This guide outlines a straightforward approach to empty the Trash using the built-in features of macOS.
How To Use:
Step 1: Access the Trash
Find the Trash icon on your Dock and click on it to open the Trash folder.
Step 2: Empty the Trash
To empty the Trash completely, right-click the Trash icon on the Dock and choose "Empty Trash." A confirmation window will pop up; select "Empty Trash" again to confirm and permanently delete the files.
Pros and Cons
Pros:
- Simplicity: The process is easy and quick.
- Convenience: The option is always accessible from the Dock.
Cons:
- Irreversibility: Once the Trash is emptied, the files cannot be retrieved without using specialized recovery software.
- Warning Ignored: Users might accidentally confirm the deletion without fully considering the warning.
. Conclusion:
Securing your data by permanently and securely emptying the trash on your Mac is vital in today\'s digital age. Simply deleting files through the conventional method is not enough, as remnants of the data can still be recovered, posing a significant risk to your privacy. The methods discussed in this article offer various ways to ensure your sensitive information is completely erased.
From employing powerful third-party tools like Macube Cleaner to utilizing macOS\'s built-in functionalities such as Safe Mode and Finder Preferences, each approach has its own advantages and limitations. Using Terminal commands can be particularly effective for stubborn files, while the simple empty method provides a quick and easy solution for everyday needs.
By implementing these techniques, you can enhance your data security, maintain your privacy, and ensure your Mac operates efficiently. Whether you choose an automated solution or a more manual approach, understanding and utilizing these methods will help you manage your digital footprint responsibly, protecting your sensitive information from unauthorized access and potential data breaches.