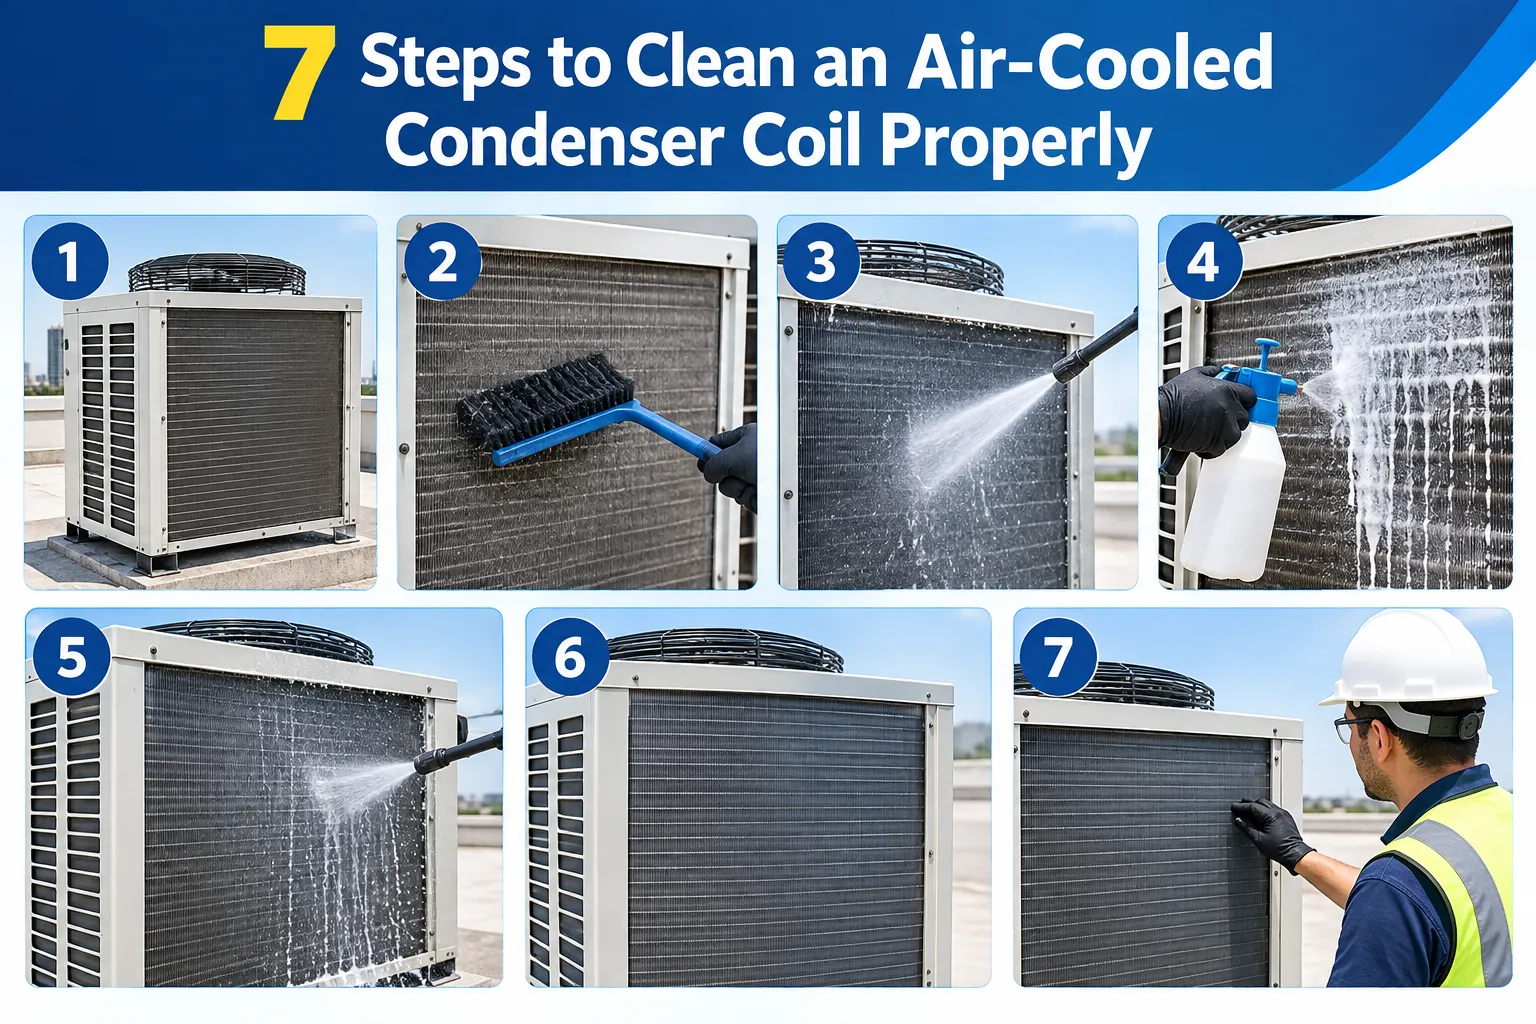

A dirty condenser coil can quietly hurt cooling performance. Dust, leaves, grease, pollen, and other debris block airflow across the coil. The compressor then has to work harder to reject heat. Energy use can rise, cooling capacity can fall, and wear on key components can increase. For any air cooled chiller supplier, proper coil maintenance is one of the simplest ways to support reliable system performance.
The good news? Cleaning an air-cooled condenser coil does not have to be complicated. But it does need to be done carefully. The fins are thin and easy to bend. A careless cleaning job can create more problems than it solves.
Here are seven practical steps to clean the coil properly.
Why Condenser Coil Cleaning Matters
An air-cooled condenser releases heat from the refrigerant into the surrounding air. The coil needs steady airflow to do this job well.
When dirt builds up between the fins, airflow becomes restricted. Heat transfer suffers. The system may run for longer periods, develop higher operating pressures, or struggle during peak summer conditions.
Manufacturers generally recommend routine inspection and cleaning. The exact schedule depends on the equipment, location, coil design, and level of airborne dirt. Units in dusty, industrial, or polluted areas may need cleaning more often.
Step 1: Switch Off and Isolate the Power
Safety comes first.
Turn the equipment off. Then isolate the electrical supply according to the manufacturer's service procedure. For commercial chillers, follow proper lockout/tagout procedures before opening panels or working near fans and electrical components.
Do not rely only on the controller or thermostat. Fans can start unexpectedly.
Also wear suitable gloves and eye protection. Coil fins can be sharp, and cleaning can loosen dirt and debris.
Manufacturer guidance stresses disconnecting power before coil maintenance because moving fans and electrical parts can cause serious injury.
Step 2: Inspect the Coil and Surrounding Area
Before spraying anything, look closely at the condenser.
Check for:
- Leaves and grass
- Dust and lint
- Mud or grease
- Insects and nests
- Corrosion
- Bent or crushed fins
- Damaged coil sections
- Obstructions around the unit
Clear debris from around the condenser as well. Good airflow does not depend only on a clean coil. The space around the unit also needs to remain open.
This is especially important for outdoor equipment exposed to traffic dust, construction debris, or vegetation.
Step 3: Remove Loose Dirt First
Do not immediately soak a heavily clogged coil.
Start by removing dry, loose debris. A soft brush or suitable vacuum can help. Brush in the same direction as the fins rather than across them.
For larger commercial systems, trained technicians may use compressed air. The airflow should generally move debris away from the coil rather than push it deeper into the fin pack.
This step matters more than many people think. If loose fibers and dirt are still packed against the coil, water can turn that material into a stubborn layer inside the fins. Daikin specifically advises removing surface-loaded debris before water rinsing.
Step 4: Choose the Right Cleaning Method
Now identify the coil type.
Do not assume every condenser coil can be cleaned with the same chemical. Microchannel coils, coated coils, and traditional tube-and-fin coils can have different cleaning requirements.
For many microchannel coils, manufacturers recommend clean water and caution against chemical cleaners because the all-aluminum construction can be sensitive to certain products.
If a chemical cleaner is approved for your equipment, use the product and dilution rate specified by the manufacturer. Never substitute a strong household chemical simply because it appears effective.
When in doubt, check the chiller's installation and maintenance manual first.
Step 5: Rinse the Coil Carefully
Use clean water and a controlled spray.
The goal is to remove dirt without bending the fins. Avoid aggressive pinpoint jets and careless spraying from extreme angles. High-pressure cleaning can deform delicate fins and restrict airflow even further.
Several major HVAC manufacturers warn against using ordinary power washers on condenser coils. Daikin also recommends low-pressure water for routine rinsing of certain air-cooled chiller coils.
For equipment with specific microchannel cleaning instructions, follow those instructions instead. Some commercial systems have defined pressure, nozzle, and spray-angle limits.
Work methodically. Rinse until the water leaving the coil is reasonably clear.
Step 6: Straighten Damaged Fins and Check the Coil
Once the coil is clean, inspect it again.
Look for areas where fins have been flattened. Bent fins reduce the open area available for airflow. A trained technician can use the correct fin comb to straighten suitable sections without damaging the coil.
Also check for signs of corrosion, oil staining, physical damage, or possible refrigerant leaks.
Do not ignore a damaged coil just because it looks clean. Cleaning improves heat transfer, but it cannot repair a leaking or badly corroded coil.
If deeper HVAC work is required, professional service is the safer choice. This is also where experienced ductable ac repair services In Delhi can be useful when cleaning reveals airflow, electrical, or refrigeration problems.
Step 7: Restore the System and Verify Performance
After cleaning, make sure panels and guards are correctly refitted. Remove tools and debris from the service area.
Restore power according to the equipment procedure and allow the system to operate.
Then check for:
- Normal condenser fan operation
- Unusual vibration or noise
- Proper airflow
- Abnormal operating pressure
- Excessive cycling
- Visible refrigerant or oil leaks
- Any remaining coil blockage
For larger chillers, record relevant operating readings before and after maintenance when your service procedure calls for it. This creates a useful maintenance history and can help identify performance changes over time.
How Often Should You Clean the Coil?
There is no single schedule for every installation.
A clean commercial site may need less frequent cleaning than a unit beside a busy road or industrial process. Daikin guidance notes that high airborne particle levels can require more frequent cleaning, while other manufacturer guidance recommends routine inspection and cleaning based on operating conditions.
A practical approach is to inspect the coil regularly and clean it when dirt begins to restrict airflow. Annual professional maintenance is also a sensible baseline for many systems, with more frequent attention where conditions demand it.
Common Coil-Cleaning Mistakes to Avoid
The biggest mistakes are usually simple ones.
Never clean an energized unit. Do not attack delicate fins with a stiff metal brush. Avoid blindly using strong chemicals. And do not assume maximum water pressure means better cleaning.
The right method is gentle, controlled, and suited to the specific coil.
For businesses that want dependable HVAC maintenance and equipment support, Blueace Limited can be a practical partner for professional guidance and service.
Keep Your Condenser Ready for the Heat
A clean condenser coil helps the system move heat efficiently and maintain stable cooling performance. More importantly, regular inspection can uncover problems before they become costly breakdowns.
Clean carefully. Follow the manufacturer's instructions. And treat the condenser coil as a precision heat-transfer surface, not something that can simply be blasted with water.
If your commercial cooling system needs expert inspection, maintenance, or repair, connect with Blueace Limited to keep your HVAC equipment operating reliably and ready for demanding conditions.























Sign in to leave a comment.