
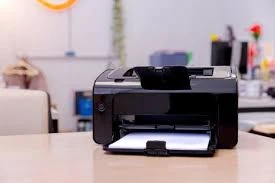
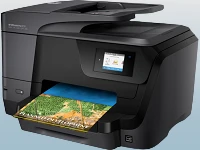
In today's fast-paced world, having a reliable printer at your disposal is essential for both personal and professional tasks. The HP Envy 7640 printer, with its multifunction capabilities and advanced features, offers a versatile solution for printing, scanning, copying, and more. Setting up the HP Envy 7640 printer is a straightforward process that can be completed in a few simple steps. In this comprehensive guide, we'll walk you through the entire setup process, from unboxing to connecting to a wireless network, empowering you to unleash the full potential of your How to Set Up HP Envy 7640 Printer.
1. Unboxing and Preparation:
Before you begin setting up your HP Envy 7640 printer, ensure that you have all the necessary components at hand. These typically include:
HP Envy 7640 printerPower cableSetup cartridgesSetup guide and documentationOnce you have gathered all the components, follow these steps to prepare for setup:
Carefully unbox the HP Envy 7640 printer and remove all packaging materials.Remove the printer from the box and set it on a flat, stable surface.Remove any protective tape or packaging material from the printer.Install the setup cartridges that came with the printer by following the instructions provided.With the printer prepared, it's time to move on to the setup process.
2. Power On and Initial Setup:
Once you have installed the setup cartridges, follow these steps to power on the printer and complete the initial setup:
Plug one end of the power cable into the power port on the back of the printer and the other end into a power outlet.Press the power button on the front panel of the printer to turn it on.The printer will initialize and prompt you to select your language, country/region, and time/date settings using the touchscreen display.Follow the on-screen instructions to complete the initial setup process.3. Loading Paper:
Before you can start printing, you'll need to load paper into the printer's input tray. Here's how to do it:
Open the input tray door located at the bottom front of the printer.Slide out the paper width guides to their outermost position.Load a stack of plain, white paper into the input tray, making sure to align the edges neatly.Adjust the paper width guides until they lightly touch the edges of the paper stack.Close the input tray door.4. Installing Printer Software:
To enable full functionality and compatibility with your computer, you'll need to install the HP printer software. Follow these steps to install the software:
Insert the installation CD that came with your printer into your computer's CD/DVD drive. If your computer doesn't have a CD/DVD drive, you can download the software from the HP website.Follow the on-screen instructions to install the printer software. This typically involves selecting your printer model, agreeing to the terms and conditions, and choosing the desired software components to install.Once the software installation is complete, restart your computer if prompted.If you don't have the installation CD or prefer to download the software from the HP website, you can do so by visiting the HP Support website and navigating to the "Drivers & Software" section. Enter your printer model (HP Envy 7640) and follow the prompts to download the software for your operating system.
5. Connecting to a Wireless Network:
One of the key features of the HP Envy 7640 printer is its wireless connectivity, which allows you to print from multiple devices without the need for physical cables. Here's how to connect your printer to a wireless network:
On the printer's control panel, touch the Wireless icon to access the wireless menu.Select the option for Wireless Setup Wizard or Wireless Setup, depending on the specific menu options displayed.The printer will search for available wireless networks. Once it detects your network, select it from the list.If prompted, enter the password for your wireless network using the on-screen keyboard.After entering the password, the printer will attempt to connect to the wireless network. Once connected successfully, a confirmation message will be displayed.6. Test Print:
Once you have completed the setup process and connected your printer to a wireless network, it's a good idea to perform a test print to ensure that everything is functioning correctly. Here's how to do it:
Load a few sheets of plain paper into the input tray.Open a document or image on your computer that you want to print.Select the Print option from the File menu or use the keyboard shortcut (Ctrl+P).In the print dialog box, select your HP Envy 7640 printer from the list of available printers.Adjust any print settings as desired, such as paper size and print quality.Click the Print button to send the print job to your printer.Wait for the printer to complete the print job. If the printout looks good and there are no errors, your HP Envy 7640 printer setup is complete!Conclusion:
Setting up the HP Envy 7640 printer is a relatively simple process that can be completed in just a few steps. By following the steps outlined in this guide, you can quickly and easily get your printer up and running, allowing you to print, scan, and copy with ease. Whether you're using the printer for personal or professional use, its versatile features and wireless connectivity make it a valuable addition to any home or office. With the HP Envy 7640 printer, you can streamline your printing tasks and enjoy high-quality results every time.


Sign in to leave a comment.