When it comes to maintaining the aesthetic and functional appeal of your home, carpet integrity is crucial. Torn carpets not only diminish the look of your space but can also be a tripping hazard, posing a risk to household safety. Fortunately, carpet repair is a manageable task that can restore your carpet to its former glory. This comprehensive guide will walk you through the process of repairing torn carpets, When it comes to restoring the beauty and functionality of your flooring, finding a reliable service for carpet repair in Melbourne is crucial. Whether you're dealing with a minor snag or a significant tear, this article will provide you with the knowledge and confidence to tackle carpet repair.
Understanding Carpet Damage
Before diving into the repair process, it's important to assess the type of damage your carpet has sustained. Carpet damage can range from simple wear and tear to severe rips and tears caused by furniture, pets, or accidents. Understanding the extent of the damage is crucial in determining the most effective repair method.
Essential Tools for Carpet Repair
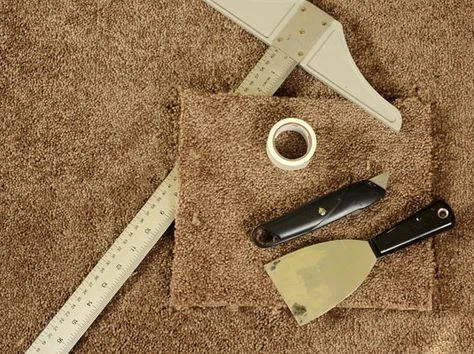
To successfully repair a torn carpet, you'll need the right tools and materials. Here's a basic list:
Carpet knife or scissorsSeam roller or a heavy bookCarpet tape or adhesiveA donor carpet piece (for larger repairs)A vacuum cleanerStep 1: Clean the Area
Begin by thoroughly cleaning the damaged area. Use a vacuum cleaner to remove any dirt, debris, or loose fibers. A clean surface is essential for a seamless repair.
Step 2: Trim the Damaged Fibers
Carefully trim any frayed edges or loose fibers around the tear using a carpet knife or scissors. This step ensures a neat and even surface for the repair.
Step 3: Apply Carpet Tape
For small tears, double-sided carpet tape is an effective solution. Cut a piece of tape slightly larger than the tear and position it underneath the damaged area. Press down firmly to secure the carpet to the tape.
Step 4: Use a Donor Piece for Larger Repairs
If the tear is too large for tape alone, you'll need a donor piece of carpet. Cut a piece from an inconspicuous area (like a closet) or use leftover carpet from the initial installation. Ensure the donor piece matches the damaged area in size and texture.
Step 5: Adhere to the Donor Piece
Apply carpet adhesive to the back of the donor piece and carefully place it into the damaged area. Use a seam roller or a heavy book to press down on the patch, ensuring it adheres well.
Step 6: Let It Dry
Allow the adhesive to dry completely according to the manufacturer's instructions. This may take several hours or overnight.
Step 7: Blend the Repair
Once dry, use a vacuum cleaner or a hand brush to blend the repaired area with the surrounding carpet. This helps to integrate the patch seamlessly.
Regular Carpet Maintenance
To prevent future damage, regular carpet maintenance is key. Vacuum regularly, address spills promptly, and consider professional cleaning once a year. This not only extends the life of your carpet but also maintains its appearance.
When to Seek Professional Help
While many tears can be repaired DIY, some situations call for professional expertise. If your carpet is antique, made of delicate materials, or the damage is extensive, seeking professional carpet repair in Truganina is advisable.
Conclusion
Repairing torn carpets can seem daunting, but with the right tools and a bit of patience, it's a task well within the reach of most homeowners. Whether you're performing a minor fix or a major repair, the satisfaction of breathing new life into your carpet is unparalleled. Remember, regular maintenance can prevent damage, but when tears occur, this step-by-step guide will be your go-to resource for carpet repair. For those facing a carpet repair challenge beyond the DIY scope, professional services are just a call away. By following these guidelines, your carpets can continue to add warmth and comfort to your home for years to come.


