SCenturylink email is simple to set up on your Android smartphone. You may link your Centurylink email to your Android phone with just a few configuration tweaks. You no longer need to check your emails on a computer. On your Android phone, you can easily access the emails stored in your Centurylink account. POP settings can be used to configure Centurylink email on Android.
POP is chosen by most Centurylink customers over IMAP because it offers more functionality, reliability, and flexibility. IMAP is not supported by Centurylink. Incorrect email settings might result in a variety of issues while sending and receiving emails. You can, however, avoid the problem if you follow the proper approach. This article will show you how to configure Centurylink's email settings on your phone correctly.
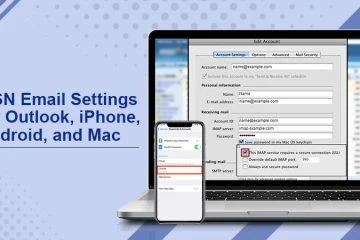
How do I get my Centurylink email on my Android phone?
The procedure of setting up Centurylink email on an Android device is really straightforward. The setup, on the other hand, is entirely dependent on the type, make, and model of Android phone you have. The basic operation, i.e. the server settings, will remain mostly unchanged regardless of the type of mobile phone used. For your Android phone, here are the Centurylink email settings. -
Go to the settings section of the "mail" app on your Android device's applications tray.To add a new Centurylink email account, select "add a new email account."You'll be asked to select an account type from a list of alternatives. Choose "POP3" from the drop-down menu.Username: This is the username/address that you use to access your Centurylink email account.Centurylink.net is the incoming server.Incoming port: The incoming port number must be set to 993.Type of security: Select the "ssl" option to enable the security feature.Password: Enter your Centurylink email password.To get to the outgoing settings for Centurylink email setup on Android, select the 'next' option.Here's what you need put in the incoming email server settings:Centurylink.net is the incoming server.Type of security: By choosing the "ssl" option, you can enable the feature.The following authorization is required: Place a checkbox next to the option to enable authentication.Port of departure: Set the port number for the outgoing email server to 143.Username: Enter your full email address here.Type your password in the box below.To finish the configuration, use the 'next' option.When you've finished setting up Centurylink on Android, check the box that says "leave a copy of your emails on the server."Congratulations! You have completed the setup successfully. You can now send and receive emails using Centurylink email on your Android phone.Read Also: SbcGlobal net Email Not Working


Sign in to leave a comment.