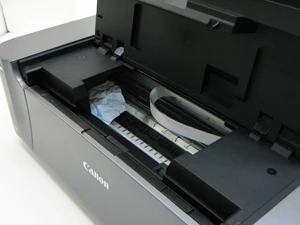
The Canon PIXMA MG3620 is a versatile all-in-one wireless printer that supports printing, scanning, and copying. One of its most useful features is wireless connectivity, which enables users to print from multiple devices without the hassle of cables. Canon pixma mg3620 wireless setup printing can be done using different methods, including WPS (Wi-Fi Protected Setup) and Standard Wireless Connection Setup.
This guide provides a detailed step-by-step process to help you set up your Canon PIXMA MG3620 for wireless printing, whether you’re using a Windows PC, Mac, or mobile device.
Method 1: Wireless Setup Using WPS Button (Easy Method)
If your router supports WPS (Wi-Fi Protected Setup), you can quickly connect the Canon MG3620 without needing to enter a Wi-Fi password.
Step-by-Step Instructions:
- Power On the Printer: Ensure the Canon MG3620 is powered on.
- Enable Wi-Fi Setup Mode:
- Press and hold the Wi-Fi button on the printer until the power light flashes.
- Release the button when the Wi-Fi light starts blinking.
3. Press the WPS Button on the Router:
- Locate the WPS button on your router and press it.
- Hold the button for about 2 minutes.
4. Confirm the Connection:
- The printer’s Wi-Fi light will continue flashing.
- Once the connection is successful, the Wi-Fi light will turn solid.
5. Print a Test Page:
- Press and hold the Wi-Fi button until the power lamp flashes twice, then release it.
- The printer will print a network configuration page to confirm the successful connection.
Your Canon PIXMA MG3620 is now wirelessly connected using WPS!
Method 2: Wireless Setup Using Standard Connection (Manual Method)
If your router does not have a WPS button, you can set up the wireless connection manually using a Windows PC, Mac, or mobile device.
For Windows Users:
Step 1: Download and Install Printer Software
- Visit Canon’s official website (https://www.usa.canon.com).
- Download the Canon MG3620 driver for Windows.
- Run the installation wizard and select Wireless Connection as the connection type.
Step 2: Connect the Printer to Wi-Fi
- Follow the on-screen instructions to enable Wi-Fi setup mode.
- Select your Wi-Fi network (SSID) and enter the password.
- The printer will attempt to connect to the network. Once successful, a confirmation message will appear.
- Click Finish to complete the installation.
Your Canon PIXMA MG3620 is now connected to Wi-Fi on Windows!
For Mac Users:
Step 1: Install Printer Drivers
- Open System Preferences on your Mac.
- Select Printers & Scanners and click the “+” icon.
- Choose Canon MG3620 from the available printers.
- If required, download the drivers from Canon’s official website.
Step 2: Connect to Wi-Fi
- In the Printers & Scanners menu, click "Use: AirPrint" (if available).
- Click Add, and wait for the printer to appear as "Online."
Your Canon PIXMA MG3620 is now connected to Wi-Fi on Mac.
For Mobile Devices (iPhone & Android)
Using the Canon PRINT Inkjet/SELPHY App:
1. Download the App:
- iPhone users: Download from the App Store.
- Android users: Download from the Google Play Store.
2. Enable Wi-Fi on Your Printer:
- Press the Wi-Fi button until the light starts flashing.
3. Connect Phone to Printer:
- Open the app and select "Connect to Printer".
- Follow on-screen instructions to choose your Wi-Fi network and enter the password.
4. Complete Setup:
- Once connected, the app will confirm the successful connection.
Your Canon PIXMA MG3620 is now ready for mobile printing!
Troubleshooting Wi-Fi Connection Issues
If you experience connectivity issues, try the following troubleshooting steps:
1. Restart Printer and Router
- Turn off the Canon MG3620 printer and unplug it for 30 seconds.
- Restart your Wi-Fi router.
- Turn the printer back on and try reconnecting.
2. Check Wi-Fi Signal Strength
- Ensure your printer is within 10 feet of the router.
- Avoid placing the printer near microwaves, cordless phones, or thick walls.
3. Verify Wi-Fi Credentials
- Ensure you are entering the correct Wi-Fi network name (SSID) and password.
4. Reset Printer’s Network Settings
- Press and hold the Wi-Fi button until the power light blinks.
- Release the button and wait for the printer to reset.
- Reconfigure the Wi-Fi connection using the setup process.
5. Update Printer Firmware and Drivers
- Visit Canon’s website to download the latest firmware and drivers.
- Install updates to fix bugs and improve connectivity.
6. Disable Firewall or Antivirus Temporarily
- Some security software may block the printer’s connection.
- Temporarily disable your firewall or antivirus and check if the connection works.
Final Thoughts
Setting up your Canon PIXMA MG3620 for wireless printing is a straightforward process when following the correct steps. Whether using the WPS method or manually configuring the connection, this guide ensures a successful setup. If you encounter issues, troubleshooting steps like resetting the printer, updating drivers, or restarting your router can help resolve connectivity problems.
By ensuring a stable Wi-Fi connection, you can enjoy the wireless printing capabilities of the Canon PIXMA MG3620, making your printing tasks more efficient and convenient!


Sign in to leave a comment.