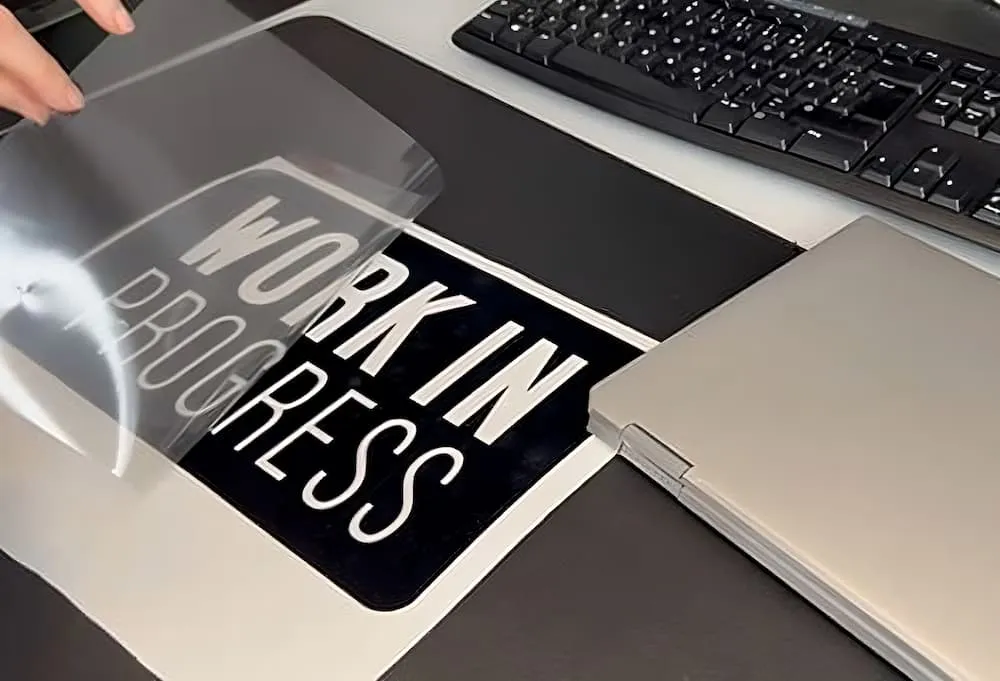

Transfer applications can sometimes become difficult when the material does not behave as expected during positioning or application. Problems such as poor adhesion, excessive sticking, air bubbles, tearing, and uneven transfer can affect the appearance of a finished project. Understanding why these issues happen can help users make better decisions before and during application. Proper preparation, suitable pressure, clean surfaces, and careful handling all contribute to reliable results. When users understand how adhesive transfer tape works, they can troubleshoot common problems more effectively and reduce material waste during decorative and functional vinyl projects.
Why Proper Application Matters
Successful transfer depends on several factors working together. The surface should be clean, the vinyl should be properly prepared, and the transfer material should have an appropriate level of tack for the design. If one element is unsuitable, the application may become difficult even when the technique appears correct. Users should therefore consider the material, surface, design complexity, and environmental conditions before beginning. A controlled process makes it easier to identify problems when they occur. Proper preparation also reduces the amount of force needed during application, helping protect delicate lettering and detailed graphics.
Problem One: Transfer Tape Will Not Pick Up the Vinyl
Check Adhesive Strength
One common issue occurs when the transfer tape does not lift the vinyl from its backing. This may happen when the adhesive strength is too low for the material being transferred. Users should first check whether the selected transfer material is appropriate for the vinyl type and design. Pressing the tape firmly over the vinyl can improve contact between both layers. A squeegee or similar application tool can be moved across the design with controlled pressure. If the vinyl still refuses to lift, a different tack level may be more suitable.
Apply Consistent Pressure
Uneven pressure can leave sections of vinyl attached to the backing while other areas transfer successfully. Users should work across the entire design rather than concentrating pressure only on visible problem areas. The application tool should move smoothly over letters, corners, and detailed sections. Repeated passes may be helpful for intricate designs, particularly when the vinyl has a textured or slightly uneven surface. Care should be taken not to stretch the transfer material during this process. Consistent contact allows the adhesive to engage more evenly with the vinyl.
Problem Two: Vinyl Sticks Too Strongly to the Transfer Tape
Use Controlled Peeling
Excessive adhesion can make the vinyl difficult to release onto the final surface. When this happens, users should avoid pulling the transfer material quickly because sudden force can distort the design. Instead, the tape can be peeled back slowly at a low angle while the vinyl is pressed firmly against the application surface. Working gradually gives individual letters and small elements enough time to remain in place. If certain sections continue to lift, they can be pressed down again before peeling continues. Controlled movement provides greater accuracy than using additional force.
Consider Tack Level
The tack level of transfer material should match the vinyl and design being handled. Highly detailed designs may require stronger holding ability, while lightweight or easily released vinyl can benefit from a gentler adhesive. Using a material with excessive tack can create unnecessary difficulty during removal. Users should therefore consider the characteristics of the vinyl before selecting transfer tape. Testing a small portion can help determine whether the chosen material provides enough grip without holding the design too aggressively. Proper compatibility is an important factor in achieving predictable transfer results.
Problem Three: Air Bubbles Appear During Application
Prepare the Surface
Air bubbles often develop when the transfer material or vinyl is applied over a surface that has dust, moisture, grease, or other contamination. Before application begins, the surface should be cleaned using a method suitable for that material. It should also be allowed to dry completely. Even small particles can create raised areas that prevent smooth contact. Preparing the surface carefully gives the vinyl a more uniform foundation. A clean and dry application area makes it easier to position the design and reduces the likelihood of bubbles forming during installation.
Use a Squeegee Carefully
A squeegee can help remove trapped air when used with controlled movements. Users should begin from one side of the design and gradually work toward the opposite edge. Applying steady pressure allows air to move outward instead of becoming trapped beneath the vinyl. The tool should be held at a suitable angle and moved across the design without excessive force. For larger graphics, working in manageable sections can provide greater control. Patience is important because rushing the application can create additional wrinkles, bubbles, or alignment problems.
Problem Four: Transfer Tape Tears During Use
Handle the Material Carefully
Transfer tape can tear when it is pulled aggressively, folded sharply, or exposed to unsuitable conditions. Users should handle the material carefully and avoid unnecessary stretching before application. When removing the tape, a smooth and controlled motion can reduce stress on the material. If a tear begins, the affected area should be stabilized rather than pulled harder. Smaller pieces may sometimes be removed separately if the design allows it. Careful handling is particularly important when working with large graphics because a damaged transfer sheet can make positioning more difficult.
Store Transfer Material Properly
Storage conditions can influence the condition of transfer materials before they are used. Excessive heat, moisture, dust, or pressure can affect adhesive performance and material flexibility. Rolls should be stored in a clean environment where they are protected from direct sunlight and extreme temperature changes. Sheets should remain flat when appropriate to prevent unwanted creases. Keeping materials in suitable conditions helps preserve their intended properties. Users should also avoid storing adhesive materials for extended periods in areas where dust can accumulate on exposed surfaces.
Problem Five: Vinyl Develops Wrinkles During Transfer
Position the Design Carefully
Wrinkles can appear when the vinyl or transfer material is positioned unevenly. Before the design makes full contact with the surface, users should confirm that it is correctly aligned and supported. Large designs may require a more controlled application technique because their size makes accidental folding easier. The transfer material should not be allowed to collapse onto the surface without guidance. Supporting the design while gradually applying it can help maintain a smooth appearance. Proper positioning reduces the need to lift and reposition the material repeatedly.
Work in Small Sections
Large graphics can be easier to handle when they are applied progressively. Users can expose a manageable portion of the adhesive surface and gradually press it onto the intended area. A squeegee can then be used to secure that section before moving forward. This method reduces the amount of exposed adhesive at one time and provides greater control over alignment. Working slowly also makes it easier to correct a problem before it affects the entire design. Smaller sections are particularly useful when applying long or complex graphics.
Problem Six: Vinyl Does Not Release From the Transfer Tape
Check Surface Adhesion
If vinyl remains attached to the transfer tape after application, the final surface may not have sufficient adhesion. The surface should be clean, dry, and suitable for the vinyl being applied. Users can press the design again with a squeegee to strengthen contact before attempting to remove the transfer material. Corners and narrow sections may need additional attention because they can be more difficult to secure. Once the vinyl has been pressed firmly, the transfer tape can be peeled slowly while monitoring the design for any lifting.
Change the Peeling Angle
The angle used during tape removal can influence how easily the vinyl remains on the surface. Pulling the tape upward can place more lifting force on the design, while folding the tape back and peeling it gradually can reduce that force. Users should experiment carefully with the peeling direction while keeping the vinyl pressed against the surface. If a section begins to lift, the tape should be lowered and the area pressed again. A suitable peeling technique can make a noticeable difference when working with thin lines or small lettering.
Problem Seven: Transfer Tape Leaves Residue
Identify the Source of Residue
Residue may appear when adhesive interacts with the surface, vinyl, or environmental conditions in an unexpected way. Users should first determine whether the residue comes from the transfer material itself or from another part of the application process. Excessive pressure, heat, prolonged contact, or unsuitable storage may contribute to adhesive transfer. The surface should be handled carefully because aggressive cleaning can damage paint, finishes, or delicate materials. When residue occurs repeatedly, reviewing the compatibility between the transfer material and application surface can help identify the underlying cause.
Clean the Surface Carefully
If residue remains after transfer, the cleaning method should match the surface being treated. A soft cloth may be sufficient for light residue, while certain durable surfaces may allow an appropriate adhesive residue cleaner. Users should avoid applying harsh chemicals without confirming that the surface can tolerate them. A small inconspicuous area can be tested first when there is uncertainty. Gentle cleaning is preferable to aggressive rubbing because excessive friction may create marks. Careful residue removal helps restore the appearance of the surface without creating a second problem.
Problem Eight: Transfer Tape Does Not Stick to the Surface
Examine Surface Condition
Transfer material is designed primarily to hold vinyl during positioning, but the application surface still influences the overall process. Dust, oil, moisture, and uneven textures can interfere with proper placement. Users should inspect the surface before beginning and remove contaminants using a suitable cleaning method. Highly textured surfaces may also require a different application approach because complete contact can be difficult. Understanding the surface characteristics helps users choose realistic expectations and appropriate techniques. A clean, dry, and compatible surface provides a better foundation for successful vinyl application.
Problem Nine: Small Details Lift During Removal
Secure Delicate Elements
Small lettering and intricate shapes can be more likely to lift when transfer material is removed. Before peeling, users should press these sections carefully with a squeegee to ensure strong contact with the final surface. The tape should then be removed slowly while the design is observed closely. If a tiny element begins to move, the tape can be lowered and the section pressed again. This process may take additional time, but it can protect detailed designs from distortion. Patience is especially valuable when working with narrow lines and small decorative elements.
Problem Ten: Transfer Tape Is Difficult to Position
Use Alignment Techniques
Accurate positioning becomes more difficult when a large design is placed without a clear alignment method. Users can use temporary reference marks or surface guides when appropriate to help establish the correct position before the adhesive makes full contact. The design should be held carefully so that it does not accidentally touch the surface too early. For larger projects, having a second person assist with positioning may provide additional control. Planning the placement before removing the backing can significantly reduce repositioning and improve the overall appearance of the finished design.
Preventive Practices for Better Results
Choose Suitable Materials
Many transfer problems can be prevented by selecting materials that are compatible with each other. Users should consider the vinyl type, design size, surface characteristics, and required tack level before starting a project. A transfer material that works well for one vinyl may not provide the same results with another. Reading product instructions and performing a small test can help reduce uncertainty. Proper material selection also reduces the need for excessive pressure or repeated repositioning. Compatibility should therefore be considered an important part of the preparation process.
Keep Tools Clean
Clean application tools can contribute to smoother transfer results. Dust and adhesive residue on a squeegee may create scratches, marks, or uneven pressure during application. Tools should be inspected regularly and cleaned using methods appropriate for their surfaces. The work area should also remain free from scraps and loose particles. Keeping tools organized makes the application process more efficient and reduces interruptions. Good workspace habits are particularly useful when completing detailed projects because small contaminants can become more noticeable on clean, newly applied graphics.
Conclusion
Adhesive transfer problems can usually be reduced through proper material selection, surface preparation, controlled pressure, careful positioning, and patient removal techniques. Issues such as weak adhesion, excessive sticking, bubbles, wrinkles, residue, tearing, and lifted details often have identifiable causes that can be addressed through simple adjustments. Users who test materials and maintain clean working conditions can achieve more predictable results while reducing wasted vinyl and transfer material. For supplies, equipment, and resources related to vinyl applications, CutterPros can be a useful reference for users looking to improve their transfer and crafting workflow.























Sign in to leave a comment.