Whether you are an amateur photographer or a smartphone photography expert, you must have wondered how professional photographers capture the most beautiful skies. Generally, professional photographers dedicatedly spend days and weeks capturing one perfect shot. In contrast, others take a shortcut and use Photoshop to create the desired sky and mesmerize the world with their art. It might be surprising to know, but many photographers take their time to replace the sky with Photoshop as it is a relatively easier and quicker process.

If you also want to get the perfect sky without spending weeks capturing one perfect shot, then Photoshop will be your ideal platform. You can capture any sky and edit or replace the image to suit your interest and imaginative vision. You can start by replacing the sky using the following steps:
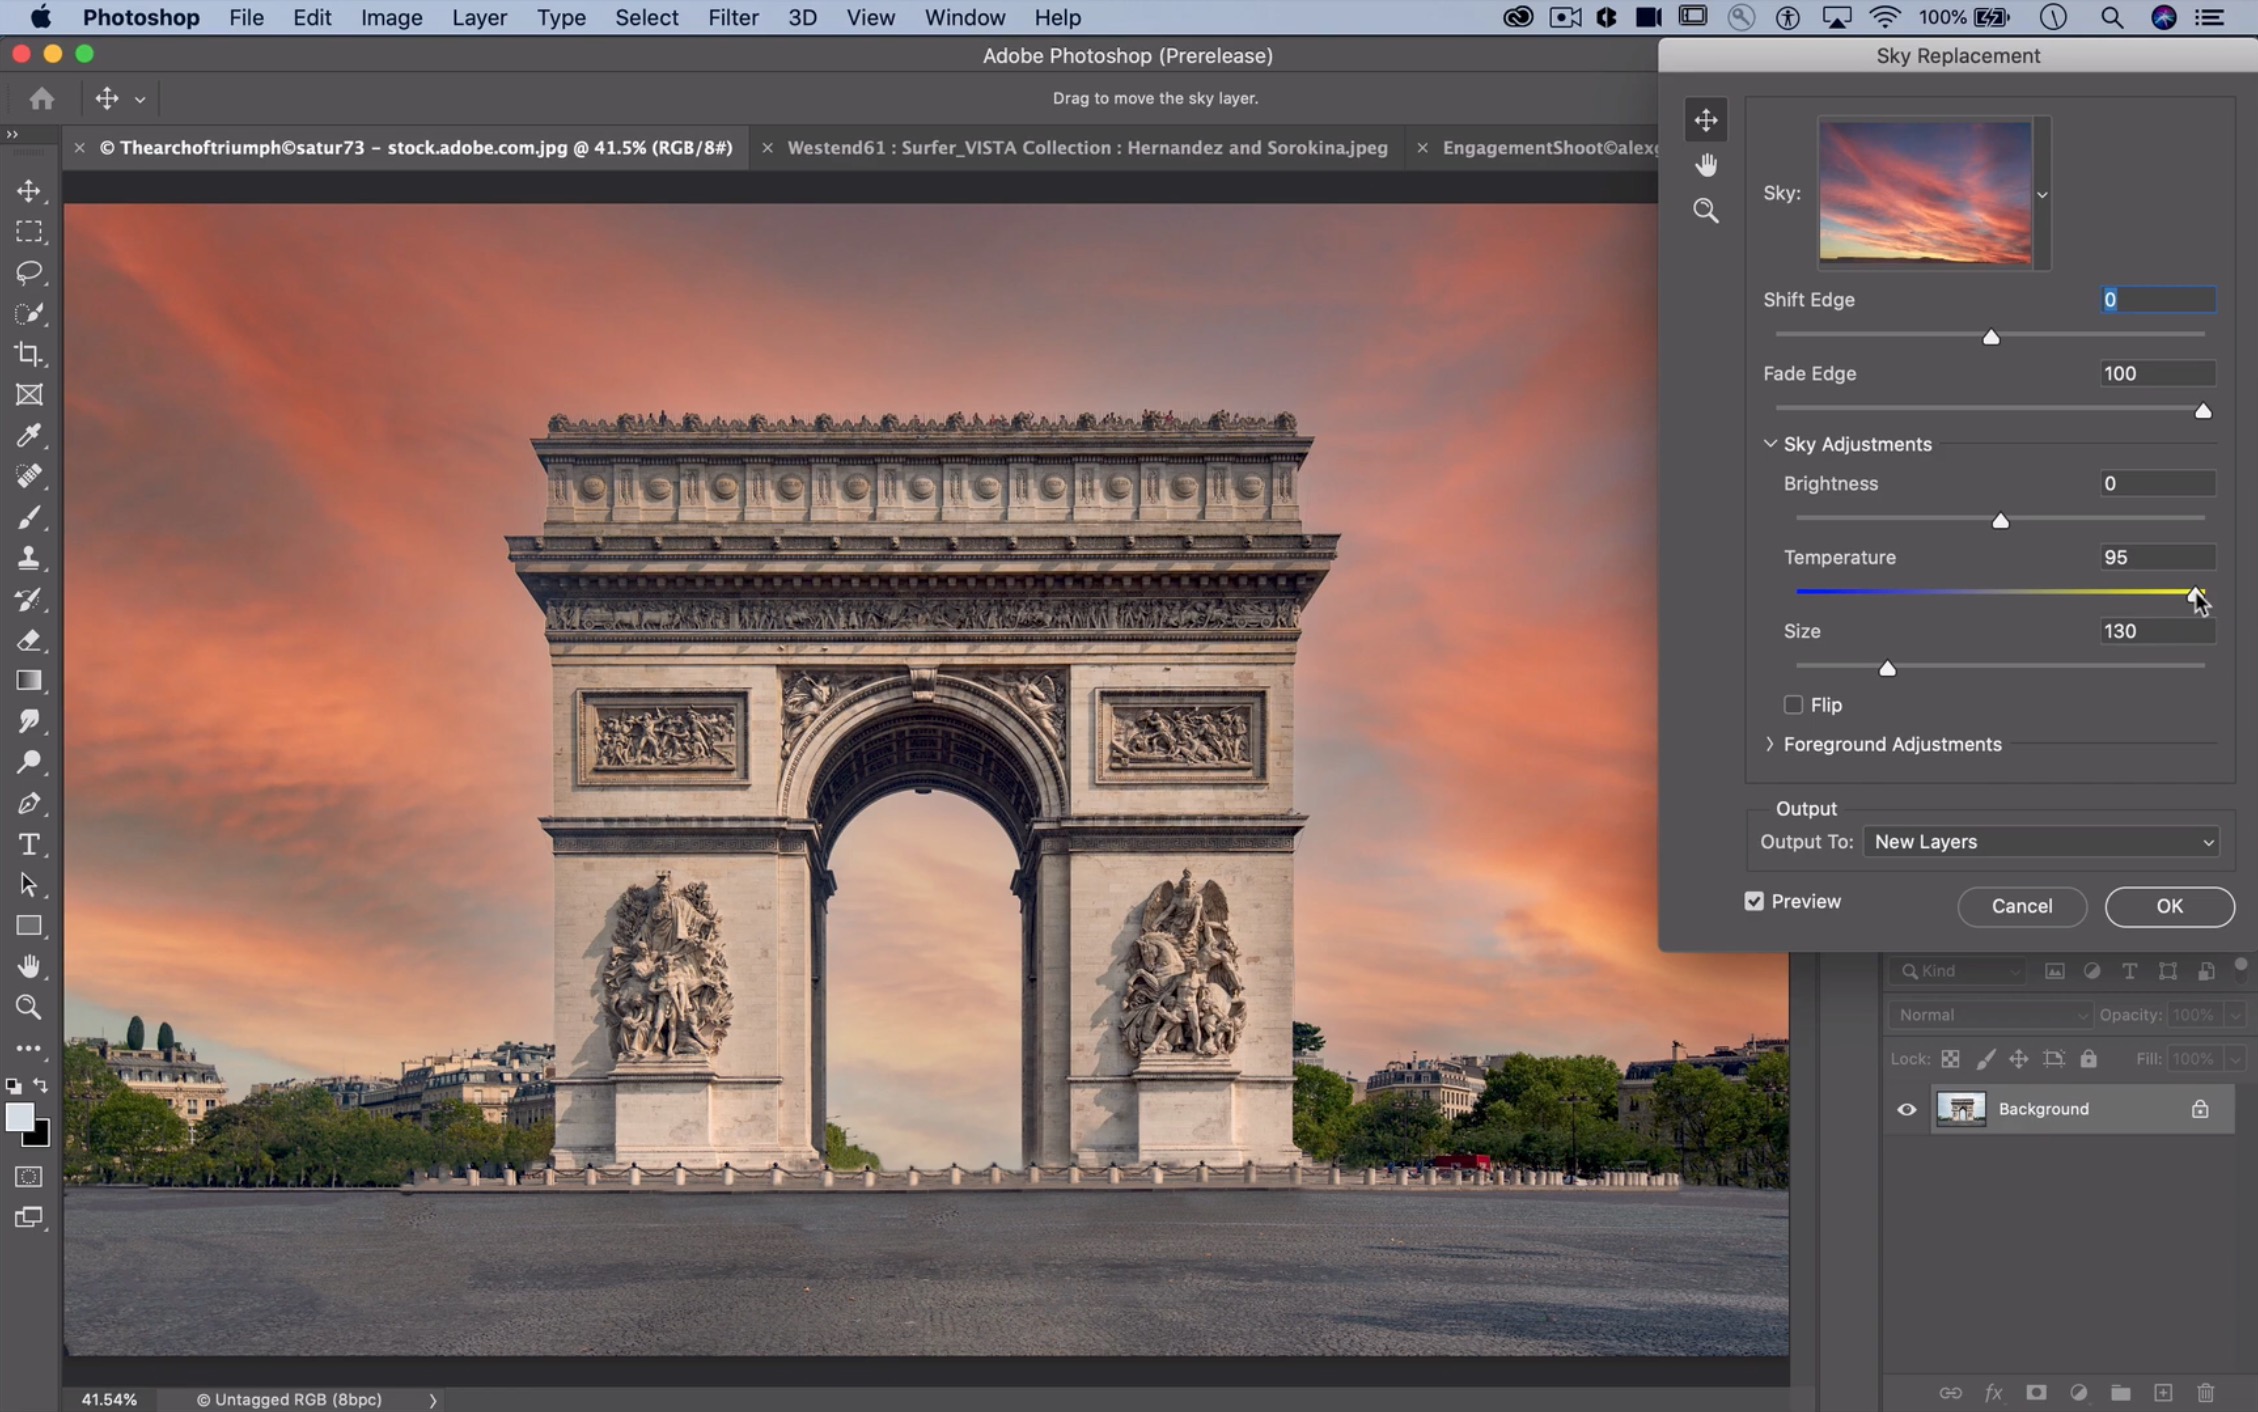
- Open Photoshop and import the image you want to edit.
- Select Edit and click on Sky Replacement.
- A new sky replacement dialogue box will open up. From the Sky thumbnail box, click on the downward arrow.
- From the new box of options, select the gear tool, and click on New Sky.
- Photoshop will automatically open your default download location box.
- From there, select the sky image you want to use and click on Open.
- Your sky will now load in the preview box, and you will be able to use the ‘Sky Replacement’ controls for blending two images.
- Adjust everything according to your preferences and then click on OK.
Since every image has its unique adjustments, it is recommended to use every slider to check how the image will render with each adjustment.
Image Editing to Suit the New Sky
You can find all the adjustments under the Sky Replacement Group option. Here, you might as well find a few layers based on the brightness level adjustments you made earlier. All the layers will have a different name related to the sky and its lighting and brightness. You have to make the adjustments carefully so that the final image doesn’t look fake or unrealistic. Photoshop does a great job of helping you with picture editing, but the final product will be based on the colors you used.
You can explore all the options and unleash your creativity on the screen as per your preferences. It is up to you to spend as many hours as you want to achieve your desired result. It would be best to create two additional layers for achieving a successful sky replacement before getting onto the advanced methods. Here is the layer by layer editing explanation for better understanding:
Layer 1
- Click on the down arrow to collapse the Sky Replacement Group layer, and don’t forget to highlight this layer.
- From the bottom right panel, select Create a New Layer. You will find a new layer named “Layer 1” appearing above the Sky Replacement Group layer.
- Tweak the blending mode from Normal to Color.
- Select the Eyedropper tool and click on your photo’s colored regions that you want to see in your edited sky. Note that the foreground box must include the color you chose.
- Click on B for selecting the Brush tool, and from the General Brushes section, choose a Soft Round brush.
- Paint the highlighted areas and adjust the flow if you don’t like strong effects. You can also alter the brush sizes.
Color Balance Layer
Using the Color Balance Layer, you can use and adjust additional highlights, shadows, and mid-tones for giving a new life to the new sky and successfully finish the sky replacement process. Here are the steps you need to follow:
- From the bottom right corner of your screen, select the fill-adjustment layer icon and click on Color Balance to open a list of options.
- Now, you can adjust the Midtones, Highlights, and Shadows sliders as per your preference.
- You can also try adjusting the Opacity layer to get a better effect.
- Now, select the ready-made Mask of the Color Balance layer and click on B.
- If you want, toggle the X key for selecting Black as the ‘Foreground Color.’
- Use the Brush tool to blend everything well.
- You can also go back to the individual layers to adjust and fine-tune your image.
- After customizing everything, your final product or image will be ready to share with the world.
Using this guide, you can easily create and customize the sky images as per your taste and preference. Every image will turn out to be different with this editing guide as all the pictures are unique on their own and need different adjustment levels.
Robert Hunt is a creative person who has been writing blogs and articles about cybersecurity. He writes about the latest updates regarding mcafee.com/activate and how it can improve the work experience of users. His articles have been published in many popular e-magazines, blogs and websites.


