brown smith's articles


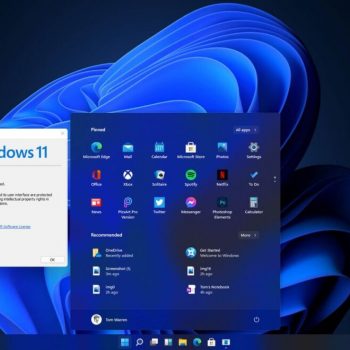


McAfee’s real-time antivirus engine ensures excellent local and online protection against potential dangers. For a few last decades, McAfee has been casually dominating most security systems. Talking of its efficiency, it is capable of defeating targeted cyber-attacks and local viruses.
You can go to the McAfee.com/activate site to know more about their features and pricing. You should also check whether your system is compatible with McAfee before purchasing and installing any security product.
Signing Up for User Account on McAfee.com/Activate
Are you new to McAfee? If yes, then you will need a user account on their site to get started. Without an account, you can’t download, install, or activate the software from their site. Here’s a quick guide to Sign up on McAfee:
- In the starting, please navigate to your preferred internet browser.
- Then head to the website address bar on the top.
- After that, go to www.mcafee.com/activate using the address bar.
- Once the site appears, head to My Account.
- Click on Sign In.
- If you are a new user, click the Register Now link to get a new account.
- Please complete all information fields to create an account.
- Head to Agree.
- Please strictly follow the instructions that you see on your screen to carry on the account creation.
Accessing Your User Account
Here’s a simple way to log on to your McAfee account:
- In a new tab, browse www.mcafee.com/activate.
- Click on My Accounts. Find your way to the Sign In button.
- Provide your sign in credentials such as your username and passcode into the mandatory fields.
- Click the Login button on the bottom to continue.
- Great! Now you have logged in to your newly created user account.
McAfee.Com/Activate: Downloading & Installing McAfee
Just stick close to the instructions given here to complete the download and installation of any McAfee protection software:
- To start with, please reach mcafee.com/activate using the browser of your choice.
- Kindly locate and navigate to the My Account tab.
- Get yourself to the Sign In link.
- Then feed your McAfee user account credentials to log in. In case you are logged in, please leave this step.
- Now you should select the Device that you want to secure with McAfee.
- Choose the product that you wish to use to secure your equipment.
- Find its Download link and then open it to start the download.
- Go to the Agree button to carry on.
- Please note down the serial number that you see on display.
- Let the download complete.
- Once it completes, please open the file you just got from McAfee.com/activate.
- Press on yes to let the installer file modify your computer data.
- Choose the appropriate options on your screen to complete the installation.
- Once complete, close the McAfee Activate installer and restart your computer.
Activating McAfee Security Program
Please stick close to the commands given here to complete the activation process of your McAfee protection suite:
- To begin with, tap the Windows and D buttons all at once on your keyboard.
- See the new McAfee icon and then open it.
- Please log in to your McAfee account if you see any prompt to do so.
- When the home screen of the antivirus becomes visible, find your way to the My Info section.
- Then click on the Your Subscription option.
- Head to the Edit Profile.
- Enter the user account details.
- Go to Next.
- Obey the instructions on your screen to finish the McAfee activation.
- When the activation procedure wraps up, you will have to synchronize your subscription with the installed program.
- In the system tray, find the little McAfee button on the bottom-right corner of your screen. It is located near the Clock of your system.
- Right-click this small button to see more options.
- Find your way to the Verify Subscription link.
- Now let it fetch the subscription that you just verified on www.mcafee.com/activate.
- Open the McAfee software once again.
- Then open the My Info section.
- Get to the Your Subscription option.
- Cross-check your subscription’s ending date.
- That was it! You have activated your new protection suite effectively.
Please restart your device once more to ensure all things are working correctly. You may see a new notification from McAfee on your next startup, telling you that McAfee is now protecting your device. Open the program to explore it more deeply.
If you own a Windows 10 PC, you must have noticed that it comes with some pre-installed folders. Some of you might have questions regarding these folders and what they do. While some might not have paid attention to the same, others have built-up a curiosity to know about the same.
Windows Operating System consists of some Public Folders that allows you to share files and folders using the same PC. Not only this, but it also enables you to share data with people using different systems but shared networks. Therefore, any folder can be shared automatically with others having access to your Public Folder. A Public Folder is present in the same Drive as your Windows, which is usually C:UsersPublic.
Notably, these folders can be accessed by any local user on a Windows PC. In simple words, Public Folder is an essential part of your Windows computer as these files cut down the need to connect and forward files on emails or use any external devices.
Furthermore, these Public Folders have a bunch of sub-folders that keep your data organized. Until or unless you add the data to the same, the folders remain empty. It is essential to know that the Public Folders get disabled by default. Therefore, you’ll have to enable the same each time before starting to share.
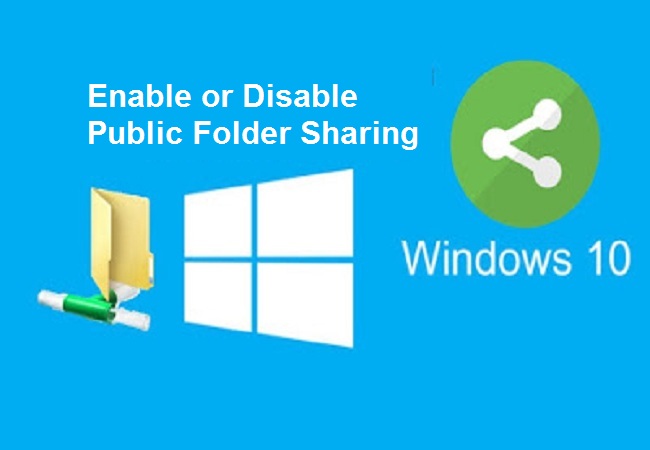
Enabling or Disabling the Public Folder Sharing on a Windows PC
Even though anyone can open and work with the files stored in the Public Folder, you’ll still have to go through a set of permissions. Make sure you’re permitting the right person as any changes made will be reflected on your computer as well. On the other hand, when Public Folder sharing is disabled, only those users having a user account and password will work with the same.
The steps to enable the Public Folder sharing on your Windows PC are:
- Go to the ‘Start’ menu and launch the ‘Control Panel.’
- Select the ‘Network and Internet’ option from the menu.
- Click on the ‘Network and Sharing Center’ option in the next window.
- Select the ‘Change Advanced Sharing Settings’ option from the left toolbar.
- Click on the drop-down icon for ‘All Networks’ to expand the menu.
- Locate the ‘Public Folder Sharing’ section and tap on ‘Turn on sharing so anyone with network access can read and write files in the Public Folders’ option.
- Hit the ‘Save Changes’ button.
Note: You may enable ‘Password Protected Sharing’ for additional security.
In case you want to disable the Public Folder sharing, you can do it by following the same steps and selecting the ‘Turn off sharing so anyone with network access can read and write files in the Public Folders’ option under the ‘All Networks’ section.
All those who were not familiar with the concept of Public Folder sharing might have a clear vision about the same by now. It is a handy feature when it comes to working in an organization or conducting a group project.
Jaxson Harry is a creative person who has been writing blogs and articles about cybersecurity. He writes about the latest updates regarding mcafee.com/activate and how it can improve the work experience of users. His articles have been published in many popular e-magazines, blogs, and websites.
Source: Enable or Disable Public Folder Sharing on Windows 10.

An animated GIF is an image encoded in a graphics interchange format (GIF), which consists of a number of pictures or frames in a single file and its graphic control extension that describes the same. GIFs are also used on Twitter and other social media sites. Sometimes users want to save these animated GIFs directly from the Twitter’s page to their device, be it Windows PC, Android or iPhone.
Saving Animated GIF is very easy, and here we will guide you on how to save your animated GIF directly from your Twitter account.
Here is how to save animated GIF directly from Twitter:
On Computer
Using Ezgif
Pursue these steps to use Ezgif tool:
- First and foremost, open the Twitter app on your device.
- Then, launch the tweet that has the particular GIF which you desire to save.
- Now, you have to copy your tweet’s address.
- After that, visit the Ezgif site and then paste the link into the appropriate location.
- Hit the Upload tab there.
- Press the play tab to run the video.
- After that, perform a right-click on the video and then select the option “Save Video As.”
- Hit the tab “Convert to GIF” and perform a right-click on the particular GIF that you desire to save.
- Then, hit the option “Save Image As.”
Using Twdownload
Follow these instructions to use Twdownload on your device:
- At the start, you have to copy the specific link of your tweet that contains the particular GIF.
- Then, visit the site of “Twdownload.”
- Now, you need to paste the link into the relevant location and then hit the tab “Download.”
- Then, press the Download Link option there.
- Now, your video will show up on your screen. Then, press the right click on it, and after that, select the option “Save Video As.”
- Now, save your video to your desired location.
Note: Users can use any other site too, but they should check the compatibility and reliability of the respective site.
On iPhone
Using GIFwrapped App
Here is how to use GIFwrapped application:
- In the beginning, you have to download the app called “GIFwrapped.”
- After that, look for the Twitter GIF that you desire to save.
- Now, hit the down arrow button located at the uppermost right-hand side edge and then select the “Share Tweet via” option.
- Next, hit the tab “Copy Link to Tweet.”
- Then, open the app “GIF Wrapped” and then paste the respective URL to the relevant section.
- Now, hit the Search tab there.
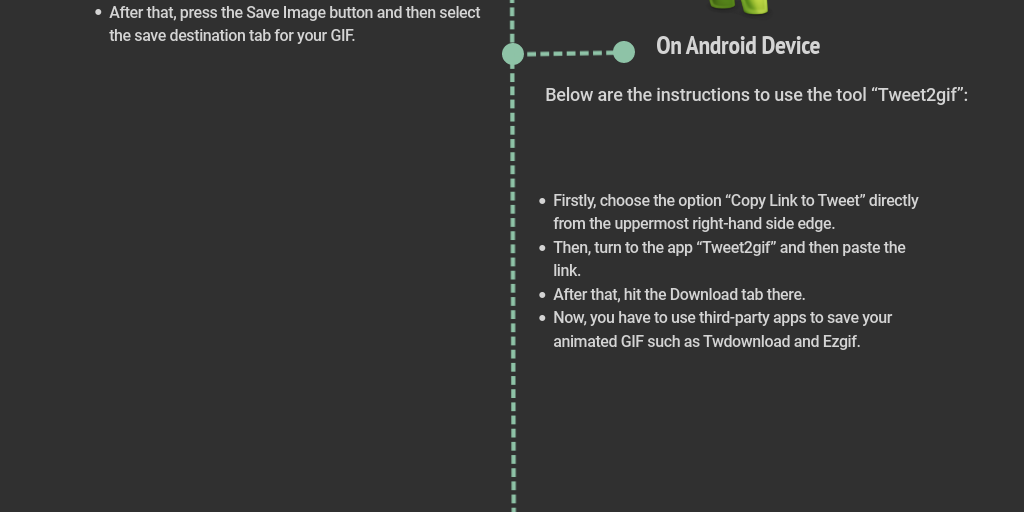
- After that, press the Save Image button and then select the save destination tab for your GIF.
On Android Device
Using Tweet2gif
Below are the instructions to use the tool “Tweet2gif”:
- Firstly, choose the option “Copy Link to Tweet” directly from the uppermost right-hand side edge.
- Then, turn to the app “Tweet2gif” and then paste the link.
- After that, hit the Download tab there.
- Now, you have to use third-party apps to save your animated GIF such as Twdownload and Ezgif.
Conclusion
Nowadays, GIF’s are used on most of the platforms such as Facebook, Instagram and Twitter. Sometimes, users wish to download their desired GIFs directly to their PC, or smartphone. If you are also one of them, then you can easily do this task by using various third party apps like Twdownload, Ezgif, Tweet2gif, GIFwrapped etc.
Charlie Wilson is a Norton expert and has been working in the technology industry since 2002. As a technical expert, Charlie has written technical blogs, manuals, white papers, and reviews for many websites such as norton.com/setup.
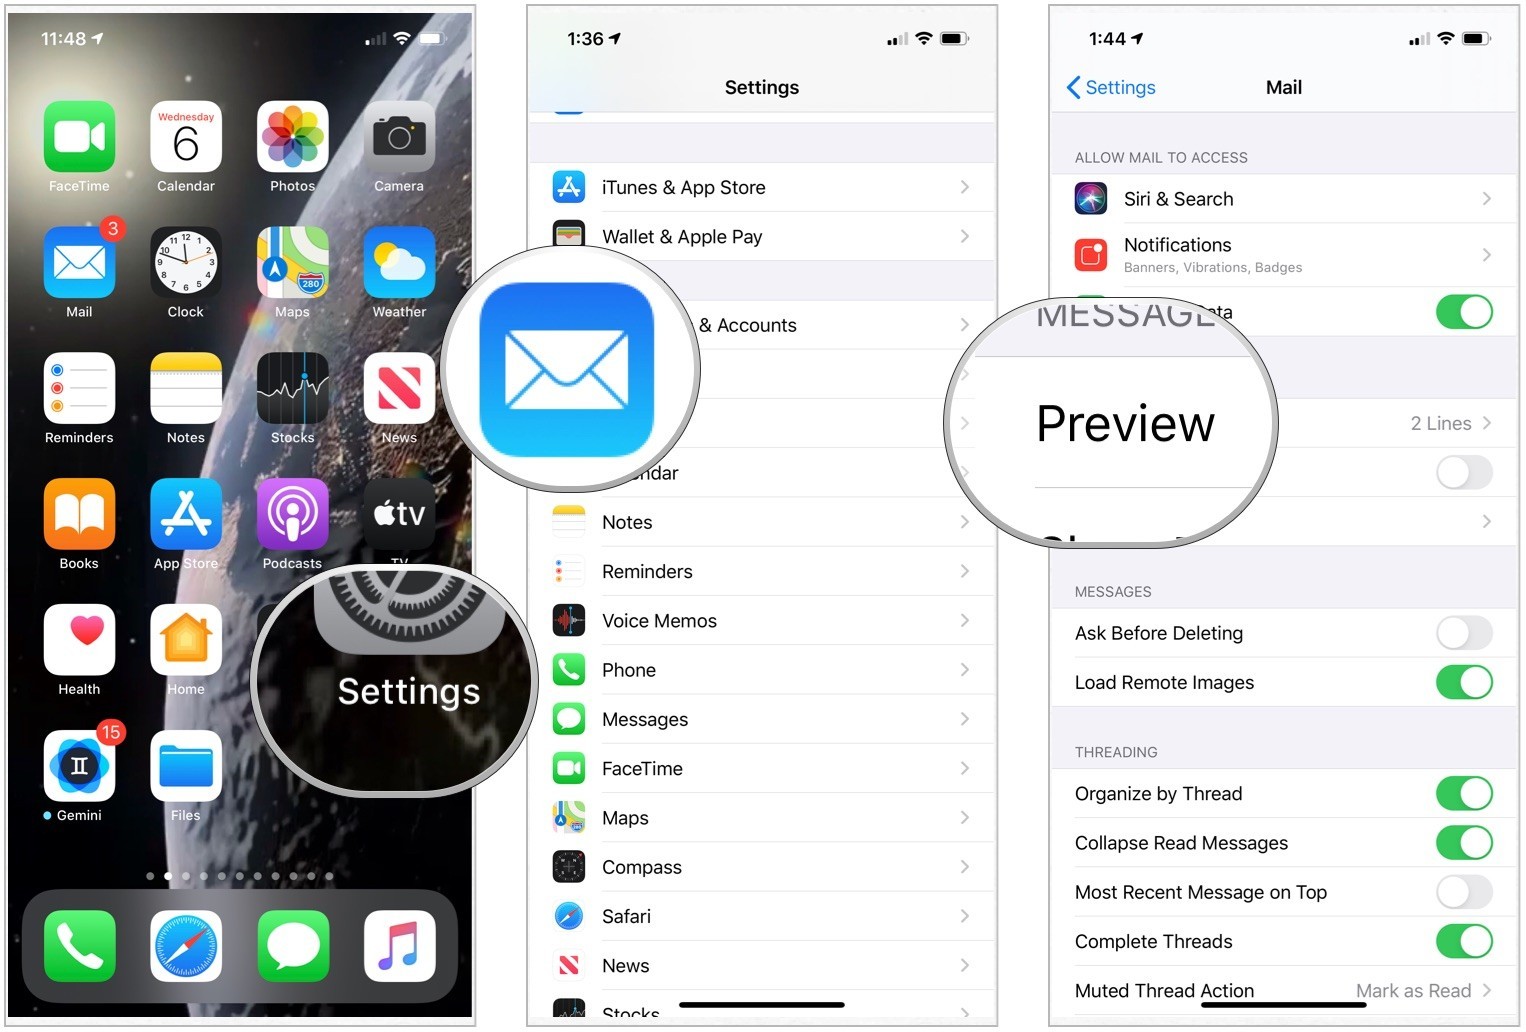
Managing or changing mail settings on iOS devices is now an easy task. Apple has added some interesting and useful features to the iPad and iPhone. With just a couple of taps on your iOS devices, you can easily make all sorts of configuration or customizations to your Email accounts. You can easily customize various stuff such as mail preview options, swipe actions, display of flags, email signature, and threading, etc.
Here is how to manage or configure Mail Settings directly on your iPhone and iPad:
How to Get Alerts When Someone Replies to the Email
Here is how to receive notifications if someone responds to the Email:
- First of all, open the Settings app directly on your home screen.
- Hit the Notification tab there.
- Now, scroll your page until you get the Mail option.
- Then, hit the Mail icon to launch the Mail app on your iOS gadget.
- Turn on the switch located just beside the option “Allow Notifications.”
- Next, select the specific Email ID that you desire to manage.
- Now, press the Sounds tab there.
- Choose the particular sound that you want.
How to Manage Email Accounts
Follow these steps to manage your Email accounts on your device:
- Open the Settings app directly on your device’s home screen.
- Then, scroll down your screen in the Settings menu until you view the Mail icon.
- Hit the Accounts tab there.
- Click the particular Email account that you desire to manage.
- Now make the modifications as per your desire.
How to Change Preview Lines
Follow these steps to customize the preview lines:
- Open the Settings page on your device.
- Then, locate and tap the Mail option. You need to scroll your page a little to find the same.
- Select the Preview tab and then choose the number of lines to modify the mail preview display.
How to Display To/Cc Labels
Pursue these instructions to display To/Cc labels in your mail:
- At the start, launch the Settings app on your screen.
- Then, hit the Mail option. Scroll your page if needed.
- Hit the switch tab located just after the option “Show To/Cc Labels” so that the toggle converts to green.
How to Change Swipe Options
Follow these guidelines to change Swipe Options on your screen:
- First and foremost, open the Settings app directly on your device.
- Then, scroll down the page to locate the Mail app. Once found, hit the same.
- Now, press the Swipe Options.
- Next, hit the Swipe Right or Swipe Left option to customize your side options.
- Hit the Flag or Move Messages option to set up the slide direction.
How to Toggle “Ask Before Removing”
Here are the steps to toggle the option- ask before deleting:
- Open your Settings app directly on the Home screen.
- Then, hit the Mail tab. You can scroll the list for quick searching.
- Now, click the tab located just after the option “Ask Before Deleting,” so that it turns to green.
How to Enable Remote Load Images
Below are the guidelines to load Remote Images on your device:
- At the start, open the Settings menu on your device’s screen.
- Then, hit the Mail tab. You can search the same quickly by scrolling your page.
- Hit the option located just after “Load Remote Images.”
How to Organize Mails by Threads
Follow these steps to manage Mails via threads efficiently:
- Open the Settings app directly on your Home screen.
- Then, find the Mail app by scrolling down the list.
- Hit the relevant tab available just after the option “Organize by Thread.”
How to Collapse Read Messages
Pursue these instructions to collapse read messages:
- Hit the gear-shaped icon to launch the Settings app.
- Locate and hit the Mail tab.
- Now, press the option located after the Collapse Read Messages tab.
Conclusion
Mail Settings can be easily managed or customized by following some useful tips on iPhone and iPad devices. Apple has added various features and tools to make customization easy. One can easily change the preview appearance, swipe setups, threading tasks, flag orientations, and more.
Jaxson Harry is a creative person who has been writing blogs and articles about cybersecurity. He writes about the latest updates regarding mcafee.com/activate and how it can improve the work experience of users. His articles have been published in many popular e-magazines, blogs, and websites.

Key performance indicators (KPI) are a set of quantifiable measurements that are used to gauge the long-term performance of the company. They help in determining the company’s financial, strategic and operational achievements. KPI helps you to understand the performance of your organization. As a quantifiable and outcome-based statement, they are the elements that express the goal of the company.
Here are some of the key performance indicators that you should start using for improved marketing of your business.
Customer Acquisition Cost (CAC)
Customer Acquisition Cost (CAC) is the total cost of acquiring a customer through sales and marketing efforts. It is the cost of convincing prospects and customers to buy your products and services.
Lifetime Value of a Customer (LTV)
It is one of the key statuses likely to be tracked as part of a customer experience program. LTV helps businesses develop strategies to acquire new customers and retain existing ones.
Return on Investment (ROI)
It is a performance metric that is used to evaluate the efficiency of an investment made. You can calculate the ROI for all your marketing strategies and in most cases, the ROI should be 100%.
Return on Ad Spend (ROAS)
It is a metric that measures the efficacy of digital advertising campaigns. ROAS is influenced by profit margins, operating expenses and the overall performance of the business. To gauge onROAS, you need to have a defined budget and firm handle on the profit margins.
Marketing Qualified Leads (MQL)
Marketing Qualified Leads (MQL) are leads that are likely to become a customer compared to other leads based on lead intelligence. It can be tracked from looking at specific behaviors and levels of engagement such as website visits etc.
Sales Qualified Leads (SQL)
Sales Qualified Leads (SQL) are prospective customers that are ready to engage with the sales team. They are determined by the company’s lead management process that is often indicated by the actions of the prospects.
Conversion Rate
It is the percentage of visitors who take the desired action on your website. The action can be in many forms, varying from site to site. It is a systematic process of increasing the number of visitors on your website who can potentially contribute to your sales revenue.
It measures the shares, likes and comments for your business’s social media efforts. Social media engagements help you to measure the performance of your online campaigns. It helps in generating new leads, nurture existing leads, generate sales and build brand loyalty with consumers.
Net Promoter Score (NPS)
Net promoter score (NPS) measures the experience of your customers and predicts the growth of your business. It has been proved to transform the business world and provides core management for customer experience management programs.
Customer Retention
It is the collection of activities businesses have been using to increase the number of repeated customers and the profitability of each existing customer. This strategy enables you to provide and extract more value from your existing customers.
Key performance indicators are beneficial tools for your business as they give you a complete overview of your company’s progress towards its goal. It also helps in evaluating the performance while also increasing its visibility.
Jaxson Harry is a creative person who has been writing blogs and articles about cybersecurity. He writes about the latest updates regarding mcafee.com/activate and how it can improve the work experience of users. His articles have been published in many popular e-magazines, blogs, and websites.
Source: Key Performance Indicators that can Help Improve Your Marketing.
