Sharing files over the network is a complicated job, but if you are using Windows 10, then you can share files through files with other users simply. Windows 10 allows its users to share files over the network with any physical plugging activity. In Windows 10 it has its tool for sharing that allow their user to use it.
Now it’s about sharing through the network, so you should have a proper network that can provide the right service for sharing. For sharing the file in Windows 10, there are almost 4 ways available to it. Depending on the choice, people prefer to share a file without configuring permission set up, and in that condition, they can use the public folder for sharing easily.
In Windows 10, feature file sharing is also available. However, if you are looking to share files far from you through the internet, then you can try through “OneDrive” for sharing the file. In Windows 10 Homegroup feature is no more available that used to share pictures, documents, videos, the music automatically.
Unfortunately, the Homegroup feature is no more available, but now better features are available. Now that Windows 10 is making things easier about sharing files for their users, it is important for the users to know about it too. For sharing files through, you can try OneDrive and File Sharing.
How to Share File Utilizing File Explorer
In-built features are more reliable than third-party tools. File Sharing feature for sharing the file in the local network is the best way. If you want some privacy while sharing, then you can modify the permissions, and later on, you can share with Mac, Linux Device, Android, or any other device virtually. Now while sharing files through File Explorer, there are two ways. The first one is the primary quick sharing mode that requires minimal modification in permission and configuration, whereas the second mode is advance that requires custom permission.
Share Filed Through Basic Settings
- Launch “File Explorer” on Windows 10.
- Choose the folder that you want to share.
- Do a “right-click” on the file and choose “properties” option.
- Press on the “Sharing” box.
- Tap on the “Share” icon.
- Try it with the drop-down menu to share with a single user or every one of the group. Select “Everyone” while sharing with the group.
- Press on the “Add” switch.
- You will be asked for permission, and in the permission section, you will be required to select Read and Read & Write option.
- Tap on the “Sharing” icon.
- Remember the path of the network for the folder, so other uses will be required to connect with the same network for sharing and then tap on “Done” after choosing a network.
- Tap on the “Close” switch.
Share File Through Advance Settings
- Run “File Explorer” in your Windows 10.
- Elect the folder for sharing.
- Do right-click on the item and choose the “Properties” section.
- Tap on “Sharing” tab.
- Press on “Advance Sharing” icon.
- Check on “Share this folder” icon.
- In Windows 10, other users can read-only content you share, but you can change this permission by tapping on full control. Read-only is set to default by Windows 10, but modifying it is on your command.
- Check on “Apply” icon.
- Tap on “OK” button.
- Tap again on “OK.”
How to Share File Through Network Without Requiring Password
Windows 10 provide a valuable feature that the file you share only those person can access who have the password and user of it. Who doesn’t have the password and username of the account, those can’t access the file. In the condition of sharing a file with friends and family, you can disable the requirement of asking for sign-in. By disabling the feature, it will allow the users to access the file without having a username and password, and here’s how you can process it.
- Launch “Control Panel.”
- Tap on the “Network and Internet.”
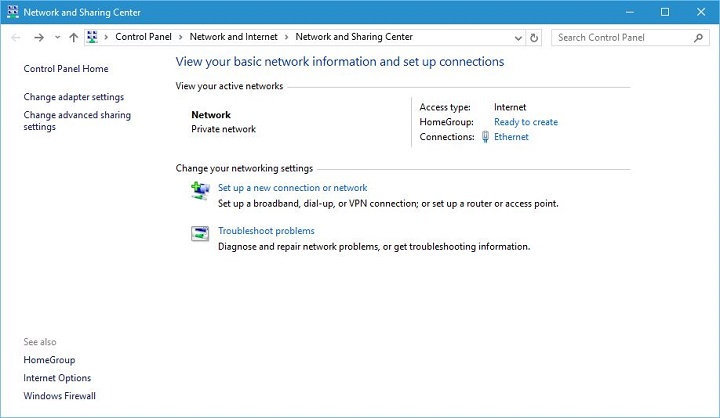
- Press on the “Network and Sharing Center.”
- On the left side, tap on the “Change advance sharing settings.”
- Expand All Network options.
- Below “Password protected sharing column, choose the “Turn off password protected sharing” section.
- Press on “Save changes” icon.
Following this step will allow the users to access the file without username and password.
Share File with Others Using OneDrive
With OneDrive, you can share any document through a network around the world. To share the file through OneDrive here is what you need to know:
- Launch OneDrive on Windows 10.
- Select the folder that you want to share.
- Make right-click on the following folder and then choose the share option.
- Mention email of the person you are sharing files through OneDrive.
- Tap on the “Send” button.
Your sending link will be shared with another user. To access the folder, the user needs to tap on the received link on the browser they are operating.
Share Files Through OneDrive Web
- Launch OneDrive through the web.
- Look for the folder and select it.
- Right-click on the content and tap on the “Share” column.
- Mention the email of the person that you want to share.
- Press on the “Send” icon.
After you share the file through the link, anyone who receives the file will be able to edit the content as they want. However, you can share the file with an individual selective person by select the sharing option in the email.
Devin Smith is a creative person who has been writing blogs and articles about cyber security. He writes about the latest updates regarding mcafee.com/activate and how it can improve the work experience of users. His articles have been published in many popular e-magazines, blogs and websites.
Source:-https://bluemcafee.com/blog/windows-10-networking-how-to-share-with-network/


