Refinishing flooring may completely change the appearance and atmosphere of any area, be it residential, commercial, or both. However, meticulous preparation and execution are necessary to achieve a flawless result. Every stage, from planning to final touches, is vital to guaranteeing the longevity, visual attractiveness, and practicality of your new floors. To assist you in getting the greatest outcomes possible, we'll go over the crucial procedures needed for a flawless flooring installation in this tutorial.
Getting Ready for Flooring Installation
Thorough preparation is essential before beginning the installation process in order to prevent issues thereafter. This stage includes a number of crucial tasks:
Evaluating the Subfloor
The way your flooring turns out depends a lot on the state of the subfloor. Make sure the surface is dry, clean, and level before installing, regardless of whether you're covering wood, concrete, or already-installed tiles. Prior to the new flooring being installed, any flaws should be fixed to avoid them showing through or creating problems.
Adjusting Resources
Certain types of flooring, such laminate or hardwood, must adjust to the conditions in which they will be installed. This entails keeping them in the space for a predetermined amount of time so that the humidity and temperature can adjust. Inability to adjust may result in growth, contraction, or warping post-installation.
Selecting the Right Flooring
It is important to choose the right flooring material for both utility and aesthetic appeal. Take into account elements like:
Sturdiness and Upkeep
Consider the traffic volume and anticipated wear and tear in the area while assessing the flooring material's durability. Evaluate the care needs as well. To keep some materials looking good, they might need to be sealed or refinished on a regular basis.
Design and Style
Your space's flooring should blend nicely with the overall design plan. Whether you go with laminate, vinyl, tile, hardwood, carpet, or another material, pick a look and color that fits your aesthetic tastes and improves the atmosphere.
Methods of Flooring Installation
The type of flooring material selected determines the installation technique. Every approach has a unique set of prerequisites and things to keep in mind.
Installation of Floating Floors
This technique, which is popular with laminate and engineered wood, entails locking the planks or tiles together without the need for adhesive. Allowing for natural movement and preventing buckling requires the proper underlayment and expansion gaps.
Glue-down Attachment
This method entails applying glue to the subfloor and forcefully pressing the flooring into place, especially for materials like vinyl or cork. To guarantee a uniform, smooth finish free of gaps and air bubbles, precision is essential.
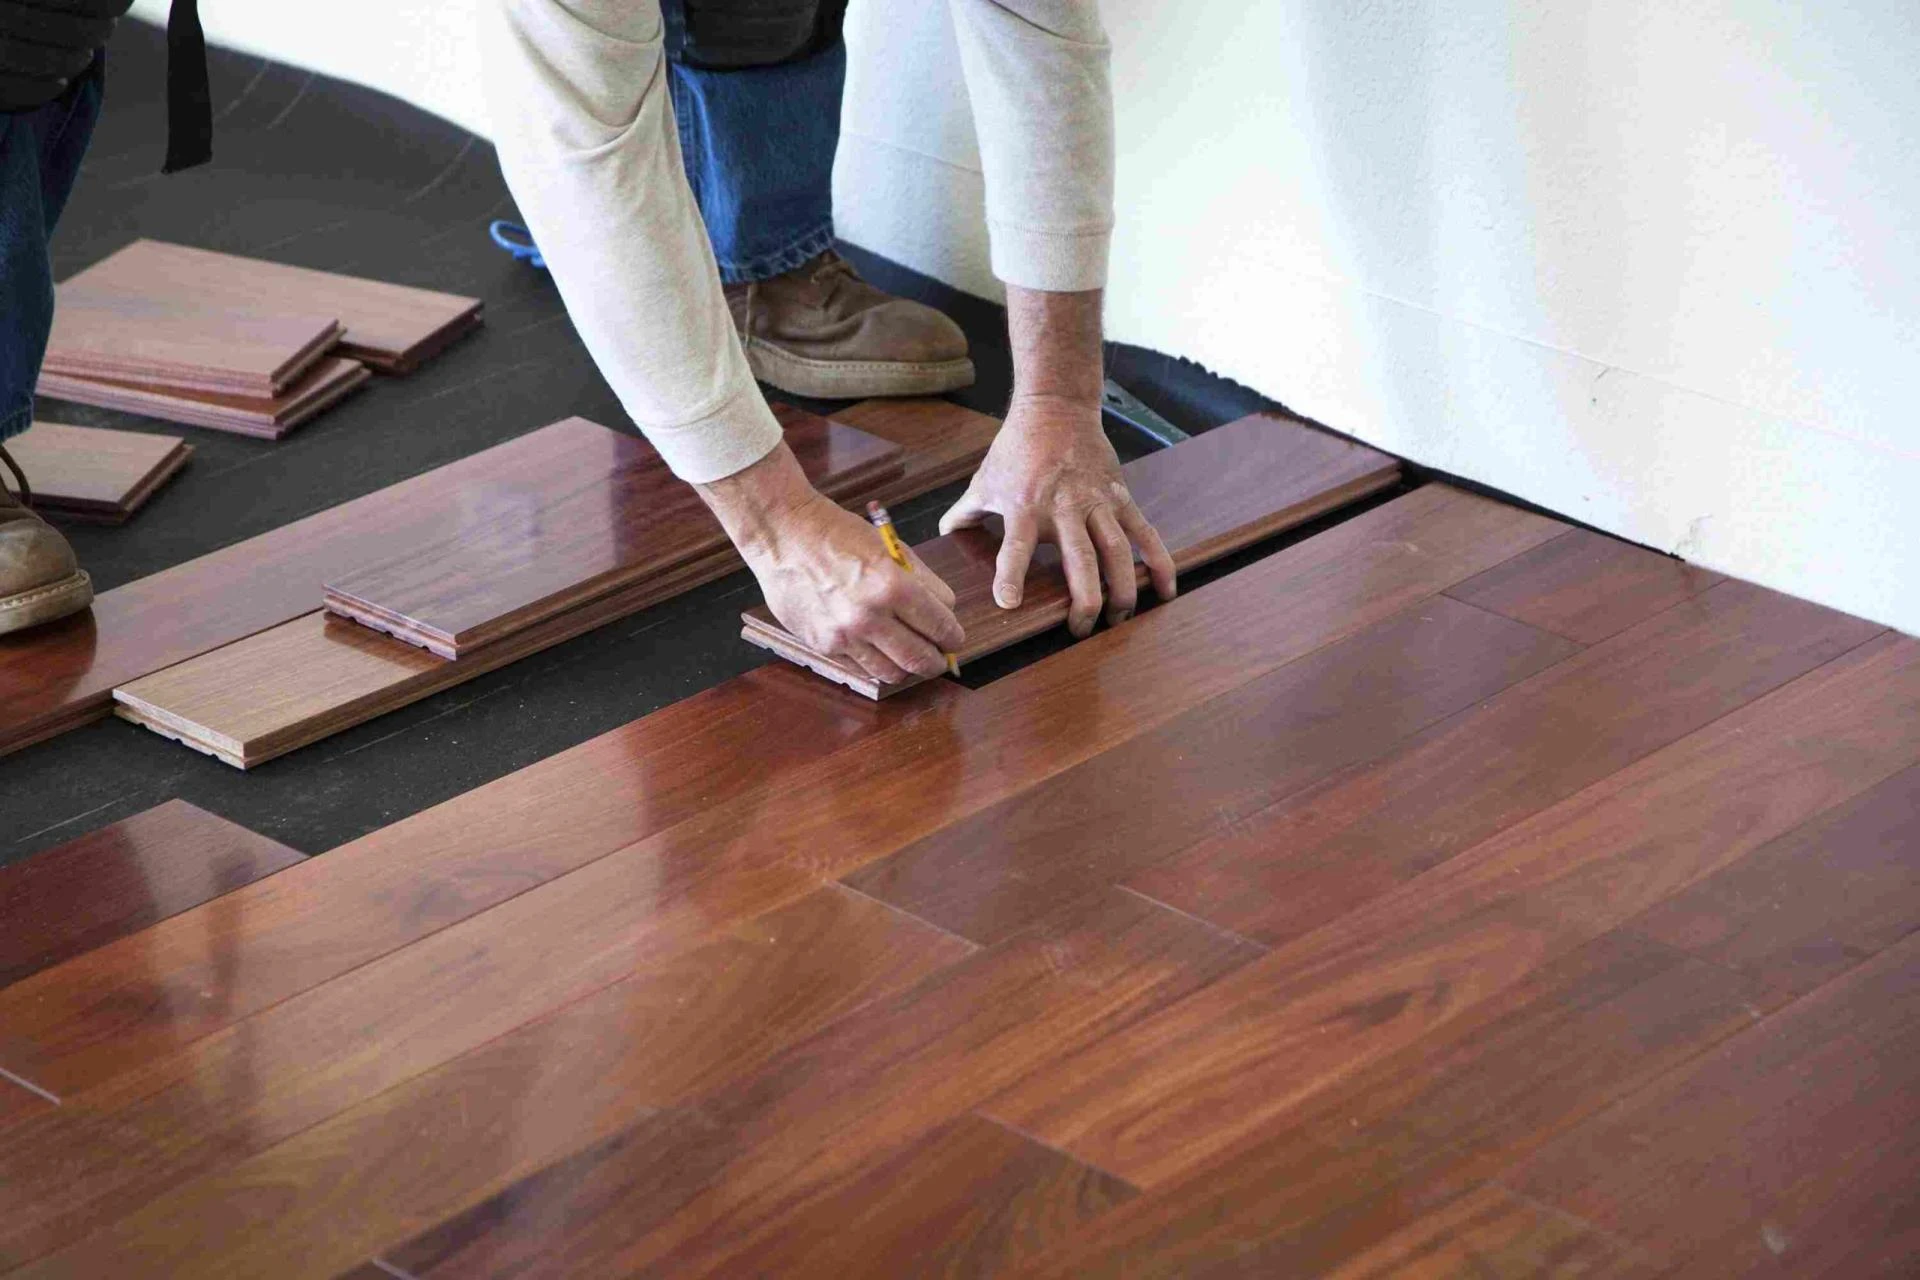
Installation using Nails or Staples
Nails or staples are usually pushed through the tongues of each plank and into the subfloor for flooring installation. To prevent damage to the wood and guarantee a tight connection, careful positioning and the use of the proper equipment are crucial.
Installing Tiles
To achieve consistent spacing and alignment when installing ceramic, porcelain, or stone tiles, the subfloor must be carefully prepared. Mortar or glue must also be applied precisely. The spaces are filled in and the appearance is smooth using grouting.
Implementation and Handling
It's time to start the installation when you've set up the area and selected your flooring material:
Installation using Nails or Staples
Nails or staples are usually pushed through the tongues of each plank and into the subfloor when installing hardwood flooring. To prevent damage to the wood and guarantee a tight connection, careful positioning and the use of the proper equipment are crucial.
Installing Tiles
To achieve consistent spacing and alignment when installing ceramic, porcelain, or stone tiles, the subfloor must be carefully prepared. Mortar or glue must also be applied precisely. The spaces are filled in and the appearance is smooth using grouting.
Implementation and Handling
It's time to start the installation when you've set up the area and selected your flooring material:
Make a plan first
Since it usually creates the most visual impact, start flooring installation from the longest and straightest wall in the space. To ensure symmetry and alignment throughout the tile or plank laying process, establish reference lines and patterns.
Observe the manufacturer's instructions
For advice on precise installation methods, consult the manufacturer's instructions. Violating these rules may have an impact on warranties and the flooring's long-term functionality.
Complete Tasks in Sections
Separate the space into reasonable portions to make installation easier and guarantee consistent outcomes. Finish each part before going on to the next in order to keep things organized and cause as few interruptions as possible.
Conclusion
In conclusion, meticulous preparation, close attention to detail, and adherence to best practices are necessary to achieve a flawless flooring installation. These fundamental measures, which include everything from planning and material selection to installation methods and after-installation maintenance, will help you guarantee a stunning, long-lasting, and useful flooring that will improve the aesthetic appeal of your area for many years to come. In the long term, it pays to invest in a skilled and precise approach to flooring installation, whether you're remodeling a house, workplace, or commercial space.


Sign in to leave a comment.