

Mastering the art of tiling can be challenging, especially when it comes to ensuring a perfect finish. One of the most significant challenges in tile installation is achieving a level surface. Fortunately, using a tile leveling system can make this task more manageable. In this article, we will guide you on how to use a tile leveling system correctly.
1. Prepare the surface by ensuring it's clean, free of debris, and level. This step is crucial to achieving a level surface when tiling. Any unevenness on the surface may affect the effectiveness of the tile leveling system. Make sure to remove any debris, dirt, or grime and check that the surface is level using a spirit level or straight edge.
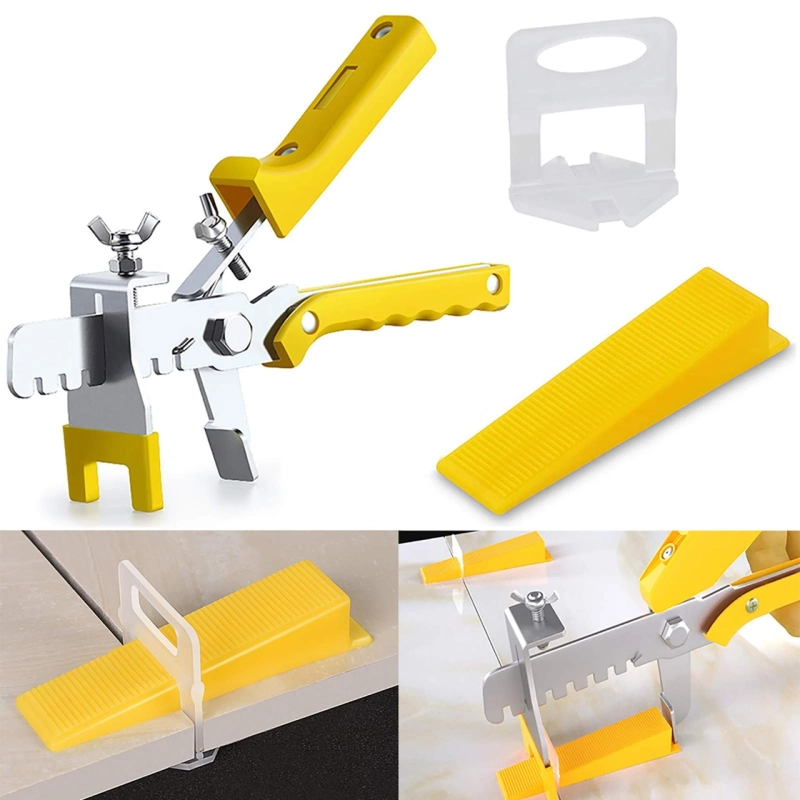
2. Gather the necessary tile leveling tools, including tile leveling wedges, wedge spacers, and window wedges. These tools are essential for ensuring a perfect finish when tiling. Make sure to choose the right size of tile leveling wedges and wedge spacers for your tiles.
3. Place the tiles on the surface and align them in your preferred pattern. Before using the tile leveling system, arrange the tiles on the surface and ensure that they are in the correct position and alignment.
4. Insert the tile leveling wedge into the gap between the tiles and slide it to the tile's edge. Tile leveling wedges are used to level the tiles and ensure that they are flush with each other. Place the wedge in the gap between the tiles and slide it to the tile's edge, ensuring that it is perpendicular to the surface.
5. Ensure that the tile leveling wedge is perpendicular to the surface and not at an angle. It's important to ensure that the tile leveling wedge is straight and not at an angle as this can affect the level of the tiles.
6. Insert a wedge spacer between the tiles to create a gap and ensure that the tiles are level. Once you have placed the tile leveling wedge, insert the wedge spacer between the tiles to create a gap. This gap ensures that the tiles are level, and it allows for the adhesive to dry evenly.
7. Use window wedges to create an even gap around the edges of the tiles, allowing for expansion and contraction. Window wedges are used to create an even gap around the edges of the tiles, allowing for expansion and contraction. Place the window wedge around the edges of the tiles, ensuring that it is perpendicular to the surface.
8. Once the adhesive has dried, remove the window wedges, then the wedge spacers, and finally, the tile leveling wedges.
9. Use a rubber mallet or a hammer and a piece of wood to tap the tile leveling wedges gently until they break off at the base.
10. Enjoy your perfectly leveled tiles!
Conclusion
Using a tile leveling system is essential for achieving a level surface when tiling. By following the above steps, you can use a tile leveling system correctly and achieve a perfect finish. If you are planning to buy window wedges or tile leveling clips, you can refer to the products offered by “Acufloor.” They have been active in their respective domain for the last decade. For more information about the products and the services, visit their official website acufloor.com.