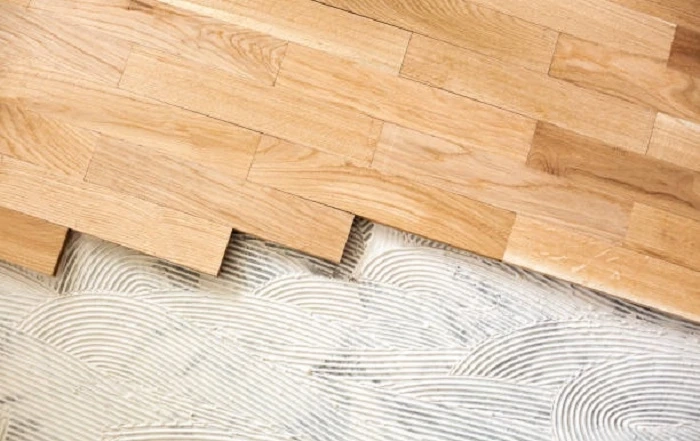
Hardwood flooring transforms rooms and looks beautiful, but the quality hardwood flooring installation process isn't easy for do-it-yourselfers. Follow these hardwood flooring tips to make the job easier and ensure that your floor looks great.
Start the project by allowing the hardwood to acclimate in the room for five days. The room should be at normal temperature and humidity levels.
1. Make a Plan
Hardwood flooring can make a significant impact on the appearance of a room. You can create a calm, large, or busy space simply by selecting the right plank widths and positioning them properly.
A crooked first row can throw off the entire installation. To ensure a straight line, start the first course with the groove side to the wall and use spacers to maintain the expansion gap.
A common mistake is forgetting to add a spacer between the first board and a wall or other obstruction. This can create a pinch point that prevents the hardwood from expanding and contracting naturally. This can lead to cracking and other problems down the road.
2. Stagger the Joints
When your new hardwood floor is nailed down, you want to make sure that the seams don't stand out in an unattractive way. To do so, you need to stagger the end seam joints in each row of boards.
Staggering the joints is not a complicated task but it takes a little care to do correctly. If you don't stagger the joints, your flooring will have a zigzag pattern that draws unwanted attention to the individual planks of your floor.
As you begin your installation, be sure to open all of your boxes and let the wood acclimate to the environment in the room where it will be installed for three to five days. This will help prevent cupping and shrinkage after your installation.
3. Rack the Boards
When installing hardwood flooring, it's important to rack the boards for a straight installation. This is especially important for the first row since every row after will be laid relative to it. The best method for racking the first row will vary based on your specific install method.
Before laying the first row, unwrap several bundles of flooring and lay them out (a process called racking). Mix up the color variation to avoid having extremes of one color next to another. This will help ensure a more balanced and aesthetically pleasing finish. Once your floors are racked, face-nail the first row in place.
4. Face-Nail the First Row
The first row is a crucial one when installing hardwood flooring. This is because it will establish how well the rest of the floor lines up with the walls.
To avoid an uneven or unattractive appearance, make sure to face nail the first row. This can be done by hand with a tapping block and mallet or by using a flooring nailer when the clearance allows.
Once you have laid the first row, follow the guidelines you established during your layout and leave a 3/4" expansion gap along the wall. Also, remember to stagger the end seam joints throughout the room. This will ensure that the flooring will expand and contract evenly with seasonal humidity changes.
5. Blind Nail the Second Row
The first row of hardwood flooring plays an important role because it affects the positioning of every other row that comes after it. If the first row is crooked, it will be nearly impossible to fix it later on.
Allow the flooring to acclimate for three to five days, then lay out several cases of boards on the floor and pick out the straightest pieces to use as the starter row. Also, try to stagger the ends of the boards in adjacent rows by about 6 inches.
Roll out strips of vapor barrier underlayment. The type you need will depend on the type of flooring you are installing, but most homeowners will use 15 lb kraft paper underlayment.
6. Use a Pneumatic Nailer
Using a pneumatic nailer will help make your floors look their best and hold up to wear and tear. The best flooring installers use one because it ensures that every fastener goes into the wood at the right angle and with enough force. It also helps prevent squeaks down the line.
Using a flooring nailer can be challenging at first since you must place the adapter foot of the gun directly up against the tongue side of the hardwood plank. Once in place, strike the actuator with a rubber mallet to drive the cleat nail into the board. Repeat this process until you reach the wall.
Business name: PG HARDWOOD FLOOR REFINISHING LLC
Address: 424 West 22nd Street, Lorain, OH 44052
Phone: (440) 506-9220
Website: http://pghardwoodfloorrefinishing.com/
Email: pghardwoodfloorrefinishing@gmail.com


