

Spinning reels with a cone at the front are also known as closed face reels. Spincast reels are another name for them. These reels are quite easy to operate, and casting is also very simple; altogether, an excellent starter reel.
Although they are simple to operate, the front cone makes spooling line into the Spincast reel a bit more difficult. Even yet, if you get the direction correct, it's really simple.
This is your guide if you're one of them who wants to learn how to place a fishing line on a closed face reel.
After 5-minutes, you should be able to spool your own spincast reel.
Step by Step Instructions
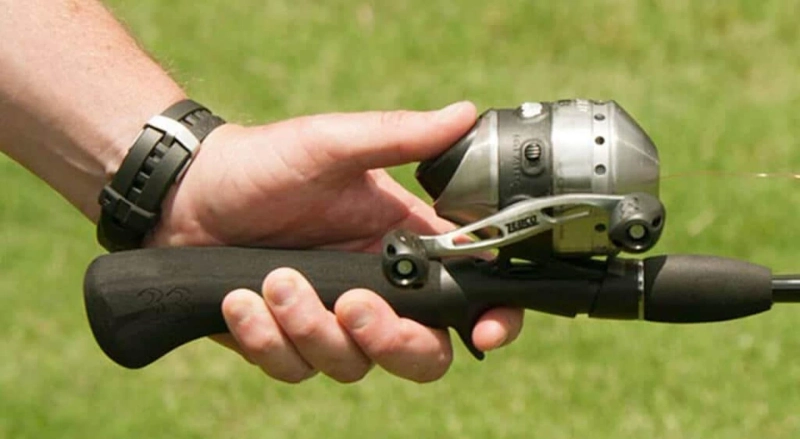
Read the Reel Specifications first.
The reason you should read the reel specifications is because not every line will work with every reel. And the reel you should use with your line should be specified in the reel's specs.
The specs are usually labeled between the reel seat linked to the fishing rod and the button on most reels.
It might be dangerous if you don't read the requirements and utilize the wrong line. The fishing reel's effectiveness will be reduced if the improper line is spooled. Not only that, but it will shorten the lifespan of the reel.
Also, read the manual that comes with the reel. The user handbook contains a number of Do's and Don'ts that might help protect the reel from harm.
Step 2: Insert the Line
In a normal spinning closed face reel, the line must be attached to the spool. However, when using the best spin-cast reel, the first step is to remove the front cone; otherwise, adding line to the spool is impossible. You should be able to simply open the cone with a tiny screwdriver.
If you're a regular angler, there's a good possibility you've got an old line in your reel; remove it all. Please do not discard the old lines after they have been removed. Animals and other species may be harmed by them. Keep the line in a secure location, preferably underground.
After you've removed the old line, feed the new one through the little hole in the line of the cone. Then create a strong knot with the spool. Because it is a handy knot, you can attempt the uni-knot.
Make sure the knot is tight and secure; a loose knot will prevent efficient and appropriate spooling.
Step 3: Begin to Reel the Line
Attach the cone and fasten it with screws after tying the knot with the spool. And now pay close attention. Do not begin reeling at a fair speed; start slowly to ensure that the line around the reel spool winds.
When you see the line is becoming spooled, have someone hold it in place to apply some tension. You may also softly push your fingers on the rod body, but be careful not to burn your finger in this scenario.
When you keep strain on the line while spooling it, the line spools firmly, preventing any birds from nesting while you're fishing. Continue reeling the line until you've spooled out all of the line on the reel.
Cut the Line (Step 4)
Cut the line once you've spooled enough, but make sure the line end hangs 5-6 feet below the rod tip. You're ready to cast now that you've attached the hook, lure, snap, or whatever else you choose.
Step 5: Have fun fishing!
You're all set to get out on the water and go fishing for your next big catch.
0