How do I cut laminate flooring without chipping?
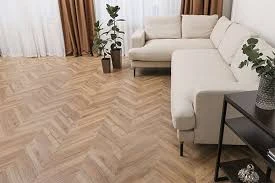
With its unique appearance and remarkable designs, laminate flooring is the most adaptable option for properly caring for your floors. Made from a synthetic particle board wood foundation and ideally covered with an image or protective layer, this flooring is the most sophisticated option for any residential or business property. This floor treatment\'s tiles and planks are easy to install with tongue and groove procedures.
After installation, you must cut the remaining portion of these planks to fit the dimensions of your space. You can utilize a variety of cutting instruments to ensure a seamless process. If you\'re planning to install laminate planks in your living spaces and need an experienced cutting guide, Flooring Expert Dubai has put together complete details to ensure a flawless installation.
Step-by-step instructions for effectively cutting laminate flooring
To make your laminate plank cutting procedure smooth and efficient, we\'ve included some basic tips to help you accomplish it professionally. Let\'s begin by gathering all of the necessary tools and materials.
This article provides step-by-step instructions for cutting laminate flooring effectively.
You will need the following tools and equipment, in addition to laminate flooring:
Tools required:
pencil, ruler, tape measure, square, miter or jigsaw, table or handsaw, high-TPI miter saw blade, eye and ear protection, safety mask, and a 220-grit sanding block.
Take precise measurements
When cutting laminate flooring, you must allow at least 24 hours for the floors to acclimate so that they do not chip or break during the cutting process. Use a tape measure to get precise measurements of the room\'s dimensions.
Measure the length and width of the planks. Measure the distance between the wall and the last plank of the flooring and deduct an extra ⅛"-¼" to create a little space for installation. To obtain width information, repeat the steps outlined above.
2. Mark your cutting line
After you have the measurement specifications for your laminate flooring, mark lines for indication. Take the last piece of flooring and place it on a firm surface. You can alternatively position it over the inserted laminate boards, with the tongue facing the opposite direction as the previously fitted piece.
Slide the plank against the wall, keeping it within the expanding gap. Then mark the points on both sides of the planks\' lengths and widths. To ensure that the line is straight, use a marker and a ruler or square.
3. Position the laminate plank on the saw
Now that you\'ve marked lines on the laminate, place it over the miter saw with the back facing upward. Slide the laminate plank against the blade\'s edge, where it hits the cutting line.
To ensure your safety, wear eye and ear protection, as well as a face mask. Before you begin cutting, make sure you are familiar with how to use a miter saw. Clamp the specified item down to ensure everything is intact.
4. Make precise cuts on the laminate
To cut, pull the trigger and bring the blade completely up to speed, keeping your fingers out of the way. Slowly lower the blade into the cutting position and push it through the material. Allow it to happen until the blade completely penetrates through.
Before removing a piece, leave the trigger in place and let the blade stop itself. Repeat the cutting process for the remaining planks in the rows, ensuring exact cuts in both length and width to perfectly match your rooms\' proportions.
5. Sand the cut and finish it
If an expert performs this cutting process, you can anticipate a smooth and precise cut. An amateur or beginner may lack the necessary abilities, resulting in less clean and precise cuts.
You can use sandpaper to smooth out the incisions and remove any splinters. To lightly sand the plank edges, use a grit-220 sanding block. It will give your laminate planks a flawless surface, ensuring fit-to-size pieces when placed in your rooms. You\'ve finished cutting laminate flooring without chips or cracks in an efficient and hassle-free manner.
To cover up
Laminate floors are available in a variety of sizes to accommodate different interior styles and room proportions. To ensure a proper fit in your residential and business spaces, you must chop down the tiles and planks for the final row after installing this flooring.


Sign in to leave a comment.