

Why do you need a laptop ring light? If you work long hours at your table, it's an important piece of machinery. It's not just for your eyes - it also helps improve peripheral vision and can be used as a makeshift desk lamp. In this article, we'll talk about how to get the best out of your laptop's ring light.
What is a laptop ring light?
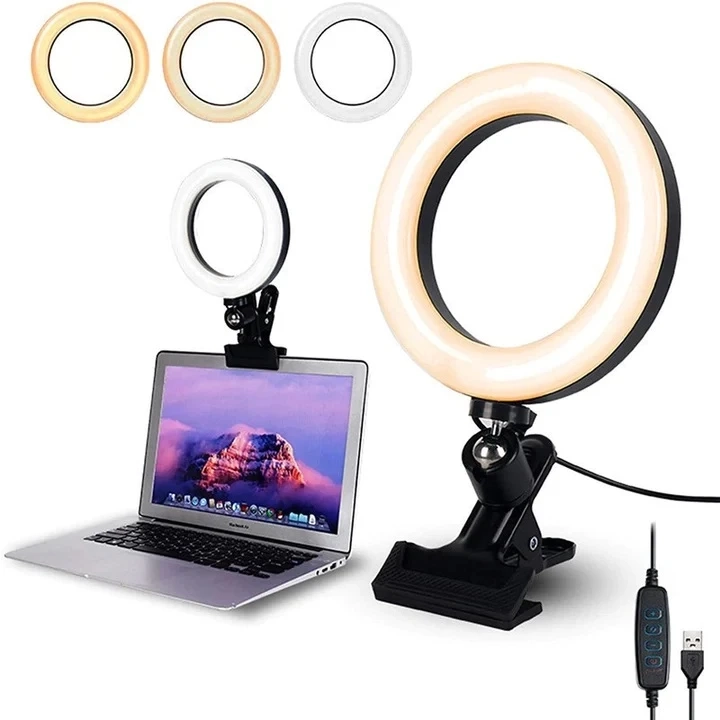
A laptop ring light is a small, portable light that can be attached to a laptop to help create a more accurate image when taking photos or videos. Laptop ring lights come in different colours and are relatively affordable, making them a great option for anyone looking to improve their photography skills. Here are three tips for getting the most out of your laptop ring light:
1. Set your Ring Light Prior to Taking Photos or Videos
Before you even start shooting, make sure your laptop is correctly positioned and set up with the ring light. Position the ring light around the subject’s head so that the light falls on their face and features evenly. This will ensure that your photos and videos are as accurate as possible.
2. Use Your Ring Light in Manual Mode
If you want to take control of the exposure and lighting of your photos or videos, use your ring light in manual mode. This will give you the ability to adjust the amount of light hitting your subject, giving you more flexibility when it comes to creating a perfect photo or video.
Why do you need a ring light?
A ring light is a great tool to have in your laptop bag or workstation. It can be used for a variety of tasks, such as creating a nice light profile for portraits or video shoots, highlighting important areas on a document or image, and even correcting colour casts. Here are four reasons why you should add one to your toolkit:
1. It's versatile
The ring light can be used for a variety of tasks, such as creating a nice light profile for portraits or video shoots, highlighting important areas on a document or image, and even correcting colour casts.
2. It's portable
The ring light is small and lightweight, so it's easy to take with you wherever you go.
3. It's affordable
A ring light can be purchased for less than $50, making it an affordable addition to your toolkit.
Proper usage of a laptop ring light
If you’re anything like me, you love using your laptop for work and pleasure. However, I can’t imagine living without a good ring light.
Not only is it a great way to add some extra brightness to photos or videos, but it can also be used to properly document your repairs or DIY projects.
Here are five tips on how to get the best out of your laptop’s ring light:
1. Make sure the light is positioned correctly
The first step is to make sure the light is positioned correctly so that it produces the desired effect. Depending on the model of your laptop, you may need to adjust the angle or height of the light depending on your needs.
2. Use a soft light
If you are looking for a softer look, then try using a soft light instead of a direct one. This will help to reduce glare and provide a more pleasing appearance.
3. Turn off unnecessary lights
When using your ring light, it is important to turn off any unnecessary lights in order to maximize the effect. This includes things like the backlight and LCD screen saver.
How to achieve the best result with your ring light
One of the great benefits of using a ring light for laptop is that you can achieve really great results with minimal effort. Here are four tips to get the best out of your laptop light:
1. Set the Right Focal Length
The first step is to set the focal length of your ring light. This refers to how far away from your subject the light will be focused on. A common focal length for a laptop ring light is around 30-50 inches, so start by setting this distance and then adjusting the focus as necessary.
2. Adjust the Angle of Light
Once you have set the focal length, you need to adjust the angle of light. This will determine where on your subject the light will be focused. To change the angle, move the light up or down in relation to your subject. Be sure to experiment until you find a setting that gives you the desired results.
3. Use a Tripod
A tripod will help you keep your camera stable and ensure accurate results. When using a tripod, be sure to use an adjustable one so that you can fine-tune your settings accordingly.