

Multi-panel wall art is creating waves in the world of interior design. The days of hanging a single panel painting on a big wall are long gone, yet it still looks odd. You can fill big rooms with a dramatic impact by using multi-panel wall décor. It will undoubtedly make a distinct impact on your house.
You may use multi-panel wall art to decorate your house in a variety of ways. You may also look at some before and after projects to see the remarkable transformations that multi-panel wall canvas can make in your home.
Even though it is a beautiful way to add interest to a space, it may be challenging to arrange wall art. The difficulty is knowing where to hang art, how to hang it, and how many pieces to hang. Given that you have purchased your first multi-panel wall art, we have included additional information about them as well as instructions on how to install them quickly below.
What is A Multi-Panel Wall Art?
Printing pictures on panels enables you to utilize your favorite photos or graphics to create one-of-a-kind home décor items. You may utilize photos on panels to adorn a house, workplace, or other areas.
There’s nothing like a beautiful piece of art to liven up a dull, empty wall. A multi-panel wall art piece may transform your house into a stunning gallery of art.
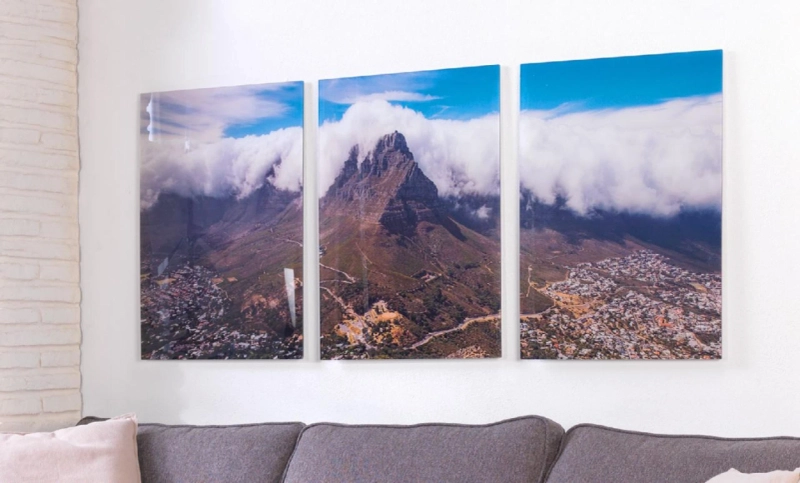
[caption class="snax-figure" align="aligncenter" width="1140"] [/caption]
The piece is gallery-wrapped over a wooden frame and printed on high-quality custom canvas in vibrant colors. This piece will add a touch of refinement to the current décor in your house. Insert a frame to match your color scheme for more pizazz. Alternatively, embrace minimalism and simplicity by leaving the paintings unframed.
Multi-panel wall art pieces are simple to hang along a wall to complete the appearance of any space in your house—a one-of-a-kind, flexible method to show your wall art. Arrange up to nine of your favorite pictures in a beautiful way. Make a one-of-a-kind statement item. You just need to choose a single or many pictures.
How To Hang A Panel Wall Art
1. Obtain All Required Materials
Make a list of the items you will need first. In this case, you\'ll need a tape measure, double-sided tape, a level, and a handy pencil. You may find these things in your home. If you do not have them, you can buy them at your local grocery store. When buying double-sided tape, make sure it is thick enough to hold the wall art in place after placing it on the wall.
2. Have Precise Measurement
After assembling all of the components, you may decide the print size of the central item. It will encourage you to hang your wall art properly. Maintain a running total of the computation and use it as a reference as we go. Appropriate estimation is essential. Ascertain that you have the correct number since this will make mounting the wall art simpler afterward.
The optimal spacing between split canvas panels remains about 2-3 inches. This distance is sufficient to provide a cohesive impression of the triptych as a whole without generating an overwhelming gap. However, this does not mean that you should examine the precise distance between the smaller and larger canvas.
For proper spacing, art should occupy about two-thirds of the wall space above a piece of furniture — a bed or couch and its side tables read as a unified unit. If the artwork seems too close together at this point, remove one and adjust the group\'s spacing so that each item hangs comfortably apart.
3. Adhere Tapes To The Rear Panel
Double-sided tape the canvas to the back. Keep in mind to apply tape to each edge of the wall art to guarantee good adhesion to the wall. It is essential to use adhesive tape. No screws or nails are required on the wall when hanging the wall décor in this way. In this manner, you will avoid causing any harm to the wall. These tapes may be used to hang canvas artwork.
4. Mark The Middle Panel
[caption class="snax-figure" align="aligncenter" width="1140"]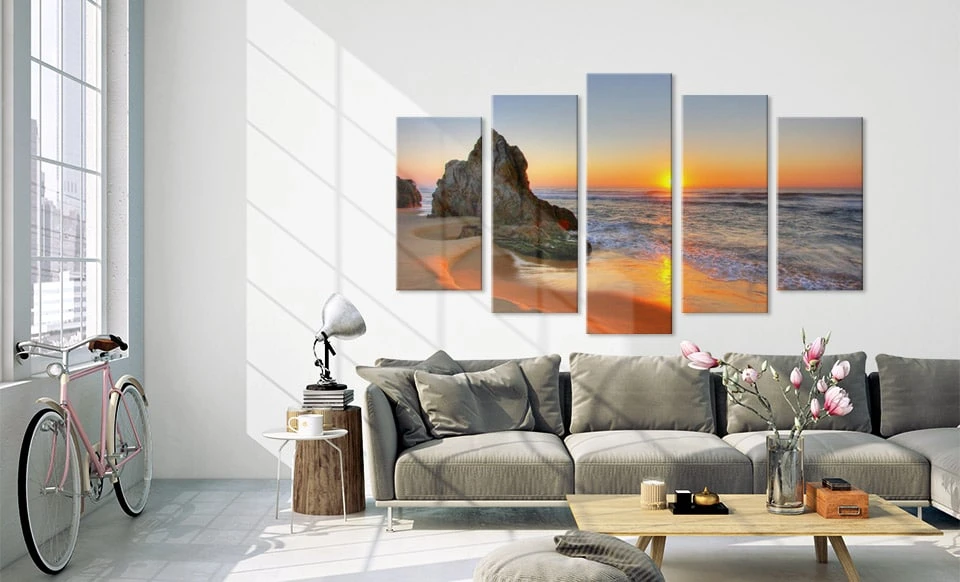 [/caption]
The height of a structure is measured in terms of the horizontal or vertical surface of a wall. Additionally, it controls the height of your work and is well-suited for height computation and setup. With a pencil, draw a line across the center of your multi-panel wall art canvas. Naturally, you also draw a line on the sides.
5. Hang The Panels Bear in mind that the panels should be hung, starting with the inner panel pieces. It is critical to position your multi-panel wall art canvas after you have completed painting on it. Start by hanging the centerpiece along the line you indicated. Firmly push the canvas to the surface to ensure it sticks. After that, go on to the outer panel portions.
6. Label Pieces & Repeat Procedure The next phase is to weigh the base of the subsequent canvas, which should be four inches below the central canvas. It will act as a reminder of the items that you will hang. Keep measuring each side until the whole multi-panel wall art canvas is mounted on the wall. However, before you begin hanging your multi-panel wall art, you should examine the following places