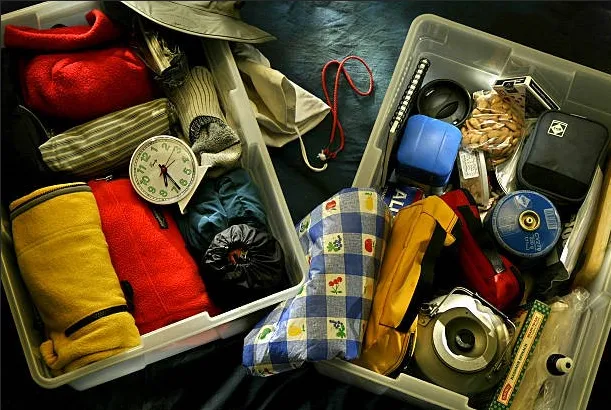

A survival tool kit can look perfectly organized while sitting on a table, yet the real test begins when you need something quickly. In an emergency, poor lighting, stress, gloves, or limited time can turn a crowded bag into a frustrating search.
Good organization is therefore about more than fitting everything inside. The layout should help you identify, reach, and return important gear without disturbing the rest of the kit. Each item needs a predictable place based on how urgently and how often it may be used.
The following steps help turn a collection of emergency supplies into a setup that is easier to navigate in less-than-ideal conditions.
Key Takeaways
- Keep the most urgent equipment in the easiest-to-reach locations.
- Group gear by function so each category has a predictable home.
- Secure small items to prevent them from shifting or disappearing.
- Keep frequently used equipment separate from reserve supplies.
- Position items used together close to one another.
- Use simple visual or tactile cues to identify compartments quickly.
- Test the loaded kit to make sure the layout works under realistic conditions.
How to Organize a Survival Tool Kit for Fast Access
Prioritize Emergency Access
Start by deciding which items may be needed within the first few moments of an emergency.
These should occupy the easiest-to-reach areas, such as exterior pockets, top compartments, or quick-open sleeves. Depending on the purpose of the kit, this might include a flashlight, whistle, communication device, or EDC first aid kit.
Avoid burying urgent equipment underneath spare clothing, food, or bulky supplies.
This section of the survival tool kit should contain only equipment that may require immediate access. Keeping the quick-access layer limited prevents it from becoming another crowded storage area.
Create Functional Categories
After separating urgent equipment, divide the remaining gear according to what it does.
Common categories may include:
- First aid
- Navigation
- Lighting
- Water treatment
- Fire-starting
- Repair
- Communication
- Shelter
- Power
Give each category a dedicated pouch, sleeve, or compartment.
This creates a simple internal map. Instead of remembering the exact position of every individual item, you only need to remember where each function is stored.
The method becomes particularly helpful when carrying several of the best survival tools, because each piece has a logical location rather than being placed wherever empty space happens to remain.
Secure Loose Small Items
Small equipment can quickly disappear to the bottom of a bag if it is not contained.
Batteries, charging cables, repair parts, compact fire-starting supplies, and other loose pieces should be held in mesh pockets, elastic loops, dividers, or small organizers.
Useful tactical backpack accessories can help keep these items stable while the kit is carried, particularly when the main bag has limited internal organization.
Avoid adding an organizer for every individual object. Too many pouches create extra layers that slow access.
The goal is simply to prevent small items from shifting, tangling, or becoming buried beneath larger equipment.
Separate Working and Reserve Gear
Primary equipment and replacement supplies should not compete for the same space.
Keep gear intended for immediate use in the main working sections. Store backup batteries, spare parts, duplicate tools, extra cordage, and other reserves in a separate area.
This gives the active portion of the survival tool kit more room and prevents backup supplies from blocking frequently used equipment.
A reserve section also simplifies maintenance. You can quickly check whether spare batteries, replacement components, or other consumables need restocking without opening and rearranging every part of the kit.
Position Related Gear Together
Functional categories tell you what type of equipment belongs in each area. The next step is deciding which categories should sit near one another.
Think about realistic situations.
For a roadside emergency, signaling equipment, lighting, and basic repair supplies may need to be accessible together. For outdoor travel, navigation, water, and shelter equipment may form a more useful group.
The point is not to create another set of categories. It is to reduce unnecessary movement between different parts of the bag when several items are commonly used during the same situation.
If equipment is purchased from a tactical equipment shop, add it according to the role it serves rather than placing it in the kit simply because there is room available.
Add Simple Recognition Cues
A well-organized kit should remain understandable when visibility is poor.
Simple recognition cues can help distinguish compartments quickly. Options include:
- Different zipper-pull shapes
- Textured tabs
- Short labels
- Consistent pouch placement
- Easily recognized attachment points
Tactile cues can be particularly useful when working in darkness or while wearing gloves.
Keep the system simple. Too many colors, labels, or markings can become harder to remember than the original layout.
One clear cue per major section is usually more useful than an elaborate coding system.
Test Retrieval Before Relying on the Kit
The final step is to test the organization rather than assuming it works.
Fully pack the kit and try retrieving several important items without laying everything out on the floor.
For example, check how quickly you can reach:
- A flashlight
- First-aid supplies
- A communication device
- Water-treatment equipment
- A backup battery
Try the same exercise in lower light or while wearing gloves if those conditions are realistic for your intended use.
If one item requires removing several unrelated pieces first, reconsider its position.
Testing also reveals whether compartments are overfilled, zippers are difficult to operate, or important equipment shifts while the bag is carried.
A layout that works during preparation should also work when access is rushed.
Conclusion
A useful survival tool kit should make important equipment easier to reach, not simply hold the greatest number of supplies. The strongest layouts separate urgent gear, working equipment, reserve supplies, and small accessories while giving each category a predictable location.
The final test is retrieval. If you can identify and reach what you need without emptying the bag or searching through unrelated equipment, the organization is doing its job. Review the setup whenever gear changes, remove items that no longer serve a clear purpose, and keep the layout simple enough to remember under pressure.
FAQs
How often should I reorganize my survival kit?
Review the layout whenever you add or remove equipment, and perform a full organizational check every few months to ensure everything remains accessible and useful.
Should heavy survival gear go at the bottom?
Heavier items can generally sit lower in the bag for better balance, provided they do not block access to emergency equipment you may need quickly.
Are clear pouches useful for survival gear?
Yes. Clear or mesh pouches can make contents easier to identify, especially for small supplies that would otherwise require opening several containers.
Should backup batteries be stored separately?
Yes. Keeping spare batteries in a dedicated reserve area helps prevent clutter and makes it easier to check quantity, condition, and replacement needs.
What is the best way to test the kit layout?
Close the bag and practice retrieving several important items without unpacking everything. Repeat the test in low light or while wearing gloves to identify access problems.






















Sign in to leave a comment.