

Is your roof leaking? A leaky roof is a major problem that can invite several home interior issues, such as waterlogging, ruined floors, etc. Leaky roof repair is a challenging project that isn’t for everyone. But if you are up to the task, it will likely save you some money. Read along to find out how to repair a leaky roof!
Repair Your Roof in 12 Steps
1. Locate the Roof Leak
First thing first, you need to locate the leaks. Start at the lowest point in the roof and work your way upward. You will need a ladder and a flashlight to spot leaks. Access the attic and start visually following an ascending vertical line to the roof. The leak often begins a few feet higher from the roofline. You can look into your roof vents as they are a major source of roof leaks. This includes attic fans, pipes, turbines, and any element with metal that extends above your roofline.
2. Examine the Roof Vents
Check all your roof vents. The boots or housings might be cracked, or the vents can be dislodged. Check your dislodged or missing nails that hold the vents to the roof.
3. Remove and Replace Damaged Roof Vent
After identifying the roof vents, remove any roof vent that is damaged. You can use the pry bar to pull out nails holding it. After removing all nails that hold it to your roof deck, remove the vent. Make sure not to remove the shingles.
Once you have removed the vent, apply roofing cement or sealant to the bottom of the vent. Then, gently roll it back and separate the shingles as you slide in the vent. Make sure the vent’s lower section rides over the shingles. This will prevent leakage. Nail down the vent and cover the nails with sealant.
4. Remove Old Roofing Shingles
If the leak is caused by the damaged roof deck, remove shingles to gain access to the affected section. Slide down the pry bar under the shingles and pull them away. Also, remove old roofing paper.
5. Mark the Cut Area
Use chalk and draw a line down the roof rafters on both sides of your roof deck’s damaged section. Make sure to mark the center of each rafter.
6. Cut Away Damaged Roof Deck
Next, set the depth of your circular saw blade according to your roofing deck thickness with 1/16 inch more. Follow the markings to cut away the damaged section.
7. Remove Roof Deck
You can use the pry bar to remove nails from the cut-out section.
8. Cut New Patch
Next, you need to cut a new roofing deck patch. Use the damaged section as a template for marking your new roof deck patch.
9. Attach the Patch
After that, set the patch in place on the roof and nail it on the rafters.
10. Lay Underlayment or Paper
Nail down the underlayment or roofing paper with nails. Start from the bottom and work your way upwards. Overlap each row by 4 inches or more.
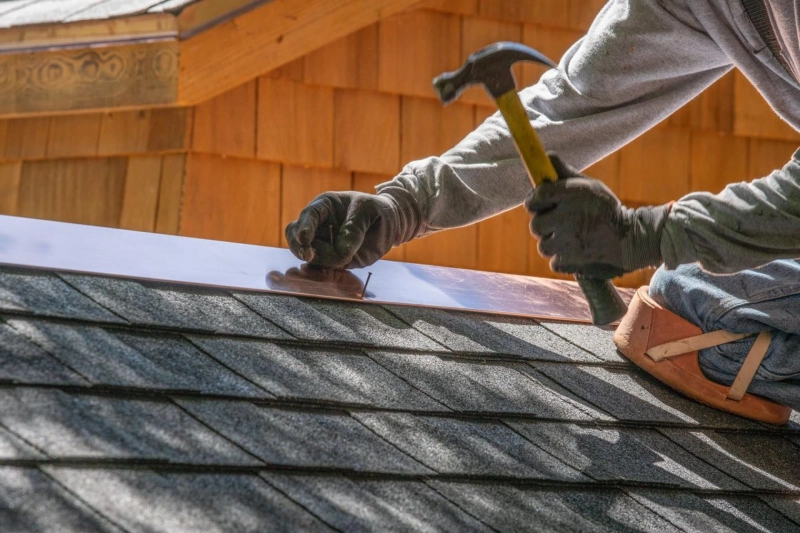
11. Lay the First Row of Shingles
Lay the shingles’ first row but start from the bottom-most row. Apply sealant along the bottom of the shingles and nail them down along the top of other shingles.
12. Complete the Shingles
Work your way up until you lay the top row of shingles. Slide the new shingles under the top row so that they can mesh with the existing ones.
When to Call a Professional
Fixing roof leaks is a labor-intensive job and may require an assistant. All the components must be precisely synchronized to prevent leaks. If you want a professional to do this job for you, feel free to contact roof repair experts in The Woodlands. It’s always best to work with a professional to avoid complications in the long run.