Photoshop has everything to improve even a damaged photo. All you need to know is how to apply different tools. We live in an era where photos are used to sell our products and express our thoughts on social media. Wedding photos, model photos, or products that catch our eyes result from photography and high-quality photo editing. You may hire a highly skilled photographer to capture pictures for your venture.
Yet he will edit those photos before delivering them to you. Also, you may need to edit your photos to make them usable for the e-commerce websites. Whatever the reason for photo editing, you can do all of them in Photoshop. There are a lot of image editing programs available. However, Photoshop is a complete photo editing program. Its features are suitable for both beginners and expert photo editors. And, photoshop is the first choice for professional photo editors.
Additionally, the latest Photoshop version with the AI generative fill has made it irresistible. So, you have to learn Photoshop to edit your photos professionally. But most of us need help finding the right method to edit our photos in Photoshop.
This article is a complete guide for the beginners. If you want to make the best use of Photoshop, follow the methods of this article. We have described different methods of Photoshop in the easiest ways. This article is for you if you are a beginner or a mid-level photo editor.
Getting Started with Photoshop
Before we start editing our photos, it is important to understand the Photoshop interface. The Photoshop workspace is divided into 5 categories.
01. Menu Bar
The Menu Bar of Photoshop is located at the top of the screen. It has menus like File, Edit, Image, Layer, Type, Select, Filter, Plugins, View, Windows, and Help. The File menu gives access to manage your documents. Using the file menu, you can open your photos, save the edits, or close the project.
Similarly, the Edit menu offers basic editing options. The Image menu beside the Edit menu has features like image adjustments, auto-tune, auto-contrast, and image size. Thus, the other menus have additional features to edit the photos with ease.
02. Tools Panel
The tools panel is the vertical panel having all the photo editing tools. It houses tools like move tools, selection tools, crop tools, erase tools, dodge and burn tools, pen tools, etc. Just hover over the tool to get its name and a quick tutorial. You can use some of the tools with ease. Using advanced tools like pen takes a lot of practice.
03. Options Bar
Located above the document window. Here you will get options to modify the selected tool. The Options Bar comes in handy to use the tool. For example, you will get options like add to selection, subtract from selection, or interact with selection after choosing the lasso tool from the toolbar. These options allow us to make the selection more accurate.
04. Document Window
The document window is in the center of the Photoshop interface. This is where your document will be visible.
05. Panels
Panels are the docked window. You will find them on the right side of the document window. The panels of Photoshop work like toolboxes. The layers panel is the most important among the panels.
You can create a new layer or merge the layers from the layers panel. The easiness of the Photoshop layers panel makes it more convenient for the users. Additionally, here you will get the navigator, Info, Action, and properties panel.
02. Opening and Importing Photos
Now that we have understood the workspace of Photoshop, it is time to bring our photos into it. You can follow one of the three methods to bring the photo into Photoshop. The first one is by navigating File > Open and locating the location of your photo.
The second one is by dragging the photo directly on the document window of Photoshop. Also, you can navigate to File>New and choose a new document. Then navigate File > Embedded Place to open the photo as a layer on this new document.
Edit Photos in Photoshop
Photoshop provides a wide range of photo editing options. However, photo editing depends on the creativity of the editor. Here we will go from the basic to the advanced photo editing techniques in Photoshop.
A. Image Resizing
Image resizing is one of the very basics of photo editing. You can resize your image according to your required image dimension without affecting the resolution. You may need to resize your image for various purposes. Photoshop makes it easy to get the required dimensions.
To resize your image using Photoshop Open your photo into it. Then go to Image>Image Size. Also, you can get it by the shortcut Alt+Ctrl+I. A new dialog box will appear. Here you can give the required width and height of the image to get in your required dimension.
You can set the unit to pixel, centimeters, or millimeters from the dropdown beside height and width boxes. Another feature you will get here is the chain icon. You can activate or deactivate it by clicking on the chain icon. By activating it ensures, the resolution remains preserved.
Relevant Article: How to Edit Photos Like a Pro
In this situation, the height will be changed according to the given value of width. Meanwhile, deactivating the chain icon allows changing both parameters manually. It turns the photo to a required dimension, but it may get distorted.
B. Image Cropping
Image cropping is also a basic image editing technique. You may need to crop your image to fix the composition. Also, cropping allows us to get rid of unwanted portions of the image. Using Photoshop, we can crop our images with ease.
So, open your image in Photoshop then choose the crop tool from the toolbar. Now drag the corners to an area that you want to keep. Then press enter to crop the image. Thus you can crop your image using Photoshop.
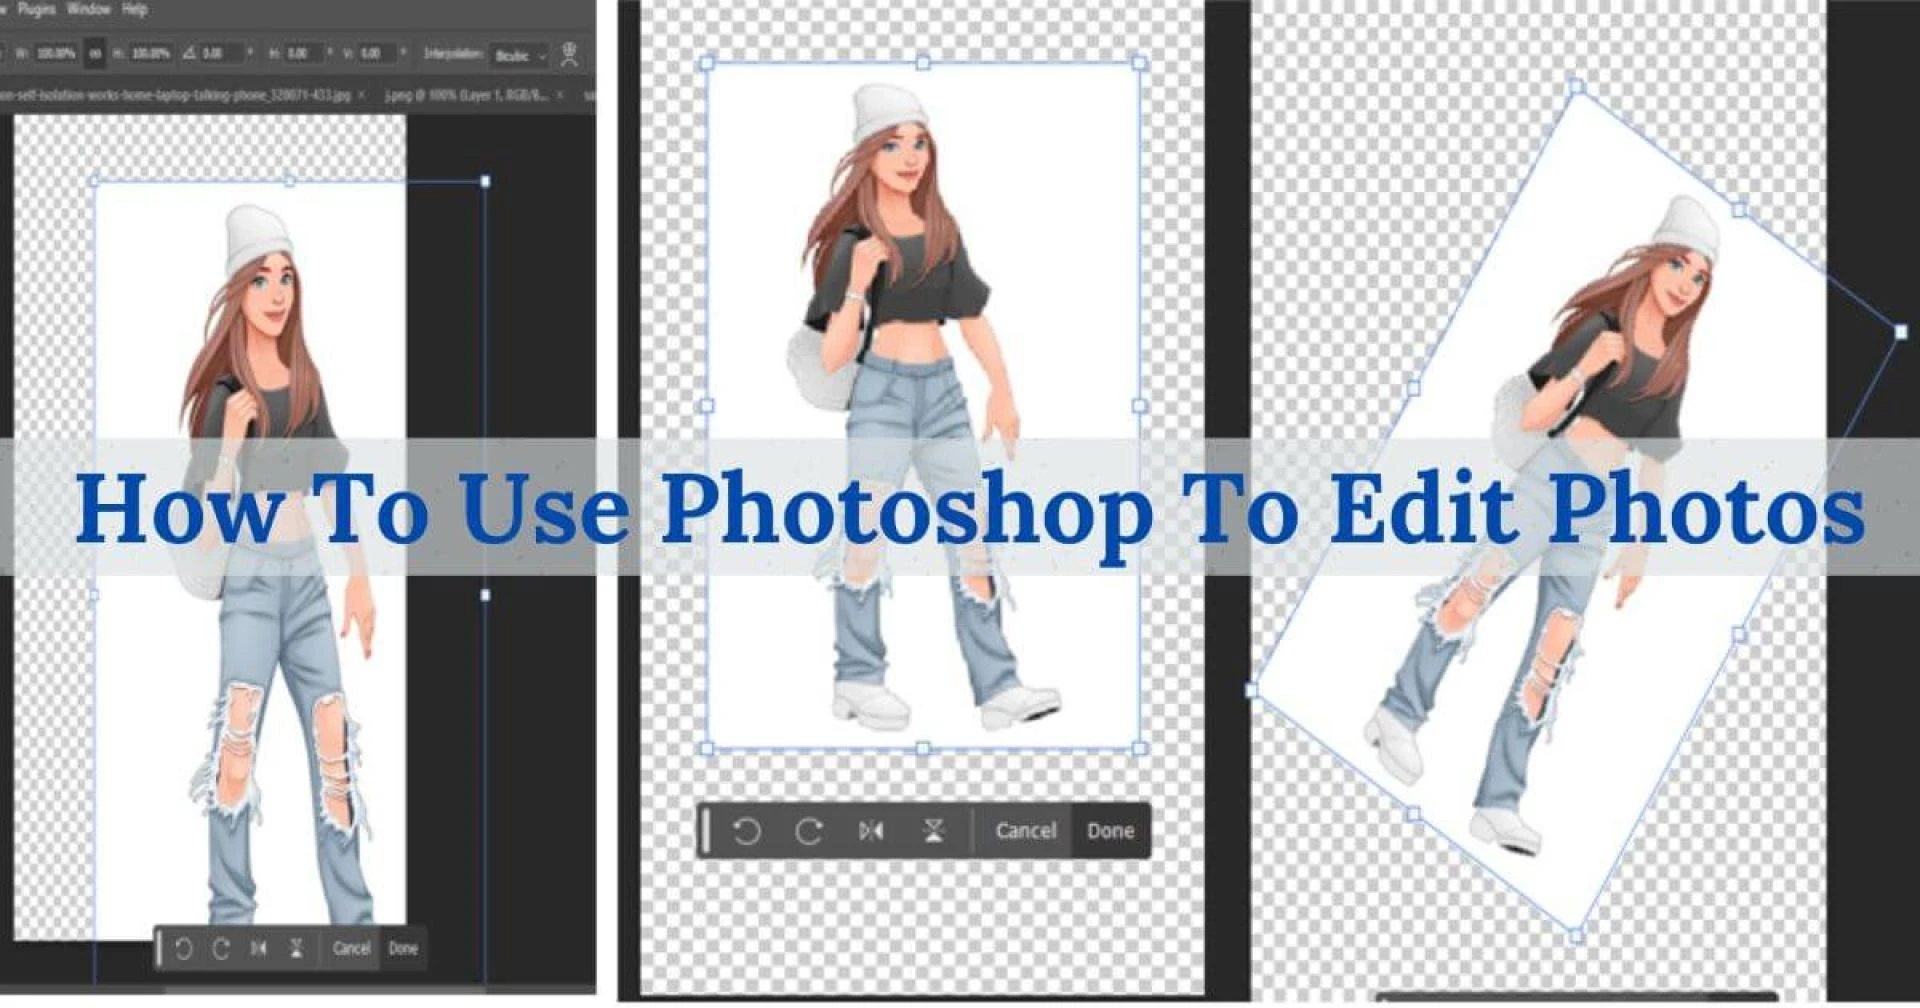
C. Rotating the Image Using The Transform Tool
Photoshop Transform Tool allows you to rotate the image or change its position on the artboard. This is a handy tool for image editing. Click ctrl+t to access the transform tool. Now you can rotate the image and change its size or position.
D. Background Removal
Background removal is one of the most crucial image editing methods. In particular, eCommerce businesses need to remove the background from the RAW photo. It gives the product a cleaner look, Also, background removal is important to get the maximum focus on the product.
Removing the unwanted background improved the overall look image. Also, it is important to perform advanced image manipulation. Using Photoshop, you can create a transparent background photo and export it into PNG. It allows to use of the image on a separate background whenever it is necessary.
The latest version of the Photoshop program makes it super easy. In Photoshop 2024, you will get a floating bar with the options such as “Select Subject” and “Remove Background”. By clicking on the “Remove background” option, the Photoshop AI will automatically remove the background.
You can also use the image selection tools to select the subject. There are different types of selection tools available. The Lasso Tool allows you to quickly make a selection. Select the tool from the toolbar. Using the mouse start selecting the subject. Then Press Ctrl+J to take the selected portion to the new layer.
The Quick Selection tool works in a similar way as that of the Lasso Tool. However, my favorite one is the Object Selection Tool. Using this tool, you can select the simple shaped objects with good accuracy.
However, you will get options in the options bar to add or subtract the areas from the selection. It helps to select the image more accurately. Explore the tools like Magnetic Lasso Tool and Magic Wand Tool. Thus, you can choose the right tool for your subjects.
However, the professional background removal editor usually uses the pen tool to make a selection. It gives complete control over the selection. As a beginner, you need a lot of practice to get accustomed to the pen tool.
You can also use the Photoshop masking method to remove the background of the complex shapes. It is an advanced technique that helps to get high-quality photos.
E. Background Replacement
Now that you know how to remove the background from an image, you can replace it as well. To create a colored background, click on the adjustment layer icon at the bottom of the layers panel. Then choose your preferred color from the color picker. Place this adjustment layer behind your subject layer that you have separated from the background.
F. Content-Aware Fill
The Content-Aware Fill works like magic in Photoshop. It allows you to get rid of unwanted objects from the photo. If you can use this tool properly there will be no trace of the element that you have removed.
So, open you image from which you want to remove the unwanted element. Now select the object or the element that you want to remove. You can use the lasso tool to make the selection. Now go to Edit and under the Fill, you will get Content Aware Fill.
Also, you can get it by right-clicking on the selected area and clicking on the Content-Aware Fill. If you are satisfied with the result click Apply. We want to remove the man in the middle position of the following image. We have selected the lasso tool to make our selection.
With the Lasso Tool, we have made the selection. Now it is time to apply the Content Aware Fill.
After selecting the Content-Aware Fill.
By right click of the mouse deselect the selection to get the final result.
G. Text Effect
Now we will learn how to add text in Photoshop. So, let's go to Photoshop then click on File and select New. Choose a new artboard and hit Create. Now select the Text Tool from the Photoshop toolbar. Now click on the document window a “Lorem Ipsum” text will appear. Here we can put our text by selecting the “Lorem Ipsum” and removing it by backspace from the keyboard.
We have written the word “SAKIB”. We can modify the text by using the options from the options bar. By selecting the text by double-clicking on it, we can change its font of it. Also, we can increase or decrease the font size.
Using masking we can create stunning text designs. Moreover, you can install different fonts in Photoshop. The layer style also allows you to change the stroke, inner shadow, outer shadow, and color.
H. Color Correction
We all know the importance of color in a photo to portray emotion in it. Using Photoshop, you can fix the color issues in an image. There are different color correction tools available in Photoshop. For example, you can use Hue and Saturation, levels, curves, exposure, brightness and contrast, or color balance to fix the color issues. You can find these tools by clicking on the adjustment layers.
The following photo shows the adjustment layer for brightness and contrast. By moving the sliders, you can change the brightness of the image. To get the best result, select your subject first. Also, you can select a particular area of the image where you need to adjust the brightness and contrast.
The levels allow you to play with the colors. You can choose a particular color from the drop-down menu and move the slider to change it. Moving sliders to the left will make the image brighter. Meanwhile, moving the sliders to the right makes the image darker.
You can also use the curves to fix the color issues in the photo. It allows you to adjust the tonal range of the image. You will get control over the highlights, shadows, and midtones. Thus, it helps create a particular effect.
Similarly, you can use the color balance tool from the adjustment layer icon. It allows you to change the cyan, magenta, and yellow color of the midtone, shadow, and highlights.
I. Exporting the Image
Now it is time to export the edited image. Go to File from the Menu Bar and click Export. Here you will get some options to export your photo. You can Export your file to PNG by clicking the quick export as PNG option.
By clicking on the Export As option, a new dialog box will appear. In the dropdown menu under the Format, you will get options like PNG, JPG, and GIF. Also, you will get options to change the image size and Canvas size.
Final Thoughts
So, this is the introduction to Photoshop. Photo editing is challenging if you do not practice it regularly. Meanwhile, photo editing gives you the scope to showcase your creative intellectuality.
In this post, we have introduced you to photo editing techniques. Practice these techniques regularly to master them. But if you are dealing with a bulk number of photos, you must hire an expert editor.
FAQ
Can Photoshop Automatically Edit Photos?
Yes, Photoshop now is more powerful with AI. The generative fill of Photoshop is doing miracles. Meanwhile, Photoshop has other features using which you can automatically remove the background and fix the color problems.
Can I Remove Spots Using Photoshop?
The spot-healing brush tool of Photoshop works amazingly. You can get rid of spots or scars in the photo by choosing this tool. Then choose the size brush and apply it to the spots.


Sign in to leave a comment.