
When it comes to printers, HP is one of the few brands that stand out by providing enhanced performance and features at the same time. That's the reason why most new printer users are choosing the HP printer as their printing partner. In this perfect dynamic, it will be no surprise if you turn out to be one who is planning to buy a new HP printer for yourself. If that's the case, then this guide will be a lot of help to you. In this beginners' guide, we will learn how to set up an HP printer in a beginner-friendly way. So, without wasting more time, let's dive into this.
Step 1: Unbox Your HP Printer
Unboxing is the very first thing that you need to do when your HP printer arrives at your doorstep. Open the box, take your printer out, and place it on a clean and steady table top area, which also has a power outlet nearby to connect. Now, remove all the printer covering, including the wraps and tapes.
Next, gather all the HP printer essentials that come with the box. Commonly, the essentials might be different because they usually depend on the printer model; however, usually, the box follows these items:
- The HP Printer.
- Power Cord
- USB Cable (optional)
- Ink Cartridge
- User guide
- HP Instant Ink Card
Step 2: Turn on Your HP Printer
Once you unbox your printer, then it will be time to turn it on. Before plugging, make sure your printer is placed on a flat and steady surface. Next, connect the power cord to your printer and then to the power outlet. Now, press the power button to turn on your printer and wait for the printer to respond.
Step 3: Insert the Ink Cartridges
Now, we will move on to the next step, where we insert the Ink cartridges into your printer and make it ready to print. You will receive two or four ink cartridges, depending on your printer model. Follow the instructions below to correctly place the ink cartridges.
For Inkjet Printer:
- First, open the cartridge access door of your printer.
- Next, wait for your print carriage to stop moving.
- Take your ink cartridge and remove its packaging.
- Now, insert the new ink cartridge in the print carriage (but make sure to insert the ink cartridge only on the right).
- Close the cartridge access door back to its original position.
For Laser Printer:
- Start by opening the toner access door of your printer.
- Now, push the cartridge to release the lever or the button to take the cartridge out.
- Next, take the printer cartridge that you want to insert into your laser printer.
- This will be a careful part where you need to align your toner cartridge with the carriage and slide it into place until it clicks into position.
- Lastly, close the toner access door and return to its place.
Step 4: Load with Paper
You have a printer; you have colors. Now, all you need is paper to start printing. This means you'll be loading the paper for printing in this step. In order to do this, start with setting up the paper tray; open the paper tray and align it in the correct position (use the printer manual to verify how to correctly place the printer tray on your HP printer model). Lastly, put some paper in bundles but no more than ½ inch in thickness (because it will cause paper jam-like problems.)
Step 5: Offline Printing Test
Once you equip your printer with all the printing essentials, it will be time to test the print. And to test the print, use an offline printing test. Follow the below steps to run the test:
- Make sure your printer is turned on.
- Now, find the "Go" button on your printer and click it.
- If the printer prints, then it's a good sign, but if not, don't feel stressed. Try clicking and holding the cancel button. Also, you can go to the printer's on board settings for reports and test print pages.
Once your printer starts to print then it means it is ready to move on to the next step.
Step 6: Connect Your HP Printer to a Computer
Now that you have tested out that your HP printer is fully functional, it will be time to connect your printer to your computer. Although there are multiple methods to connect your printer, in this beginners' guide, we'll focus on the following:
- Connecting to Wi-Fi (Control Panel)
- Using WPS (Wireless Connect)
- USB Connect (If supported)
- Add HP Printer to Your Computer
However, before starting to connect your printer to a computer, it's important to make your computer ready for HP printer set-up by installing printer drivers first. Follow these steps to download and install printer drivers on your computer successfully.
Printer Drivers Set-up on Your Computer
- Open your PC first, then go to the HP official website using any web browser.
- Next, click on the Support link from the navigation menu.
- Then, select the option "Software & Drivers."
- Later on, select the printer option from the "Select your product type below."
- On this page, search the printer drivers using your printer model.
- Choose the OS and its version that suits your system and hit update.
- Select the preferred driver file and click on download.
- Once it is downloaded, launch it from the file manager.
- Next, follow the on-screen instructions and complete the installation by agreeing to the terms and conditions.
- Lastly, restart your computer and start the process to connect your printer.
Methods to Connect Your Printer
Method 01: Connecting to Wi-Fi (Control Panel)
- Turn on your printer and go to the control panel.
- Use the arrows or the touchscreen to find Wireless Setup Wizard settings.
- Then, let your printer search for available networks. Once it's done, select your wireless network.
- Now, enter the password and wait until your connection is successfully established.
Method 02: Using WPS (Wireless Connect)
- First, turn on your WPS mode on your Wi-Fi router (only if your router is supported. If not, try using another method to connect your printer to Wi-Fi).
- Now, go to your printer and turn on the WPS button.
- Doing this will automatically connect your printer to the Wi-Fi without any password.
Method 03: USB Connect (If supported)
- Using USB to connect means establishing a direct connection between your printer and computer.
- Start by plugging in the USB cable to the correct ports on your printer and computer.
- After completing the previous step, your computer will automatically identify your HP printer and establish the connection using the USB.
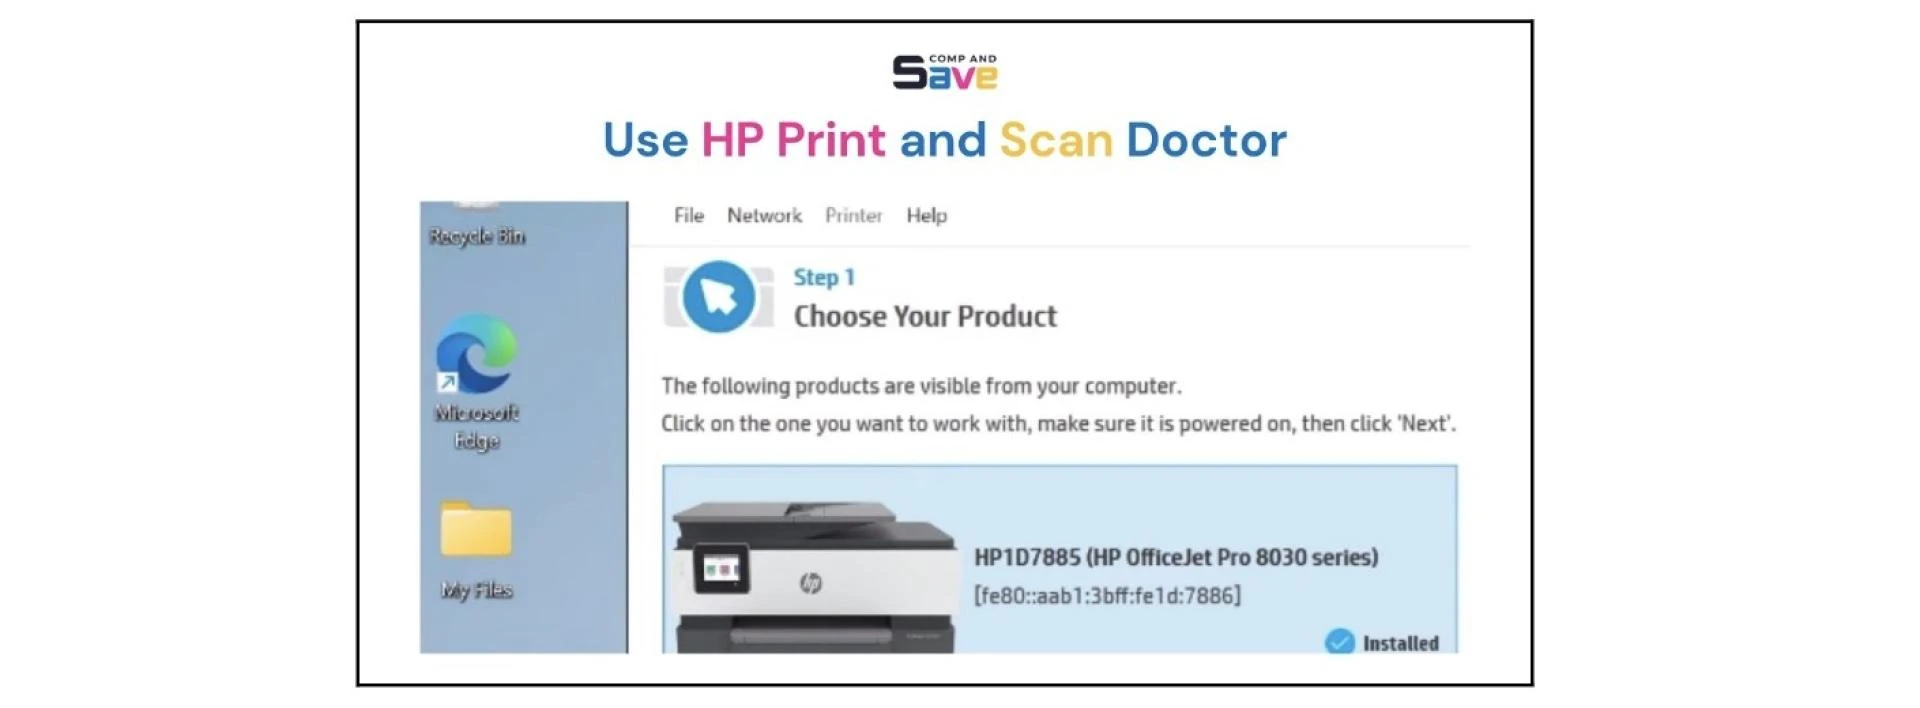
Add HP Printer to Your Computer
Once you connect your printer to Wi-Fi, the only thing left is to add the printer to your computer. Follow the steps below to add a printer to your computer:
- First, turn on your computer.
- Second, open Windows settings.
- Third, go to the Bluetooth & devices settings page.
- Fourth, click on the Printers & scanners option.
- Fifth, click on the Add Device button in the topmost section.
- Sixth, let your computer run the search for available printers.
- Lastly, click on the printer you would like to add and wait for the connection to be complete.
And that's how you can connect your printer to a computer in just a few easy steps.
Step 7: Print Using Your HP Printer
Now, you have a working printer connected to your computer, and it is ready to start printing your desired document and images. And to start printing, right-click or open the image or the document that you want to print. Lastly, select the print option; it's simple to run the print.
Conclusion
In the end, we hope you find this beginners' guide useful and informative for your HP printer set-up. In this guide, we carefully categorize the methods and sections to make them suitable for your complete understanding and add value to your HP printer set-up. Covering everything from the basics of unboxing to connecting an HP printer to your computer. However, if you still encounter any issues with your HP printer set-up, you are free to contact us for further assistance. We are professionals who are committed to fixing any printer-related problem, providing users ease of mind and a seamless printing experience every time.
Source URL: - HP Printer Set Up Guide


Sign in to leave a comment.