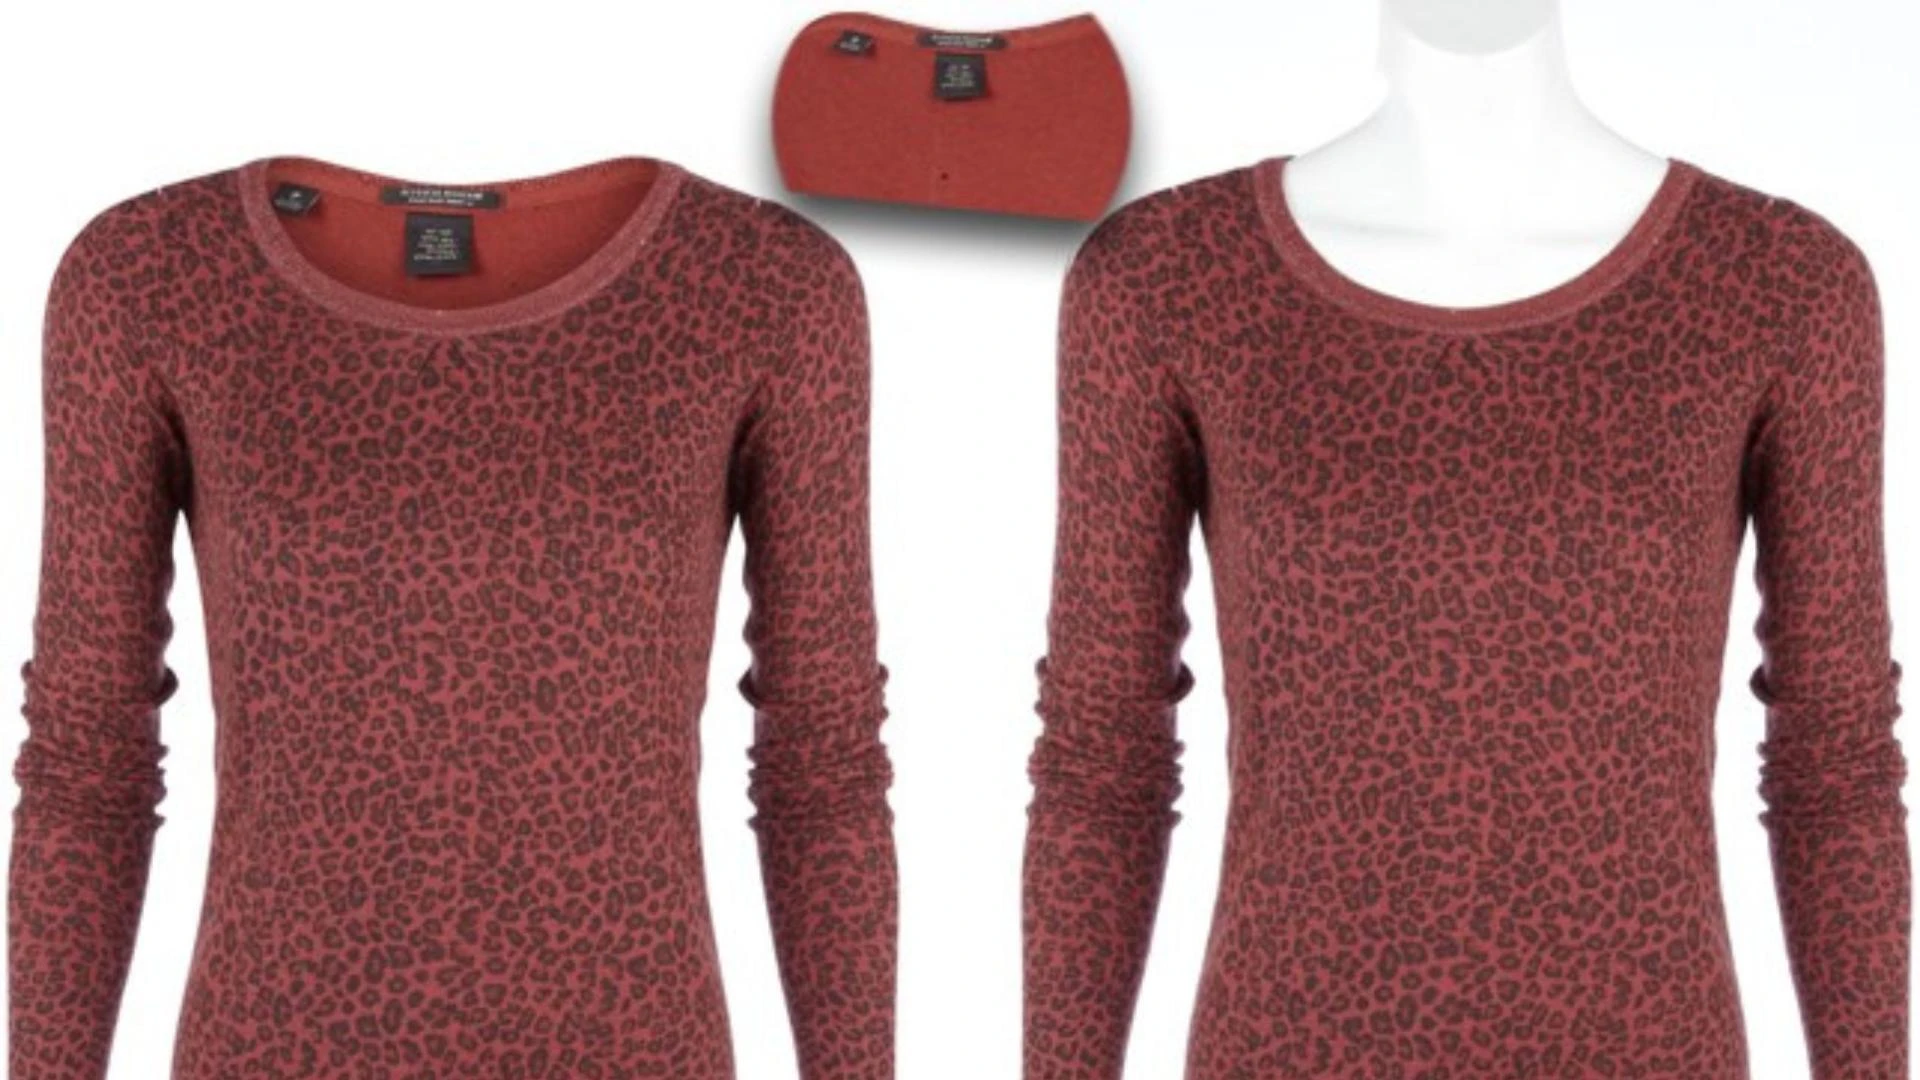
In the fast-paced realm of e-commerce, striking and professional product imagery is non-negotiable. One powerful technique that has gained immense popularity in fashion and apparel photography is the Ghost Mannequin Technique.
This innovative approach allows products to be showcased without the distraction of a visible model or mannequin, creating a clean, seamless, and visually appealing look.
In this comprehensive tutorial, we'll guide you through the steps of unlocking the full potential of the Ghost Mannequin Technique using Adobe Photoshop.
Ghost Mannequin Technique in Photoshop: A Step-by-Step
Step 1: Gather Your Resources
Before delving into the tutorial, ensure that you have all the necessary resources at your disposal. This includes the original images of your apparel, a working knowledge of Photoshop, and a creative vision for achieving the Ghost Mannequin effect.
Step 2: Select Your Base Image
Begin by choosing a photograph where the apparel is worn by a mannequin or model. This image will serve as the foundation for your Ghost Mannequin Technique. Verify that the clothing fits well and is appropriately aligned with the model or mannequin.
Step 3: Duplicate Your Image
Open your chosen image in Photoshop and duplicate the background layer. This duplication acts as a safeguard for your original image, providing a reference point if needed in the future.
Step 4: Remove the Mannequin or Model
Utilize the selection tools available in Photoshop, such as the Pen Tool or Lasso Tool, to meticulously remove the mannequin or model from the image. Take your time during this step to ensure precise outlines and a clean separation.
Step 5: Refine the Edges
After removing the mannequin or model, refine the edges of your clothing item for a seamless appearance. Leverage Photoshop's Refine Edge tool to smooth out edges, creating a polished and natural look.
Step 6: Create the Ghost Effect
Duplicate the clothing layer and adjust the opacity to create a ghostly effect. This step is pivotal in achieving the illusion of a floating garment without the distraction of a visible mannequin or model.
Step 7: Fine-Tune the Shadows
Enhance the realism of your Ghost Mannequin effect by paying attention to shadows. Use Photoshop's Dodge and Burn tools to add or subtract shadows, providing a three-dimensional look that mirrors natural lighting.
Step 8: Final Touches
Complete your Ghost Mannequin effect by making any necessary final adjustments to color, contrast, and saturation. Ensure that the garment appears natural and visually appealing without any distracting elements.
Conclusion
Mastering the Ghost Mannequin Technique in Photoshop is a game-changer for e-commerce product photography. By following this step-by-step tutorial, you'll gain the skills needed to elevate your product images, creating a seamless and captivating online shopping experience.
Experiment with different techniques, refine your skills, and soon you'll be seamlessly integrating the Ghost Mannequin Technique into your visual storytelling repertoire.


Sign in to leave a comment.