Microsoft 365 is the most widely used application for managing and organising data, whether it is for business or for personal use. Because of the enhanced capabilities of the Microsoft 365 account, the vast majority of customers have switched from their previous app to this one.
Do you want to migrate your files to Microsoft 365 account ? Are you looking for a direct solution to get this task done in some simple clicks ?
You don't have to be concerned anymore. Allow us to assist you with any migration you require.
In this article, we are going to explain the step-by-step process. So, read on.…
Introducing the Best Tool to Migrate Your Files to Microsoft 365 Account
Mailsware Email Migration Tool is the only application that allows you to migrate files from more than 90 cloud or web-based applications in a single operation. With the help of this programme, one may quickly migrate emails to a Microsoft 365 account, retaining all of their attributes in the process.
The tool successfully supports to migrate your files from 1&1 Mail, 126, 163, AIM, Amazon WorkMail, AOL, Aruba, Asia.com, Axigen, BlueHost, BOL, Comcast, DreamHost, EarthLink, Email.com, Europe.com, Exchange Server, FastMail, FTP Email Accounts, G Suite, Gmail, GMX, GoDaddy, Horde Webmail, Hosted Exchange Server, HostGator, HostMonster, Hotmail, IBM Verse, IceWarp Cloud, iCloud, IMAP Server, ISP, MDaemon Cloud, Office 365, Outlook.com, Rackspace, Rediffmail, Zoho Mail and other services directly to Microsoft 365 account.
How You Can Migrate Your Files to Microsoft 365 in Some Clicks ?
- First of all, download the recommended application on your Windows machine.
Take a Trial First: The FREE DEMO EDITION is beneficial in getting a thorough understanding of the software's operation and functions before making a purchase. There is also the option of migrating up to 25 data items from each folder.
- Now, run the software and choose the required application from which you want to migrate files. As we have selected Gmail as source application.
- Enter the required credentials and click on Login button.
- The tool load all the folders on the left panel. Choose the required folders whose data you want to migrate.
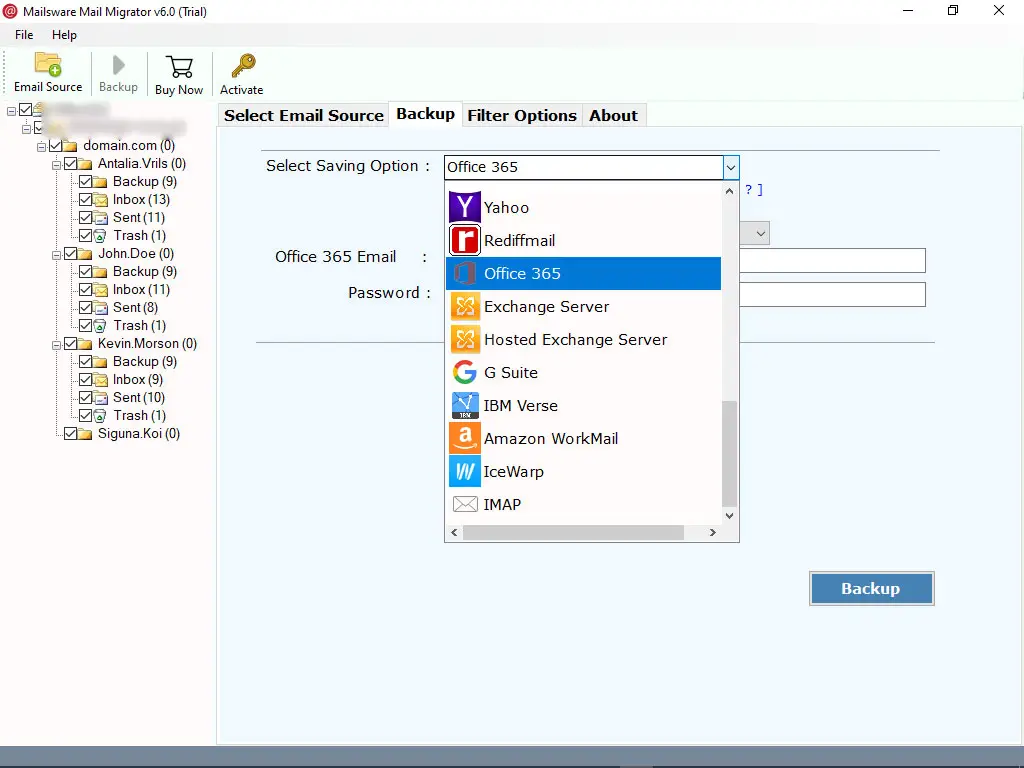
- Now, choose Microsoft 365 as saving option as shown in the screen.
- Enter the required credentials of your Microsoft 365 email account and click on Migrate button.
Now, you can see the tool starts migrating your files to Microsoft 365 account. This process will take only a few moments. So, please wait.
List of Some Advance Features of the Tool
✔ Capable to migrate your files to Microsoft 365 account directly.
✔ Supports to migrate emails to Microsoft 365 along with all the attachments.
✔ Technical and Non-Technical users can easily use this app without facing hassle.
✔ 100% safe and comes up with the very simple graphical user interface.
✔ Maintains all the email properties while migrating your files to Microsoft 365.
✔ Ability to migrate files from 90+ email services without any limitation.
✔ Supports to batch migrate your files to Microsoft 365 account at the same time.
✔ Successfully supports all the edition of Windows Operating system.
✔ No need to install supportive application to migrate your files to Microsoft 365 account.
Closing Words
In this post, we've offered the most straightforward method for transferring files from more than 90 different email providers to a Microsoft 365 account. Users may simply batch or selectively migrate files, as well as all of the associated metadata, with the help of the recommended software.
Hope this blog helps you….


