If your loo has started running at odd hours, leaving faint stains, or wobbling on the tiles, you’re not alone. Homes across the city blend older pipework with newer water-saving cisterns, so symptoms can be quirky and confusing. Early attention to tiny leaks saves litres and protects floors and skirting from hidden damage. If you’re weighing up your next step and want clear, practical direction without fluff, start with the basics and move methodically. For context throughout, I’ll refer to common scenarios I’ve seen in rentals, share the small tactics that actually work, and explain how to approach toilet repairs sensibly so little issues don’t snowball into weekend-ruining emergencies.
Quick checks before you grab the tools
A couple of low-risk checks can save time and tell you what you’re really dealing with. Do them with the water off first, then on, so you can compare symptoms safely.
- Lift the cistern lid and watch the fill level after a flush; if water creeps into the overflow, the fill valve may be set too high or be stuck.
- Add a few drops of food dye to the cistern; colour in the bowl within ten minutes suggests a flapper or seal leak.
- Gently rock the pan; movement hints at a loose fixing bolt or a perished pan collar, often the reason for smells or tiny puddles.
- Run your hand around the braided hose and isolation valve; any dampness points to a supply-side issue rather than a cistern fault.
Small checks like these narrow the problem quickly and help you avoid replacing parts that aren’t the culprit. If you’re getting mixed signals, repeat the tests once more; a second pass often reveals the pattern you missed the first time.
What that noise, drip, or stain is telling you
Different faults leave different clues, and learning the pattern speeds up repair time. I’ve found that simply listening—yes, quietly near the cistern—often reveals more than a toolbox ever will.
- A constant trickle into the bowl usually means a worn flapper or grit on the seal lip.
- “Phantom” refills every few minutes indicate a slow loss of water from the cistern, commonly a mis-seated flapper or cracked overflow.
- A slow fill or whine can trace back to a clogged inlet screen or a failing fill valve.
- Dampness at the base suggests a pan collar or wax ring issue, not a cistern leak at all.
In one small flat I looked after, the cistern refilled every hour. A tiny shred of rubber had lodged in the inlet screen; rinsing it restored quiet and cut water use. In another, a hairline crack in the overflow tube mimicked a seal leak; that one took patience, a torch, and a mirror. When the work involves supply connections, licensing rules, or anything beyond basic seals, it’s wise to confirm the person doing leaking toilet repair is appropriately qualified under state guidance, because insurance and safety both depend on it.
Low-cost fixes you can safely attempt
Some jobs are straightforward, especially if you have patience and a towel ready. If you’re unsure, don’t force parts—plastic threads and delicate seals punish heavy hands.
- Replace a flapper: turn off the tap, flush to empty, unclip the old rubber, wipe the seat, and fit the new one so it sits flat.
- Adjust a float: whether it’s a cup or arm style, tweak it to stop water reaching the overflow; test twice before reassembling the lid.
- Clean the inlet screen: shut off the supply, undo the coupling, remove the tiny mesh, rinse grit away, and reinstall.
- Reseat the pan: if wobble persists, check the fixings and the pan collar; sometimes a fresh seal and careful alignment fix both leaks and smells.
I’ve had better results taking photos during disassembly; they’re a handy map when you’re tired and wondering where a small clip was sitting. I also keep a small notepad for part numbers; returning with the exact valve or seal avoids repeat trips. Routine toilet maintenance—like gentle cleaning of seals and periodic fill-level checks—prevents many faults that people assume are “just part of living with an old loo.”
Parts, tools, and little tricks that make repairs smoother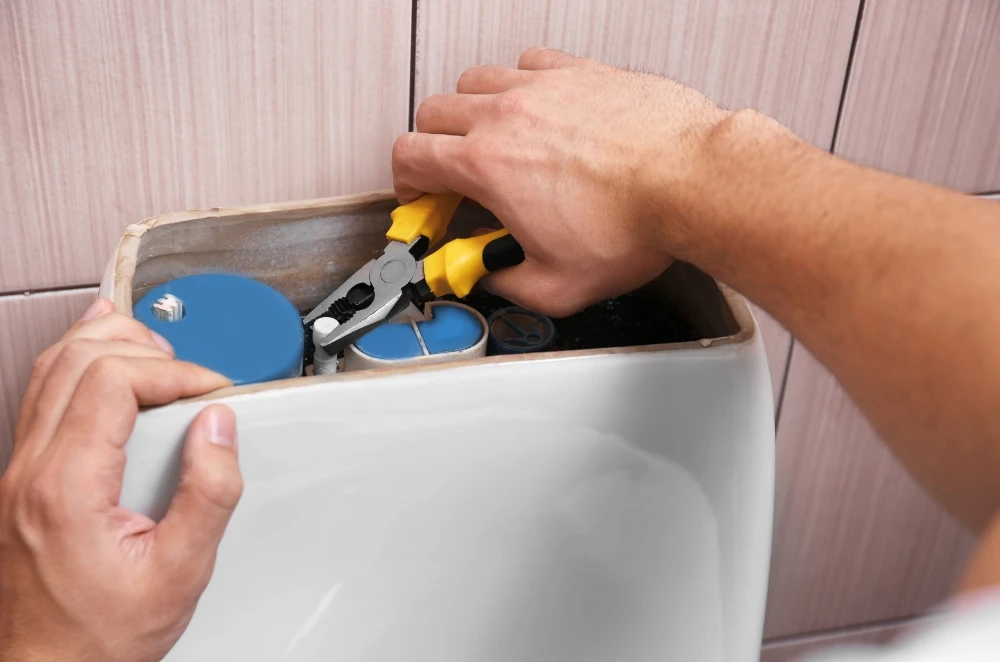
You don’t need a shed full of gear, just the right bits and a calm approach. Good prep cuts repair time by half and saves the carpet from wet-footed dashes to the tap.
- Keep a basic kit: adjustable spanner, screwdriver set, torch, rags, and a small bucket to catch residual water from the cistern.
- Buy quality rubber: flappers, seals, and pan collars made from decent compounds outlast bargain versions, especially in water-saving setups.
- Take measurements: note the inlet size, valve style, and the distance from the lid to the water line; photos help match parts precisely.
- Test progressively: after each tweak, turn the water on and watch for a minute; little drips become obvious before you reassemble the lid.
In my own place, a fiddly leak turned out to be a misaligned chain snagging on the flapper. A simple bend on the clip cleared the snag and stopped the midnight refills. The lesson was simple: work in small steps, verify the effect, and only then move on.
Misconceptions that cost time and money
There’s no shortage of myths about quick fixes, and a few are surprisingly stubborn. Framed as “handy hacks,” they end up stretching small problems into big ones, particularly in Australia, where efficient fittings react badly to trial-and-error adjustments.
- “A brick in the cistern saves water.” It can crack the cistern or jam the flapper; modern dual-flush units are calibrated to precise volumes.
- “If it still flushes, it’s fine.” A slow, silent leak can waste thousands of litres a year and stain the bowl beyond what a cleaner can reverse.
- “Tape fixes everything.” Thread tape helps on threads; it won’t seal a cracked fill valve or a warped flapper seat.
- “Any cleaner works.” Harsh chemicals eat rubber seals and accelerate the very leaks you’re trying to stop.
Many misunderstandings about how toilet plumbing services are perceived in Australia, especially the notion that every visit means replacing the whole toilet. In practice, targeted repairs on valves, seals, and collars solve the majority of issues without a costly swap-out. Knowing this helps you frame the task: look for the small failed part first, not a full suite change.
Repair versus replace: making the call
Some toilets deserve a second life; others soak time and cash. Start with age and parts availability. If the suite is decades old and compatible parts have become rare, repairs become a scavenger hunt. Factor in recurring symptoms: if you’ve replaced a flapper twice and the seat is pitted or warped, you’ll keep chasing your tail. Consider hidden damage as well; floor softness around the base hints at long-term leaks that may justify pulling the pan to check subflooring. Water bills tell a story, too—if usage jumps with no change in routine, an unseen leak is burning money.


Sign in to leave a comment.