When it comes to creating a luxurious and durable swimming pool, gunite pools are often the top choice for homeowners. Gunite, a mixture of cement, sand, and water, is pneumatically applied to create a solid and customizable pool structure. If you're considering building a gunite pool, this ultimate guide will take you through the step-by-step process, ensuring you have all the knowledge and tools to bring your vision to life.
Planning and Design
Building a gunite pool starts with careful planning and design. Begin by envisioning the size, shape, and layout of your pool. Consider factors such as available space, local regulations, and the intended use of the pool. Engage with a professional pool designer or contractor to create a detailed plan that aligns with your preferences and budget.
Excavation and Site Preparation
Once the design is finalized, it's time to prepare the construction site. Excavation involves removing soil and debris to create a level and sturdy foundation for the pool. This stage requires skilled excavation professionals and the use of heavy machinery. Ensure proper measurements and precise digging to match the design specifications.
Reinforcement and Plumbing Installation
The strength and durability of a gunite pool rely on proper reinforcement. Steel rebar is installed in a grid-like pattern to provide structural support. Additionally, plumbing lines for water circulation, filtration, and other pool features are installed during this phase. Hiring experienced contractors is crucial to ensure accurate placement and connection of the reinforcement and plumbing elements.
Gunite Application and Shaping
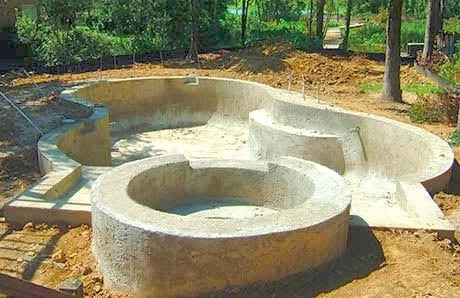
The application of gunite is a critical stage in building a gunite pool. It involves spraying a mixture of cement, sand, and water onto the reinforcement and plumbing infrastructure. Skilled workers use specialized equipment to apply the gunite, shaping it to conform to the design. Multiple layers are added to achieve the desired thickness and strength. As the gunite sets, it forms a solid structure that can be further shaped and sculpted.
Finishing Touches and Pool Equipment Installation
Once the gunite has cured, the pool's surface is finished to create a smooth and appealing texture. Various options, such as tiles, plaster, or pebble finishes, can be applied to enhance the aesthetics and durability. At this stage, pool equipment, such as pumps, filters, heaters, and lighting, is installed and connected to ensure proper functionality.
Conclusion
Building a gunite pool requires careful planning, skilled craftsmanship, and attention to detail. By following this ultimate guide, you now have a comprehensive understanding of the step-by-step process involved in constructing a gunite pool. From the initial planning and design to excavation, reinforcement, gunite application, and finishing touches, every stage contributes to the creation of a luxurious and long-lasting pool that will provide endless enjoyment for years to come. Remember to consult with experienced professionals and local regulations to ensure a successful and compliant pool construction project.


