

 Don\'t miss a step with our ultimate checklist for Yamaha YZF-R6 fairing installations. Make your installation process smoother and faster.
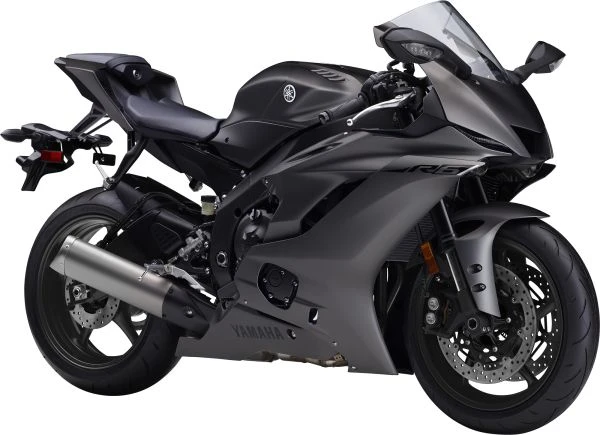
As a Yamaha owner, you are embarking on a journey that will revolutionize the aesthetics and aerodynamics of your bike. Let\'s delve into essential elements of the fairing installation process, including heat shields and bodywork.
Heat shields, crucial components of your bike\'s fairing, preserve its structural integrity. Without these shields, high temperatures emanating from your engine can cause fairing panels to warp. In your Yamaha, you\'ll want to ensure the heat shields are correctly installed, offering optimal protection for your fairings.
The heat shields should be affixed to the inside of your fairing panels using high-temperature resistant adhesive. This requires patience, precision, and the right adhesive. Don\'t rush this step! It\'s like baking a perfect loaf of bread - you can\'t hurry the process if you want an excellent result.
Now, let\'s shift gears to the bodywork aspect of your Yamaha\'s fairing installations. This is where your bike starts to regain its sleek look. The key here is to ensure that all the pieces fit together seamlessly. Remember, each section of the fairing is like a puzzle piece, designed to fit in a specific place on your Yamaha.
Installing the fairings on your Yamaha YZ-F R6 is akin to dressing it up, and every piece should be in its rightful place. Start with the larger fairing sections, such as the main body and tail sections, and work your way down to the smaller pieces like the vents and covers.
During this process, keep an eye out for alignment. The holes on the fairing should align perfectly with the mounting points on your Yamaha. If they don\'t, it\'s like trying to fit a square peg in a round hole - it just won\'t work. So, if you encounter resistance when attaching the fairing, don\'t force it. Check the alignment and adjust as necessary.
In this journey, the right tools are your best companions. A comprehensive tool kit should include a set of hex keys, a socket wrench, and a range of screwdrivers. Think of these tools as the keys to your Yamaha - they unlock the potential for a successful fairing installation.
In essence, mastering the basics of fairing installations on your Yamaha culminates in a smoother, more streamlined ride. The process might be time-consuming, but the end result is worth it - a Yamaha YZF-R6 that\'s as pleasing to the eye as it is to ride. Remember, the process is akin to a marathon, not a sprint. Patience, precision, and the right tools can make your Yamaha fairing installation a breeze.
Handy Accessories and Recommendations for your Yamaha YZF-R6 Fairing Installation
When it comes to Yamaha YZF-R6 fairing installations, having the right accessories at your disposal can make a world of difference. These accessories aren\'t just add-ons; they\'re like the supporting actors that bring out the best in your Yamaha\'s main performance. Let\'s delve into some accessories that can make your fairing installation more efficient and effective.
First on our list is a professional-grade fairing installation kit. This isn\'t your run-of-the-mill toolbox. It\'s specially curated for fairing installations on your Yamaha, boasting a comprehensive range of tools that fit perfectly into your fairing\'s fasteners. Imagine it as a bespoke suit tailored for your Yamaha - every tool, like every stitch, serves a unique purpose.
The kit should include a variety of hex keys, socket wrenches, and screwdrivers to cater to every fastener on your fairing. Having these tools in one place is like having a secret weapon up your sleeve - it makes the installation process quicker, smoother, and far less daunting.
Next up, invest in a high-quality heat-resistant adhesive for your heat shields. Think of this adhesive as the glue that holds your fairing installation together, literally. It needs to withstand the high temperatures your Yamaha\'s engine generates without losing its bonding capability.
In addition to the adhesive, consider getting a heat gun. It\'s like a magic wand that helps you shape and mould your fairing pieces, especially if they don\'t fit right. Plus, it\'s instrumental in loosening adhesive residues when you\'re replacing old fairings on your Yamaha ? making it a handy tool to have.
Now, I\'d like to recommend a must-have accessory that many Yamaha owners overlook - a comprehensive Yamaha YZF-R6 repair manual. This manual is like your personal guide or mentor, walking you through every step of the fairing installation process. It\'s chock-full of diagrams, step-by-step instructions, and troubleshooting tips that can save you a considerable amount of time and frustration.
Lastly, consider investing in a motorcycle stand. It\'s like a reliable friend that holds your Yamaha steady while you\'re busy with the fairing installation. It not only gives you better access to different parts of your bike but also ensures a safer working environment.
Remember, these accessories are designed to make your fairing installation process on your Yamaha less daunting and more efficient. By investing in these, you\'re investing in a smoother, more streamlined ride for your Yamaha YZF-R6. Like a seasoned chef with the right tools, you\'ll be able to create a masterpiece out of your Yamaha fairing installation.
Navigating the Yamaha YZF-R6 Fairing Installation Process: Tips, Feedback, and Support
Now, having the right tools and accessories for your Yamaha YZF-R6 fairing installation is only half the battle won. The real test lies in navigating the installation process adeptly. It\'s like a journey through a maze ? you need the right strategy and guidance to reach your destination successfully.
Let\'s start with some tips that can make your fairing installation experience smoother. Firstly, take your time. Patience is your greatest ally in this process. Rushing through the installation can lead to misalignments and damage to the fairing or your Yamaha. It\'s like reading a suspense thriller ? rushing to the end can ruin the whole experience.
Next, always refer to your Yamaha YZF-R6 repair manual. It\'s your road map in this journey, providing you with valuable step-by-step instructions. Having a guide to refer to can significantly reduce the chances of making errors during the installation.
Now, let\'s talk about feedback from fellow Yamaha owners. In the world of superbikes, shared knowledge is priceless. Join online forums and communities where Yamaha owners share their experiences and tips. It\'s like being part of a special club where everyone speaks the same language ? the language of Yamaha enthusiasts.
These platforms can offer insights into common issues faced during fairing installations, tips on how to overcome them, and even recommendations on the best tools and accessories. Remember, everyone\'s experience is unique, and you can learn a lot from the collective wisdom of other Yamaha owners.
Lastly, don\'t hesitate to seek support if you\'re stuck. Whether it\'s from a fellow Yamaha owner, a professional mechanic, or the Yamaha customer service, asking for help is not a sign of weakness. It\'s like asking for directions when you\'re lost ? it saves you time and gets you back on track faster.
Remember, the goal is to successfully install your fairing, enhancing the look and performance of your Yamaha YZF-R6. It\'s not a race against time, but a process that requires patience, precision, and the right guidance. With these tips, feedback, and support, you\'re well-equipped to navigate the journey of fairing installation on your Yamaha. Enjoy the ride!