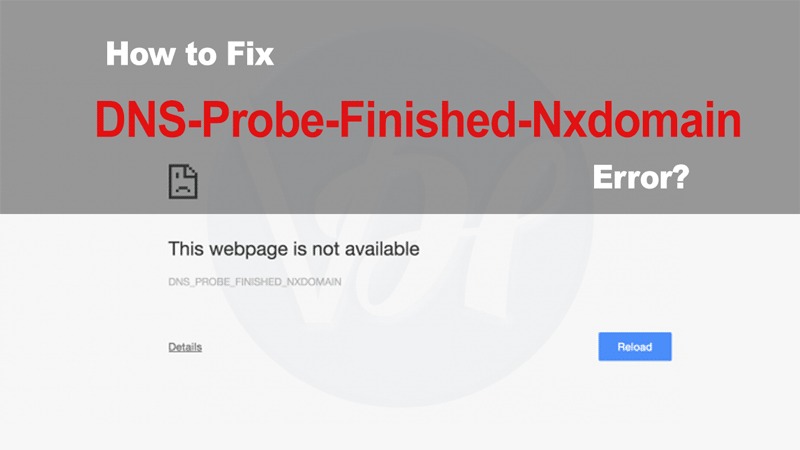
People often complain that they cannot access the internet, and the “DNS_PROBE_FINISHED_NXDOMAIN” error is popping on their screen. You will find the answer to this issue here, but you must be aware of the root cause before resolving the issue. This error code usually occurs when the browser fails to understand the IP address of a particular domain name as the problem is related to the DNS settings. Faulty internet browser settings can prevent you from accessing the internet and the website you want. This error also indicates that the webpage you want to visit does not exist. Fortunately, you can fix this issue in minutes by following the different methods given below:
Clean Your DNS Cache
Cleaning or wiping away the DNS cache is the primary and essential step to resolve this error from your device. Often, the cache is the root cause, and not cleaning it often peaks the issue. The steps of clearing cache from the desktop depending on the operating system you use. If you are a Windows user, follow these steps:
- Use the Start Menu search bar to search and launch the Command Prompt utility.
- Then, insert the following command in the new window and hit the Enter key:
ipconfig/flushdns
Following are the steps for Mac users:
- Click on Launchpad and search for Terminal.
- Open Terminal, insert the following commands, and hit the Enter key after each:
dscacheutil -flushcachesudo killall -HUP mDNSResponder
Renew Your IP Address
You should also check if you have inserted the correct IP address. Renewing the IP address can help fix this issue. Follow these steps on your Windows:
- Open the Command Prompt.
- Type the following commands in order and hit the Enter key:
ipconfig/release
- Use this command to wipe the DNS cache: ipconfig/flushdns
- Now, renew the IP address with: ipconfig/renew
- Now, you can set new DNS servers using: netsh int ip set dns
- Then, reset the Winsock settings with this command: netsh winsock reset
Follow these steps if you are working on Mac:
- Click the Wi-Fi icon and select Open Network Preferences.
- From the list of connections, select your Wi-Fi network and click on Advanced.
- Now, go to the TCP/IP tab and click on the Renew DHCP Lease button.
Tweak the DNS Servers
As we mentioned earlier, the DNS server is sometimes the root cause of this error code. If a DNS server fails to work, the websites you want to visit also fail to resolve the domain names leading you to see this error code. You can try changing the DNS servers (you use) to get rid of this issue. Follow these steps to convert your DNS into Google’s public DNS servers on Windows and Mac:
On Windows:
- Go to the Settings app and select Network & Internet.
- Click on Change Adapter Options.
- From there, give a right-click on your adapter and select Properties.
- Now, select Internet Protocol Version 4 (TCP/IPv4) and click on Properties.
- Tick mark the box for ‘Use the Following DNS Server Addresses.’
- When you see the box for Preferred DNS Server, enter 8.8.8.8 and in the box for Alternate DNS Server 8.8.4.4.
- Click on OK and relaunch your browser.
- Now, check the sites you couldn’t access earlier.
On Mac:
- Click on the Wi-Fi icon and select Open Network Preferences.
- Click on your network, and from the right pane, select Advanced.
- Now, go to the DNS tab and select the existing DNS servers.
- Click on the – (minus) button at the bottom to remove all your existing servers.
- Click on the + (plus) icon and type 8.8.8.8.
- Click on the + (plus) icon again and insert 8.8.4.4.
- Once done, hit the OK button to save your changes.
Restart DNS Client
Windows desktop uses DNS Client so that your browser can figure out the domain names quickly. Thus, restarting the DNS Client service can help you get rid of the “this site can’t be reached” error in your browser. This method is limited to Windows 10 users, so use the following steps if you have this operating system:
- Open the Run dialog.
- Then, type services.msc and hit the Enter key.
- On the following screen, find DNS Client and give a right-click on it.
- Now, select Restart.
Factory Reset Your Router Settings
If you are still stuck with this error code, you might want to check your Wi-Fi router as a misconfigured router can also generate this error. You can try resetting all the router settings and check if the problem persists. Use the following steps to reset your router:
- Use 192.168.1.1 IP address to access your router settings.
- Enter the login details and click on the Maintenance tab.
- From the left sidebar, select ‘Factory Default Settings.’
- Click on Factory Default Settings, and your router will get reset.
Note that this method will delete all the configuration, so you might need help from your internet service provider (ISP) to reconfigure it.
No matter what caused you to experience this error on the browser, this guide will help you use and access the browser as before.
I am Elina John a self-professed security expert. I have been making the people aware of the security threats. My passion is to write about Cyber security, cryptography, malware, social engineering, internet and new media. I write for Webroot security products at webroot.com/safe.
Source :- https://v7webroot.com/use-these-methods-to-fix-dns_probe_finished_nxdomain-error/


