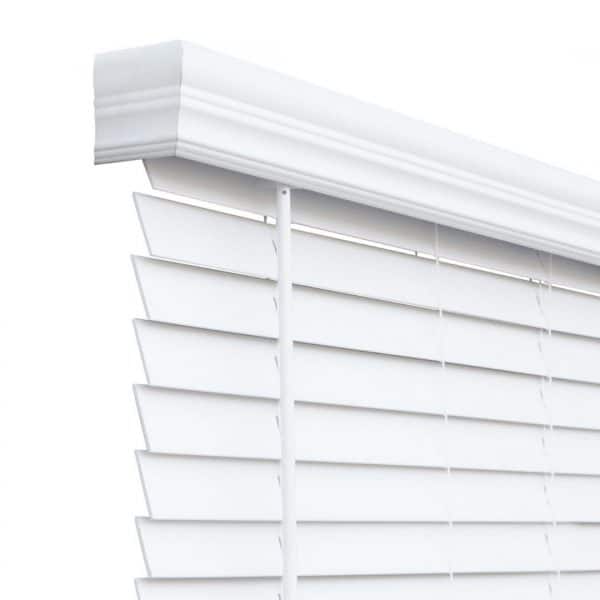
Welcome back, guys. So today I have another article for you all. I'm gonna be installing some blinds in my guest's bedroom. I haven't done anything to this room. It's always just been empty but I finally got some guests coming over. So I have got to get it ready. So I'll be having a few projects coming up for this article and the first one I'm doing is I'm gonna install some wood blinds in this bedroom. It's kind of cheap. It's the ones that run like 50 from onepriceBlinds they're about two inches and you know I'm gonna just tell you how I do it and hope you all like this article to install these blinds. All you're gonna need is an impact or a drill either one works if you don't have any you can do it by hand a screwdriver just might take a little longer but it works pin or pencil just to mark your lines and of course, a tape measure that's all you need to install these lines I'm gonna do right now is get my measurements from the top to the bottom and from side to side. I'm gonna write them down and I'm gonna be going to onepriceBlinds and we're gonna pick out some lines. So let's get started with that all right guys. So this is what we came back with. I went to onepriceBlinds and I purchased this home decorator's collection as you can see it's 47 by 48. So the width is gonna be kind of tight. I would have liked one that was 46 but we'll make it work and the 48 that doesn't matter because you know that's going down. So you'll have like two extra inches you want. It won't look bad at all and this is the two-inch one and I'll have it in the description below.
So let's get started with this all right guys. So in my case, for those faux wood blinds, I have got to install these little brackets with the shorter piece going straight down and the longer piece going up and the thing I want to avoid is hitting any of these over here. So what I'm gonna do is I'm gonna measure from my first point which will be against the wall to here I guess you can see it's. So I don't want to install it up there between five inches because if I do it at five inches I know I'll be hitting that. So I could do it maybe at seven and I'll find this site as well, the same thing at seven and seven. So I'm all I'm gonna do is mark it up here at seven inches mark it and that's where the first bracket would go and the same thing for this side seven and seven and the center one I'll be doing the same thing measure from the end to maybe here and I'll get that measurement and then I'll start the third bracket in the center. So let me go ahead and do it. So all right guys. So we're on to our next step now. What I have to do is install these little brackets. I guess they're going to hold the face of this onto place. So all you have got to do is just squeeze it like that. So once these are on we'll go ahead and hang it on the wall and let's click it in place all right. So that's in place and you can move these to wherever you need to. So there's that let me pull this down for a bit and take this cardboard out all right guys. So I forgot to install the hands on this. So it's kind of tight but I'm gonna make it work. That’s all about today. See you guys in the next article.
0


