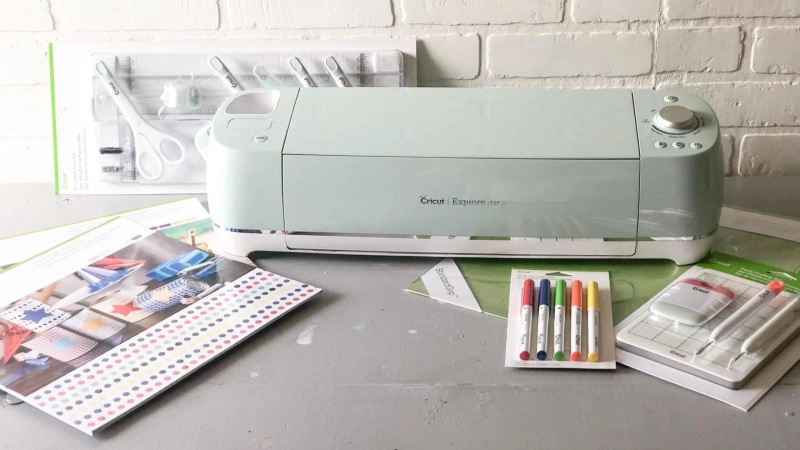
You've got a new Cricut Explore Air 2 machine and want to set it up. Don't worry; nothing complicated. Usually, beginners have doubts about its setup process. It is perfectly normal to have some doubts. But not anymore; this guide has everything to teach you about Cricut Explore Air 2 setup. Here you will get the complete step-by-step process. The Cricut Explore Air 2 machine is the latest model, so there is no doubt about it - you have a great choice. Check out the latest Cricut Explore Air 2 complete setup guide.
What Does Cricut Explore Air 2 Machine Do?
Your Cricut Explore Air 2 machine is capable of cutting more than 100 materials. This machine allows you to cut any material, like leather and cardboard. Also, the machine includes automatic settings to cut over 80 different types of fabrics with a cut size of 12” X 24”. It also has a rapid mode for faster cutting and Bluetooth connectivity.
Users who like to prepare DIY projects must consider this machine. It’s an ideal model in the Cricut line-up. You can cut your desired designs accurately and precisely with this machine. It can be a smart choice for crafters all over the world.
Cricut Explore Air 2 Complete Setup Guide
There are two main steps involved in the setup of your Explore Air 2 Setup. Follow those steps carefully to complete the setup. Refer to the step for creating a new account if you are a beginner.
Step 1: Unpack Your Machine
After getting the Explore Air 2 machine, you must check everything inside the box. Ensure that the box has all the required accessories. So, remove all plastic covers from the package and check for the available accessories inside the box. In case you find something missing, contact Cricut support or the vendor whom you purchased it from.
See the standard tools and accessories you get with the Cricut machine’s package:
A User manual Your Explore Air 2 machine Cutting blade Cricut cutting mat A power cord USB cable Silver pen & accessory adapter Samples of vinyl and cardstockSo, check all of them in your Cricut machine’s package and gather the accessories to operate your machine. Let’s move to the next step, which is to connect your Explore Air 2 machine to your device.
Step 2: Connect the Machine to Your Device
You need to install your Cricut machine first on a flat surface. The surface should be wide to cover the full machine. After that, you must follow the described steps. Although the Explore Air 2 has a wireless connection feature, we will set it up using a USB cable.
Start by connecting the power adapter and USB cable to the Cricut machine and your desktop. After that, you have to power on your machine and the device. Now, visit Cricut’s official website and log in to your Cricut account. Then, download Cricut Design Space, which is software to access Cricut machines.In the next step, let the installation complete. Now, you need to move to design.cricut.com. Tap the Menu icon in the top left corner and click New Machine Setup. Lastly, the Cricut screen will instruct you throughout the installation process.
Now that you have successfully connected your Cricut machine to your desktop, start your first project.
How Can You Create a New Account in Design Space?
If you are a new user, you need to create a new account in Design Space. Existing users can easily sign in to their user accounts by putting in the login details. But all beginners should know how to create a new account while setting up your Cricut Explore Air 2 machine.
First, move to a web browser and navigate to cricut.com/setup. After that, you need to tap on Create Cricut ID.Then, type your email address. In the next step, enter your password. Now, you need to enter your full name. From the following screen, choose your country or region. After that, go with all the on-screen steps. At last, sign in to your account using the new username and password.
Finally, you can access Design Space to make anything you want.
This is how one can easily create a new account in Design Space. This step is only for newbies. So, follow these steps to create a new account.
Conclusion
To sum up, this Cricut Explore Air 2 complete setup guide has provided step-by-step instructions to get your cutting machine up and to run. From unpacking to connecting to your operating system, we've covered all the important parts of the setup process. Now that you're armed with the knowledge, you can dive into a world of creative possibilities and start creating DIY projects with your Cricut Explore Air 2. Get ready to unleash your imagination and enjoy the journey of making unique designs and craft projects!


