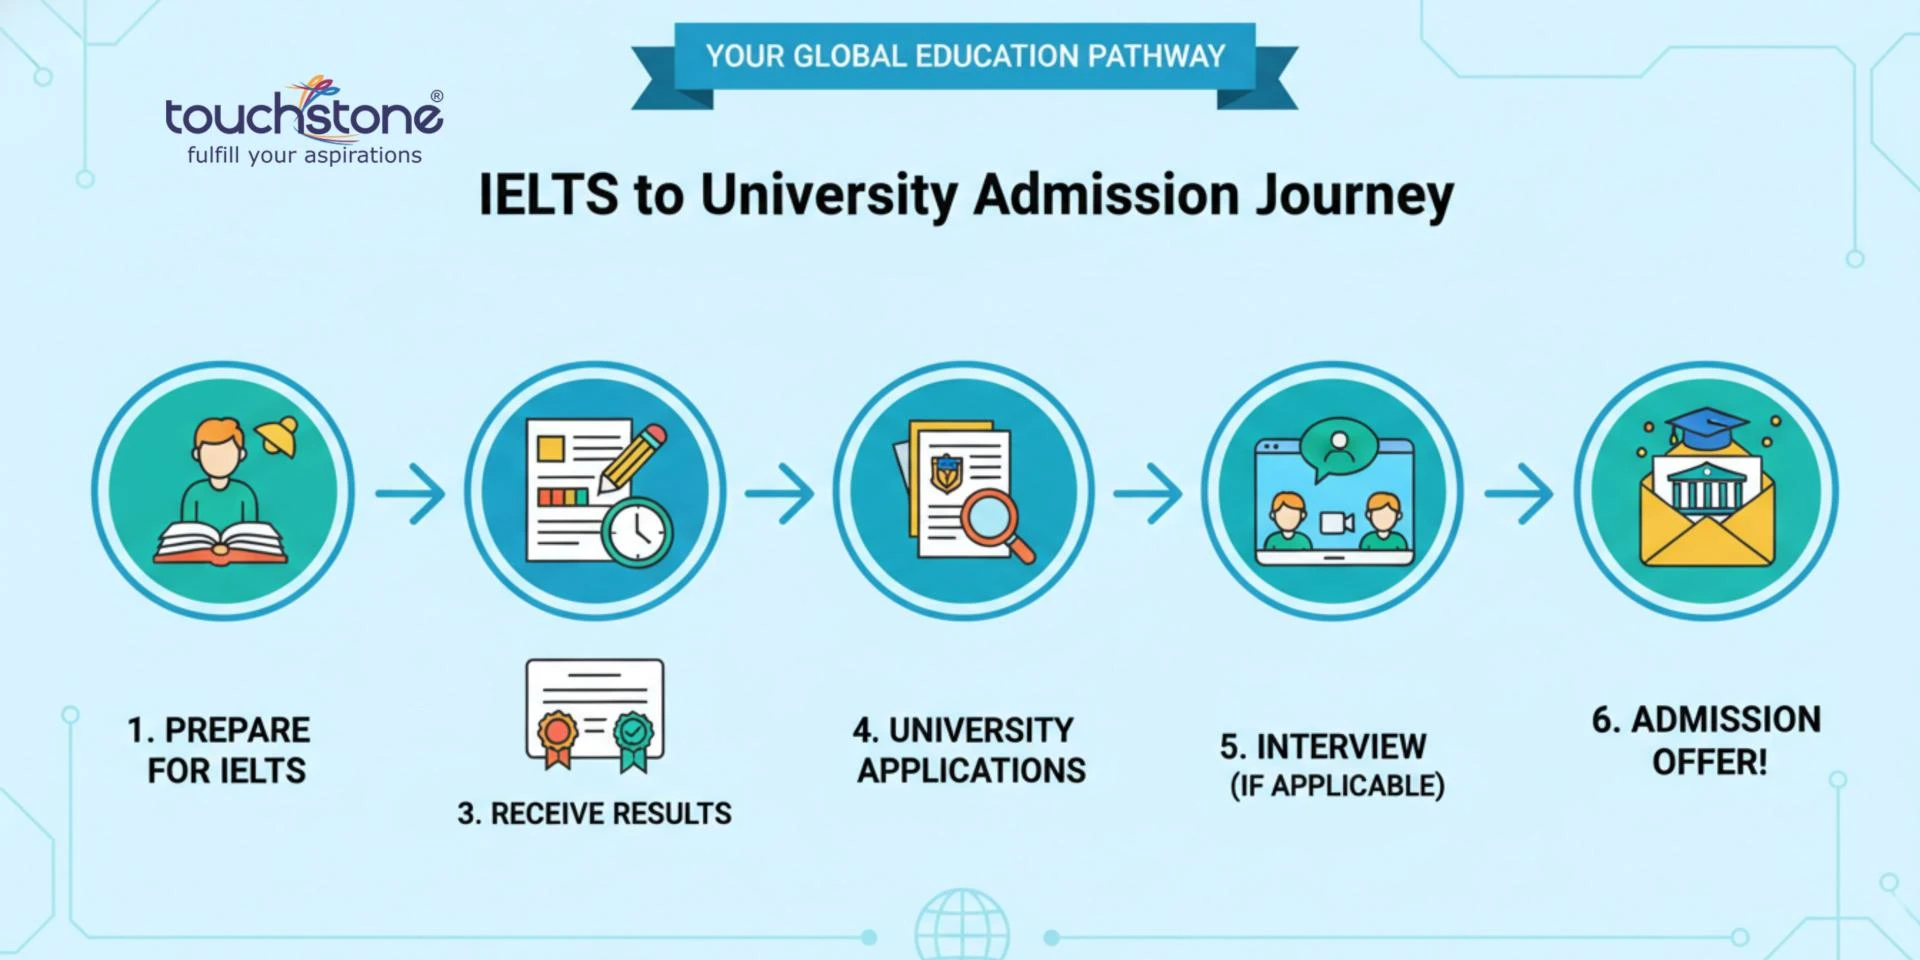
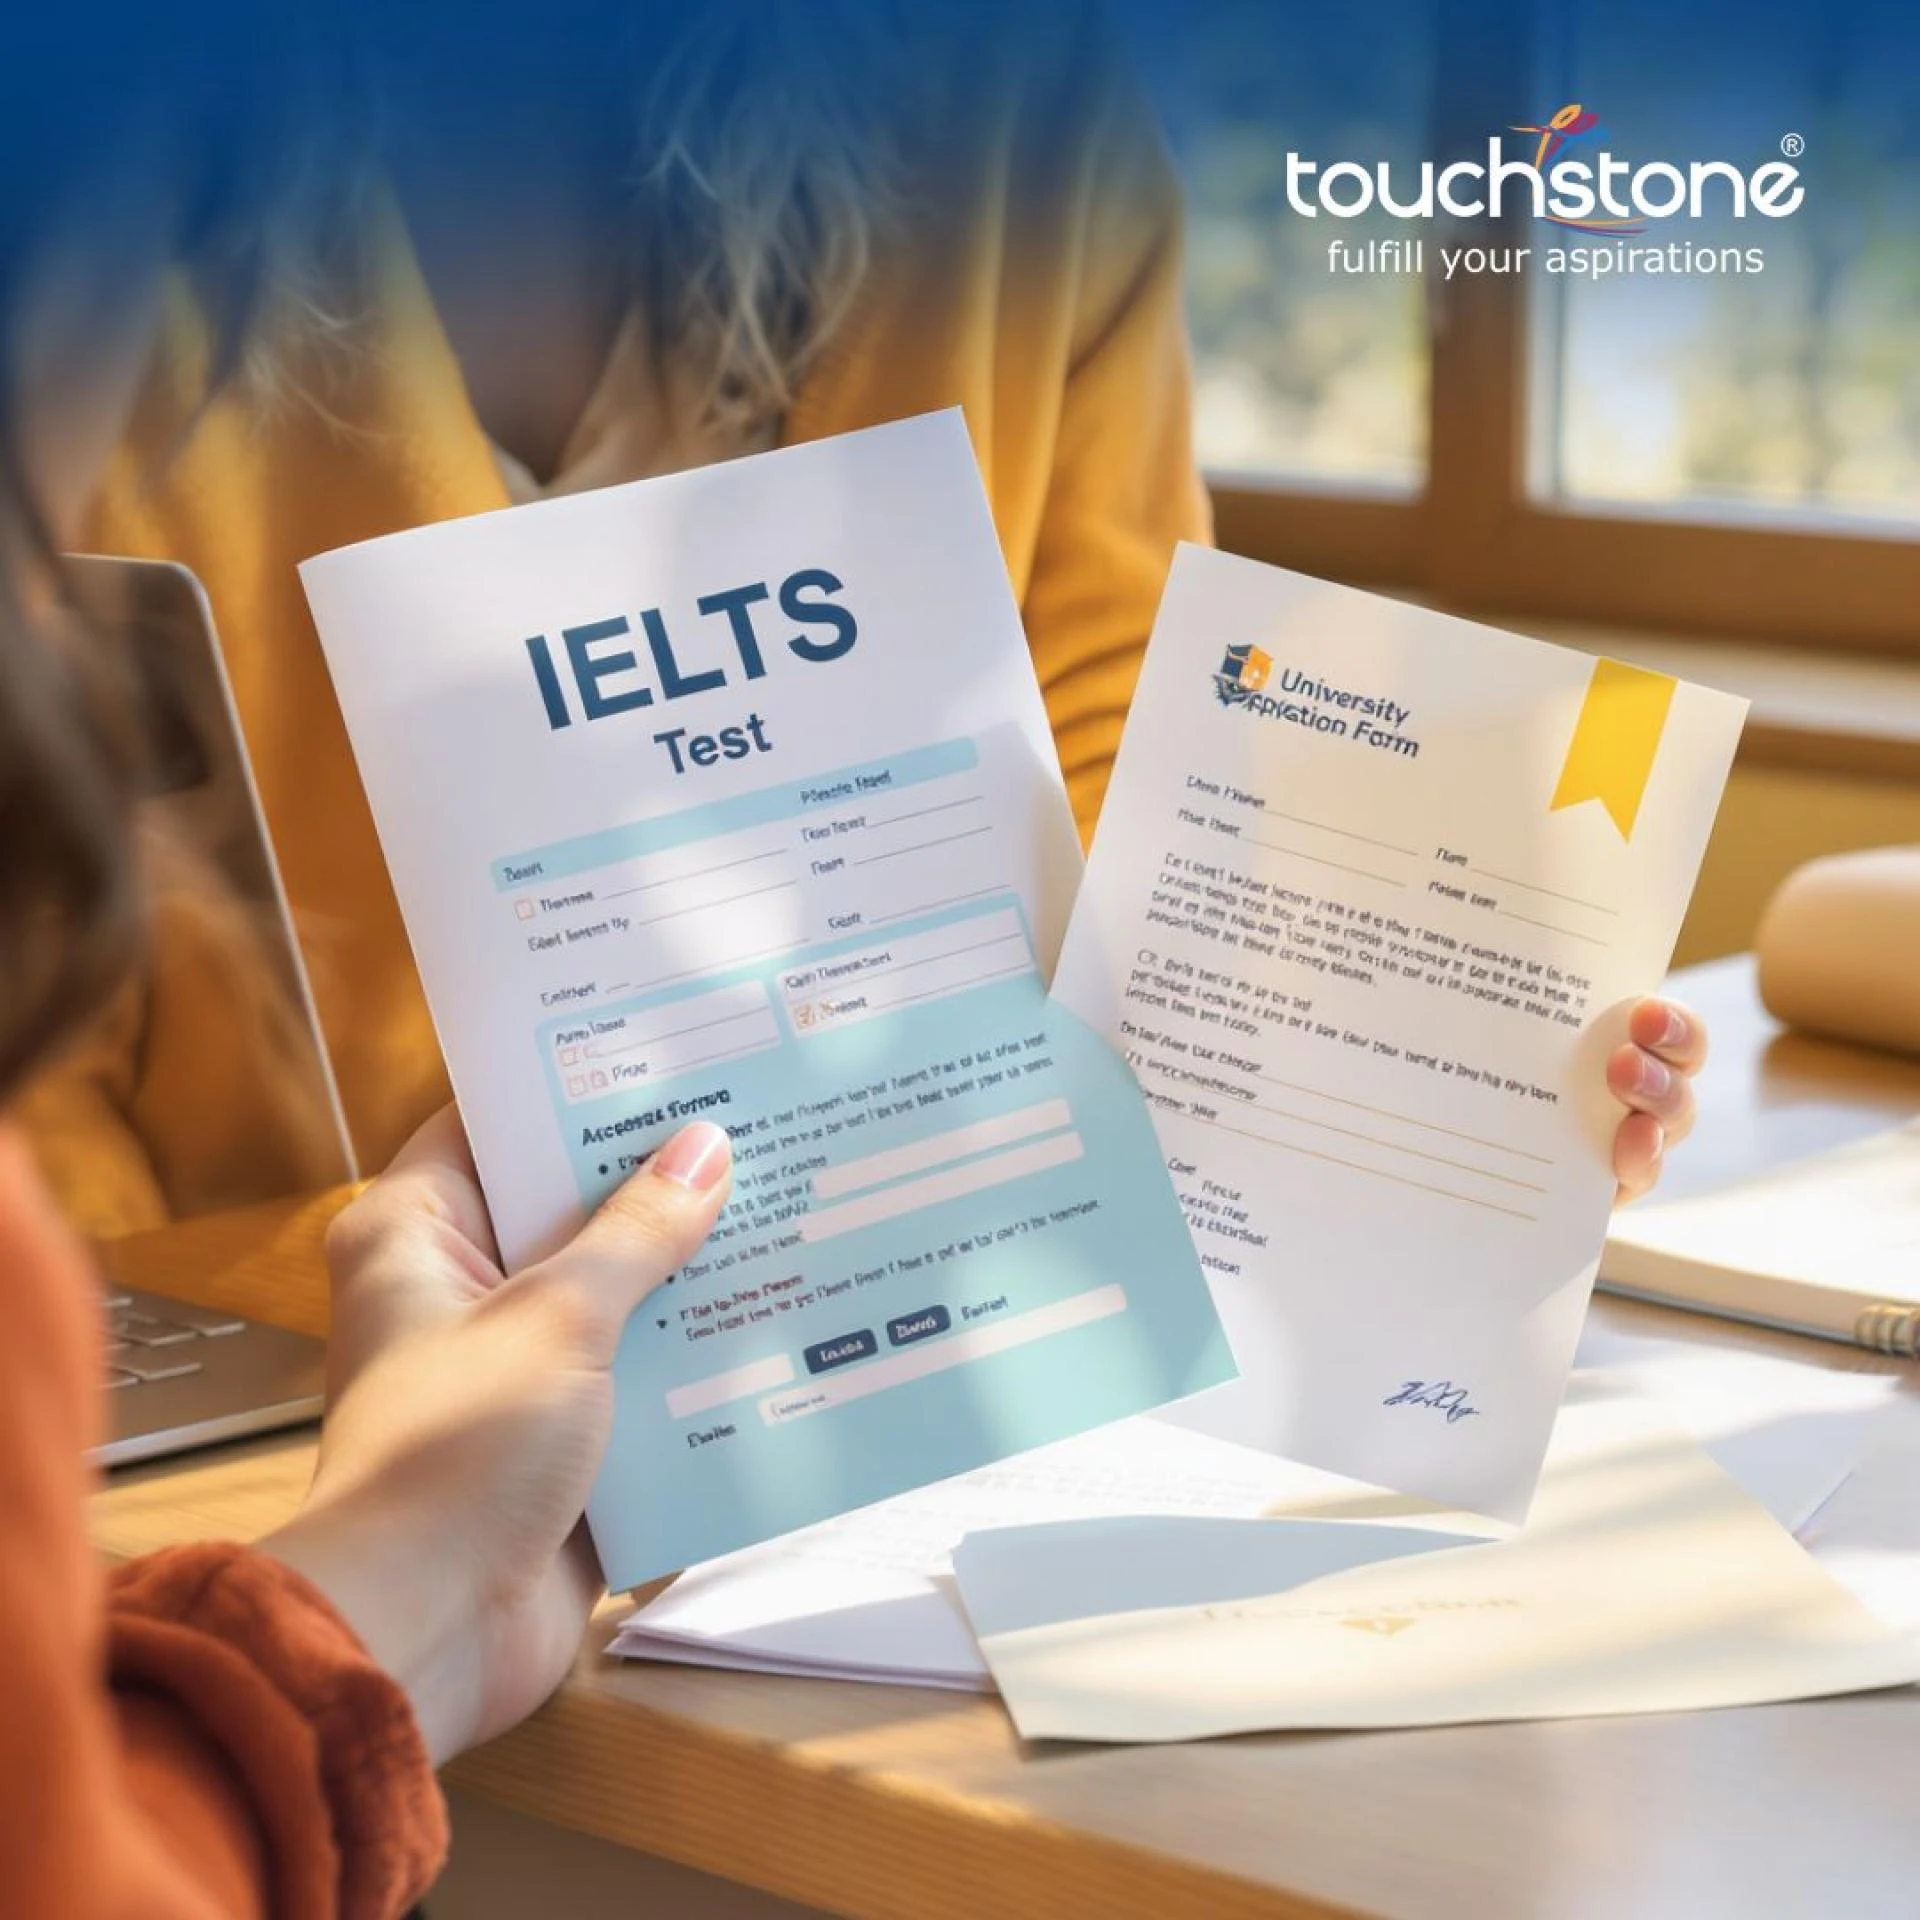
You've conquered the IELTS exam—now what? For many international students planning to study abroad, getting your IELTS results is just the beginning of an exciting journey. Whether you're a high school graduate aiming for undergraduate studies or a working professional pursuing an MBA, the path from IELTS success to university admission requires strategic planning and attention to detail. This comprehensive guide walks you through each stage, helping you navigate deadlines, requirements, and potential challenges with confidence.
Understanding Your IELTS Band Score and University Requirements
Your IELTS band score is your proof of English proficiency—a critical component of your application package. However, it's just one piece of the puzzle. Different universities have different requirements, and understanding how your score positions you in the competitive landscape is essential.
Typical IELTS Requirements by Country:
- UK Universities: 6.0-7.0 for undergraduate; 6.5-7.5 for postgraduate (some prestigious institutions require 7.0+)
- Canadian Universities: 6.5 overall with individual bands of 6.0 or higher; some programs demand 7.0+
- Australian Universities: 6.0-7.0 depending on program; professional programs (medicine, law) often require 7.0+
- US Universities: Not always mandatory (many accept other tests), but when required, typically 6.5-7.0
- New Zealand Universities: 6.0-7.0 for most programs
Important Note: Some universities have higher English proficiency requirements for specific programs. STEM fields may have different standards than humanities. Always verify the exact requirements for your chosen program, not just the general university requirements.
Create a detailed spreadsheet with your target universities, their exact IELTS band requirements, program-specific requirements, and application deadlines. This becomes your personal roadmap and ensures you don't miss critical details.
Step 1: Strategic University Selection Based on Your IELTS Score
The goal isn't finding the most famous universities—it's finding institutions that genuinely match your qualifications, goals, and financial situation. Most education consultants recommend the "three-bucket" approach:
Reach Schools: Institutions where your IELTS score meets requirements but your other credentials (GPA, work experience) are slightly below their typical profile. Apply to 1-2 of these.
Target Schools: Universities where your IELTS score and overall profile align well with their typical admitted student profile. These should be 3-4 institutions.
Safety Schools: Reputable institutions where your IELTS score and credentials exceed their typical requirements. Apply to 2-3 of these to ensure backup options.
Example Positioning:
- IELTS 7.5: Russell Group universities (UK), Ivy League candidates (USA), top-tier Canadian/Australian universities
- IELTS 7.0: Strong universities across all English-speaking countries
- IELTS 6.5: Good mid-tier universities in most countries; some competitive programs in top institutions
- IELTS 6.0: Solid options in Canadian and Australian universities; limited options at prestigious institutions
Research university websites, check QS and Times Higher Education rankings, explore program-specific outcomes, and read reviews from current students. Many universities now have dedicated international student webinars—attend these to ask specific questions about your profile.
Red Flag to Avoid: Don't apply to universities solely because they accept your IELTS score. Ensure the program, location, cost, and career outcomes align with your goals.
Step 2: Preparing Your Required Documents (Start Early)
Most international students underestimate how long documentation takes. Plan to begin gathering documents 4-6 months before your target application deadline—delays are extremely common.
Essential Documents and Timeline:
Academic Transcripts (Required immediately)
- Request officially sealed transcripts from all educational institutions you've attended
- Ensure documents are in English; if not, obtain certified English translations
- Request apostille certification (for international recognition) if required by the university
- Order multiple copies—typically need 2-3 per application
- Timeline: 2-4 weeks to obtain
Statement of Purpose/Personal Statement (Start 6-8 weeks before deadline) Your SOP is your opportunity to tell your story beyond grades. Universities want to understand your motivation, goals, and fit with their program.
Structure your SOP effectively:
- Opening: Hook the reader with your genuine interest in the field
- Background: Briefly explain your academic/professional journey and what led you to this decision
- Program Fit: Specifically explain why this university and program align with your goals (not generic reasons)
- Career Goals: Be clear about your short-term (1-3 years) and long-term (5-10 years) objectives
- Closing: Reiterate your commitment and enthusiasm
Common SOP Mistakes to Avoid:
- Writing too broadly or generically (avoid vague statements like "I want to advance my career")
- Focusing only on what the program offers, not why YOU specifically fit there
- Exceeding recommended word count (typically 500-800 words)
- Submitting without proofreading or feedback
Tip: Have 2-3 people review your SOP—ideally someone who knows your academic background and someone with strong English writing skills.
Letters of Recommendation (LOR) (Request 6-8 weeks before deadline) You typically need 2-3 letters from people who can speak to your academic abilities, character, and potential.
Best recommenders are:
- Professors or teachers who taught you recently and know your work well
- Employers or supervisors who can speak to your professional qualities
- Academic advisors or mentors familiar with your goals
When requesting LORs:
- Give recommenders at least 4-6 weeks notice
- Provide them with your SOP, resume, and a brief reminder of your relationship
- Share the university's specific submission requirements
- Follow up gently one week before the deadline
English Proficiency Documentation
- Your official IELTS score report (printed directly from your results)
- Some universities accept digital copies; others require official transcripts sent directly by IDP/British Council
- Request multiple score transcripts if applying to multiple universities
Additional Documents (Check Each University)
- Resume/CV highlighting relevant experience
- Portfolio (for creative programs like architecture, design, fine arts)
- Standardized test scores (GRE, GMAT for postgraduate programs)
- Proof of financial support (some universities request this with applications)
- Certificates or proof of work experience
- Health insurance or vaccination records (for visa purposes)
Pro Tip: Create a master document checklist for each university. Mark items as "gathered," "submitted," and "confirmed received." This prevents the common error of thinking you've submitted everything when you haven't.
Step 3: Understanding Application Deadlines and Strategic Timing
Missing an application deadline means waiting another year. The consequences are significant, so treat deadlines as non-negotiable.
Application Deadlines by Country/System:
UK Universities (UCAS System)
- Main deadline: January 15 (for most universities and courses)
- Oxford, Cambridge, and some medicine/dentistry courses: October 15
- Late applications accepted until June 30 with reduced chances
- Early applications (submitted before October 15) receive priority consideration
US Universities
- Early Decision (binding): November 1-15
- Early Action (non-binding): November 1-15
- Regular Decision: January 1-15 (most common deadline)
- Some universities have rolling admissions (process applications continuously until spots fill)
- Application processing: 4-8 weeks after submission
Canadian Universities
- Most deadlines: December-April (varies by institution and program)
- Popular universities: Earlier deadlines (December-January)
- Less competitive universities: Later deadlines (March-May)
- Application processing: 4-12 weeks
Australian Universities
- Intake periods: February/March and July/August
- Application deadlines: Usually 2-3 months before intake
- Rolling admissions model—apply earlier for better chances
New Zealand Universities
- Application deadlines: Typically December-April for following year intake
- Some programs have earlier deadlines (engineering, medicine)
Strategic Application Timeline (Working Backward from Intake Date):
- 12 months before intake: Begin research and shortlist universities
- 9-10 months before: Request transcripts, begin SOP writing, identify recommenders
- 8 months before: Submit applications to early-deadline universities
- 6-7 months before: Submit majority of applications
- 3-4 months before: Follow up on application status
- 1-2 months before: Make final decisions on which university to attend
Critical Tip: Don't submit all applications simultaneously. Spread them over 2-3 months. This allows you to refine your SOP based on feedback, customize applications for each university, and manage potential technical issues.
Step 4: Submitting Your Application and Understanding Offer Types
Each university has its own application portal. Most follow a similar structure, but always read instructions carefully.
Application Submission Checklist:
- Upload all required documents in correct formats (usually PDF)
- Ensure document file sizes don't exceed limits
- Use clear, professional file naming conventions
- Complete all mandatory fields
- Review application for errors before submission
- Pay application fee (typically $50-150 USD)
- Take screenshots of confirmation pages
- Save your application ID number
After Submission: Universities typically send confirmation emails within 24-48 hours. If you don't receive confirmation, contact the admissions office—don't assume it was submitted successfully.
Understanding Offer Types:
Unconditional Offer: You're accepted as-is. You meet all requirements, and your place is secure. This is the ideal outcome.
Conditional Offer: You're accepted pending completion of specific conditions by a deadline. Common conditions include:
- Maintaining current academic grades (especially for undergraduate students still in school)
- Achieving a specific minimum grade in final exams
- Meeting English proficiency requirements if still taking IELTS
- Completing prerequisites or foundational courses
- Providing proof of qualifications before enrollment
How to Handle Conditional Offers:
- Read conditions carefully—ensure they're achievable
- Ask the university for deadline extensions if needed
- Keep communication open with the admissions office
- Submit required documents immediately upon completion
- Request written confirmation once conditions are met
Rejected Application: If rejected, some universities allow appeals. Review their appeal policy and consider whether new evidence could strengthen your case. Most rejections are final, however. Use feedback to improve future applications or consider alternative universities.
Offer Letter Hold Time: Most universities give you 2-4 weeks to accept their offer. Use this time to compare offers from multiple universities, assess financial packages, and make an informed decision.
Step 5: Obtaining Your Offer Letter and Managing Multiple Offers
Your official offer letter is crucial for the visa application process. Once you receive it, request a physical copy and save digital copies in multiple locations.
If You Have Multiple Offers:
- Compare tuition costs and scholarship opportunities
- Evaluate program content and teaching methodologies
- Research graduate employment outcomes
- Consider location, living costs, and lifestyle factors
- Look at visa sponsorship policies and post-study work options
What to Do:
- Accept one offer formally (usually through the university portal)
- Politely decline other offers (email the admissions office)—this frees up spots for waitlisted students
- Request written confirmation of your accepted place
Financial Considerations:
- Some universities require a deposit to hold your place (typically $500-2000)
- These deposits are often credited toward tuition fees
- Clarify refund policies if you change your mind later

Step 6: Understanding Visa and Study Permit Requirements
Your offer letter opens the door to visa applications. Different countries have different processes, but the general requirements are similar.
Typical Visa Documentation Required:
Financial Documents (Most Important)
- Bank statements showing funds for at least one year of tuition and living expenses
- Proof of financial sponsorship if someone else is funding your studies
- Pay slips or employment contracts showing income stability
- Proof of scholarship or financial aid from the university
Educational Documents
- Original offer letter from the university
- Academic transcripts
- Proof of English proficiency (IELTS results)
Personal Documents
- Valid passport (must be valid for entire duration of study)
- Birth certificate
- Police clearance certificate (some countries)
- Medical examination reports (some countries)
Application Specifics by Country:
UK (Student Visa)
- Processing time: 3-12 weeks
- Requires proof of funds held for 28 days in your name or sponsor's name
- Certificate of Acceptance for Studies (CAS) from university required
- Biometric appointment necessary
US (F-1 Visa)
- Processing time: 3-6 weeks
- Requires I-20 form from university
- Proof of financial support (I-864 form if sponsored)
- SEVIS fee payment ($200)
- Visa interview at US embassy/consulate
Canada (Study Permit)
- Processing time: 4-6 weeks (regular); 2 weeks (expedited, additional fee)
- Requires Acceptance Letter from university
- Proof of financial support
- Medical examination (if required)
- No visa interview required for most countries
Australia (Student Visa)
- Processing time: 1-3 weeks
- Requires Confirmation of Enrollment (CoE) from university
- Proof of financial capacity
- Health insurance (Overseas Student Health Cover - OSHC) mandatory
Potential Visa Complications and Solutions:
- Rejected visa application: Review rejection reasons, consult visa experts, consider reapplication with stronger evidence
- Financial proof insufficient: Contact sponsors, gather additional bank statements, provide employment verification
- Medical exam complications: Follow country-specific health requirements, get re-examination if needed
- Delays in documentation: Contact university to request expedited CAS/CoE; contact visa office for status updates
Post-Visa Approval:
- Arrange accommodation before arrival
- Purchase travel insurance and health insurance
- Arrange airport pickup or transit
- Open a local bank account (do this on arrival)
- Register with your country's embassy in your destination
- Complete university orientation programs
Final Thoughts
The journey from IELTS success to university admission requires strategic planning, meticulous documentation, and persistence through potential setbacks. Every university has different requirements, timelines vary, and unexpected complications can arise. However, this process is entirely navigable with proper preparation.
Thousands of international students successfully complete this journey every year. The difference between those who succeed smoothly and those who face challenges often comes down to early planning, careful attention to deadlines, and clear communication with universities throughout the process.
Your IELTS score opened the door. Now it's up to you to walk through it strategically and confidently.
Ready to turn your IELTS score into university admission?
At Touchstone Educationals in Chandigarh and across Punjab, we don't just help you crack the IELTS exam—we guide you through the entire journey to study abroad. Our education consultants and counsellors have helped hundreds of students move from IELTS preparation to acceptance letters from top universities worldwide. Whether you're confused about the study abroad journey or need post-IELTS guidance, our team is here to ensure you're never lost on your path to international education.
Connect with us today and let's make your study abroad dreams a reality.


Sign in to leave a comment.