Makeup enthusiasts know the unparalleled joy of owning a personalized makeup palette that perfectly suits their unique style and preferences. If you\'re tired of settling for pre-made palettes that contain only a few shades you love, it\'s time to embark on an exciting journey of creativity and self-expression by make your own makeup palette. Not only does it allow you to curate your dream collection of shades, but it also empowers you to become the makeup artist of your own life.
Step 1: Define Your Color Story
Before you dive into the world of creating your own makeup palette, take a moment to reflect on the colors that truly speak to you. Consider the hues that complement your eye color, skin tone, and personality. Are you drawn to warm, earthy tones, or do you prefer cool and vibrant shades? Understanding your color preferences will help guide you through the rest of the process.
Step 2: Gather Your Supplies
To craft your unique makeup palette, you\'ll need a few essential supplies:
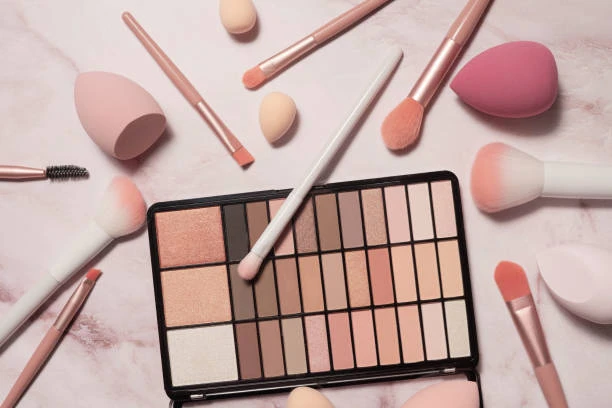
- Empty Magnetic Palette: Invest in a high-quality empty magnetic palette that suits your size preference. These palettes come in various shapes and sizes, so choose one that accommodates your makeup needs.
- Single Eyeshadows, Blushes, and Highlighters: Shop for individual pans of eyeshadows, blushes, and highlighters from your favorite brands. Many reputable makeup brands offer refill pans that fit perfectly into magnetic palettes.
- Makeup Depoting Tools: You\'ll need tools like a depotting spatula and rubbing alcohol to safely transfer the individual pans from their original packaging into your magnetic palette.
Step 3: Depotting Your Makeup
Depotting refers to the process of removing the individual pans from their original packaging. Although it may seem daunting at first, it\'s a simple and satisfying process. Gently heat the bottom of your makeup pans with a hair straightener or heat gun. Once the adhesive loosens, use the depotting spatula to carefully lift the pans out of their containers. Clean any residual glue with rubbing alcohol before placing them in your magnetic palette.
Step 4: Organize and Customize
Now comes the exciting part! Arrange your newly depotted eyeshadows, blushes, and highlighters in your magnetic palette. Play around with the placement until you\'re satisfied with the organization and flow of colors. You can group similar shades together or create color stories that tell a unique makeup tale. The freedom to customize your palette allows you to be as artistic and adventurous as you like!
Step 5: Add Personal Touches
Personalize your makeup palette by creating custom labels for each pan. This can be as simple as printing out the names of the shades or coming up with your own creative names. Adding labels not only adds a professional touch but also makes it easier to identify your favorite shades quickly.
Conclusion:
Crafting your own makeup palette is an enchanting experience that allows you to unleash your inner artist and create a collection of shades that truly represents you. By defining your color story, gathering the right supplies, depotting your makeup, and organizing it to perfection, you\'ll soon have a one-of-a-kind makeup palette that sparks joy every time you use it. Remember, makeup is all about self-expression, so embrace the process and have fun on this beauty adventure!


Sign in to leave a comment.