
In the world of modern construction, manufacturing, and everyday DIY projects, finding versatile, easy-to-install solutions for sealing, cushioning, or insulating surfaces is essential. Enter the self adhesive rubber strip: an unsung hero valued for its flexibility, immediate usability, and ability to create reliable seals or protective barriers on almost any material. However, with so many varieties available, selecting the right self adhesive rubber strip for your unique application can be daunting.
Whether you are a facility manager looking to weatherproof industrial doors, a contractor working on site installations, or simply a homeowner hoping to block drafts or silence banging cabinet doors, understanding the science and selection criteria behind the self adhesive rubber strip is crucial. This small yet powerful product can impact not just the appearance of a space, but also its comfort, longevity, and performance.
What Is a Self Adhesive Rubber Strip?
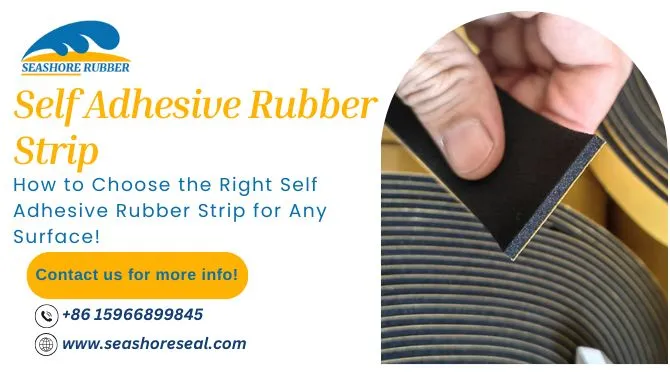
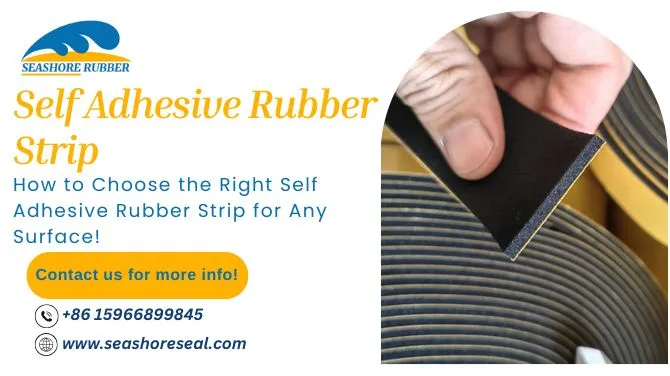
A self adhesive rubber strip is a narrow, flexible strip made from synthetic or natural rubber, pre-coated with a pressure-sensitive adhesive on one side. This design allows users to simply peel off the protective liner and press the strip onto a prepared surface—immediately creating a bond and a functional seal, buffer, or insulator. Self adhesive rubber strips are available in a variety of profiles (flat, D-shape, P-shape, etc.), materials, thicknesses, and colors.
Key characteristics include:
- Quick installation: No need for separate glue, nails, or fasteners.
- Versatility: Can be applied to metal, wood, plastic, glass, ceramic, painted/varnished surfaces, and more.
- Adaptability: Used for gasketing, weatherstripping, anti-vibration padding, noise dampening, gap-filling, and protection.
- Removability: Can often be peeled up and repositioned (at least initially), making corrections possible.
Why Use a Self Adhesive Rubber Strip?
The humble self adhesive rubber strip offers many advantages across sectors:
- Saves time and reduces installation errors: Just peel and stick!
- Supports energy savings: Forms instant seals, improving insulation and lowering energy bills for doors/windows.
- Protects surfaces: Cushions against scratches, chips, and impact damage.
- Reduces noise and vibration: Quietens machinery, appliances, or furniture.
- Prevents leaks and drafts: Blocks air, water, dust, and pests—even in tricky or irregular gaps.
- Increases comfort: By preventing rattles or cold spots, living and workspaces are more pleasant.
Many modern products with moving, closing, or mating surfaces utilize the self adhesive rubber strip as a key element in their design for both functional and quality assurance reasons.
Understanding Rubber Types: EPDM, Neoprene, Silicone, and More
The performance of any self adhesive rubber strip depends heavily on the rubber composition. Let’s explore the most common types:
1. EPDM (Ethylene Propylene Diene Monomer)
- Best for: Outdoor use, weather resistance, UV and ozone stability, general sealing
- Pros: Long lifespan, holds up to sun and rain, excellent flexibility at low and high temperatures
- Cons: Limited oil and solvent resistance
2. Neoprene (Polychloroprene)
- Best for: Moderate outdoor, good oil/chemical resistance, industrial vibration pads
- Pros: Versatile; balances weather, oil, and chemical tolerance
- Cons: Not as UV-resistant as EPDM
3. Silicone
- Best for: Extreme temperature (-50°C to 200°C), food or medical contacts
- Pros: Pure, clean, flexible, safe for sensitive applications
- Cons: More expensive; can tear under heavy load
4. Natural Rubber
- Best for: General indoor, anti-slip, high elasticity
- Pros: Typically inexpensive, very flexible
- Cons: Poor weather, UV, ozone, and oil resistance—shouldn’t be used outdoors
5. Nitrile (NBR)
- Best for: Oil and petroleum applications, automotive gaskets
- Pros: Superior oil/fuel resistance
- Cons: Not suitable for high UV or outdoor weather
Tip: Always choose a rubber type that matches your environmental exposure and use case!
How Adhesives Work: The Backbone of Reliable Sticking Power?
Adhesives on a self-adhesive rubber strip come in several varieties, each affecting sticking power, temperature range, and longevity.
1. Acrylic Adhesives
- Pros: Strong, UV resistant, excellent for outdoor applications.
- Cons: Typically requires 24 hours to reach full bond strength.
2. Rubber-Based Adhesives
- Pros: Instant tack, easy to apply, strong on many materials.
- Cons: Less UV and high-heat resistance; best for indoor or short-term outdoor use.
3. Silicone-Based Adhesives
- Pros: Excellent for high temperatures, glass, and non-porous surfaces.
- Cons: Premium cost; unique handling requirements.
Proper application sequences (cleaning, drying, pressure) are vital—cheap adhesives often fail quickly, so quality is worth the investment.
Surface Compatibility and Application
Not every self adhesive rubber strip is right for every surface. Consider:
- Smooth, hard surfaces (glass, painted wood, metal): Ideal for strong, permanent bonds.
- Porous or dusty surfaces (raw wood, concrete): May require priming, or use a product designed for rougher textures.
- Contoured or curved areas: Choose a flexible strip profile and soft rubber material.
- High-moisture or steamy locations: Use EPDM or silicone rubber and adhesives proven for damp environments.
Always check manufacturer guidelines for compatibility and test a small inconspicuous area first if in doubt.
Thickness, Width, and Shape: Matching Strip Size to Project Needs
A self adhesive rubber strip comes in a near-infinite array of sizes and forms. Factors to consider:
- Thickness: Thicker strips are more forgiving for uneven surfaces or larger gaps but may interfere with normal door/window operation if oversized.
- Width: Should cover the full area to be sealed or cushioned, aligned with aesthetics and space limitations.
- Shape: D-shape, E-shape, P-shape, round, or flat—each suited to specific applications and closure gaps.
For windows and doors, D or E profiles are common. For machinery or heavy-duty padding, thick flat strips or custom extrusions may be best.
Weather, Temperature, and Resistance Requirements
Ask yourself:
- Will the strip be exposed to sunlight, rain, frost, or heat?
Choose EPDM or silicone with UV and weather-resistant adhesives. - Is oil or chemical contact expected?
Go for nitrile or neoprene versions. - Do you need fire resistance?
Check for fire-rated materials. - Will the strip need to function in very cold or hot environments?
Prioritize high/low-temperature rubbers like silicone.
If unsure, consult with Qingdao Seashore Industrial Co., Ltd. for materials-testing data or guidance.
Special Considerations: Heavy-Duty vs. Light-Duty Strips
- Heavy-duty strips: Thicker, harder rubbers and strong adhesives, perfect for vibration, machinery feet, or gap-filling in trucks, containers, or industrial doors.
- Light-duty strips: Softer, thinner, and more flexible—great for interior doors, hobby use, or lightweight cabinetry.
Never use a light-duty strip in a high-stress environment—it will fail and require replacement.
Color, Appearance, and Customization Options
Primarily black, gray, and white are offered, but custom colors and printed logos are available for volume orders. Some strips include textured or flocked surfaces for added grip or cosmetic appeal.
OEM and architectural clients may request strips pre-cut to specific lengths, dual-layer structures, or with protective films for clean installations.
How to Install a Self Adhesive Rubber Strip—Step by Step?
- Clean the Surface: Use isopropyl alcohol or soapy water. Let dry completely.
- Measure and Mark: Lay the strip along the intended area, mark where needed.
- Cut to Size: Sharp scissors or a utility knife work best.
- Peel Backing: Start at one end, exposing only a few inches of adhesive at a time.
- Apply Pressure: Gradually stick the strip down, pressing firmly and smoothing out air bubbles.
- Overlap Corners Carefully: Ensure no gaps at joins.
- Test the Fit: For moving parts, open/close after installation—adjust as needed.
- Allow to Cure: For best results, don’t expose to heavy use/water for at least 24 hours.
Common Mistakes and How to Avoid Them
- Applying to dirty or wet surfaces: Leads to fast failure.
- Overstretching the rubber during installation: Causes shrinkage and gaps.
- Using the wrong strip type for exposure: E.g., using non-UV-resistant rubber outdoors.
- Buying strips that are too thick for the gap: Prevents doors/windows from closing properly.
- Ignoring instructions for adhesive curing: Weakens bond and performance.
A little preparation goes a long way for a long-lasting result!
Maintaining and Replacing Self Adhesive Rubber Strips
Maintenance:
- Wipe with mild soap and water—avoid harsh chemicals.
- Inspect every 6–12 months for peeling, cracking, or compression set.
- Replace if the strip loses flexibility, adhesion, or sealing power.
Replacement:
- Gently pull off old strip (a hair dryer can soften the adhesive).
- Remove leftover adhesive with solvent if necessary.
- Install a fresh strip as above.
Choosing the right self adhesive rubber strip can be the difference between a short-lived quick fix and years of reliable function, energy savings, and comfort. By understanding material choices, adhesives, and application best practices, you empower your project—no matter how large or small—for long-term success.
Frequently Asked Questions (FAQ)
1. How long does a self adhesive rubber strip last?
A: With high-quality materials, proper surface prep, and installation, most strips last 5–10 years indoors, and 3–7 years outdoors.
2. Which surfaces work best for self adhesive rubber strips?
A: Clean, smooth, non-porous surfaces (metal, plastics, glass, sealed wood) provide the strongest bond.
3. Can I use a self adhesive rubber strip in wet or outdoor settings?
A: Yes, if you choose EPDM or silicone strips with weather-resistant adhesives.
4. Will the adhesive damage paint or finishes when removed?
A: Quality adhesives are engineered to minimize damage, but very fresh or delicate finishes may require special care. Test a small area first.
5. What do I do if the strip keeps peeling off?
A: Ensure the surface is clean/dry, avoid stretching the strip, and avoid using during extreme cold or heat until cured. For challenging surfaces, use a compatible adhesive primer.
6. Is there a difference between foam and solid rubber strips?
A: Yes. Foam provides softer cushioning and can conform to larger gaps, but is usually less durable than solid rubber.
7. Can I paint over a self adhesive rubber strip?
A: It’s not recommended; most rubber surfaces reject paint, and painting may affect flexibility.
8. Are self adhesive rubber strips safe for food or medical uses?
A: Only if specified as food-grade or medical-grade (such as certain silicone versions).
9. Do these strips work well for soundproofing?
A: They can help block minor noise/leaks, but professional acoustic seals offer higher performance for critical applications.
10. Does weather/temperature affect installation?
A: Yes. Install between 10°C and 30°C for best results; extreme temperatures can affect adhesive setting.
11. Are custom shapes or sizes available from Qingdao Seashore Industrial Co., Ltd.?
A: Absolutely! We can produce strips tailored to your dimensions, colors, and requirements.


























Sign in to leave a comment.