Summary:
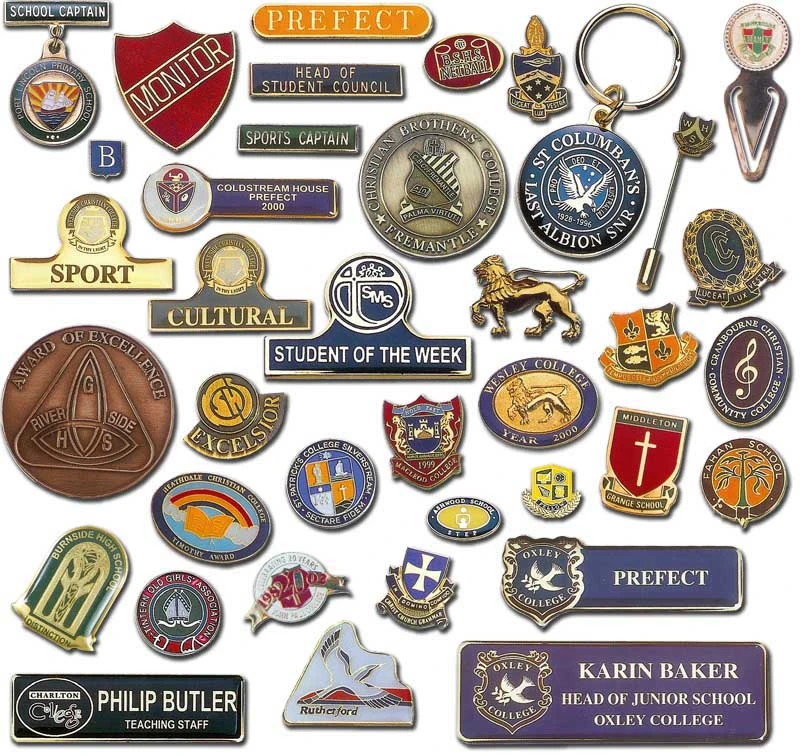
The process of personalising and creating an embroidered badge is both enjoyable and fulfilling, actually. Start by planning a complicated but simple design, especially when making a personalised badge in UK. Select the fabric material like felt or cotton or twill for example, and choose contrasting materials such as a cotton thread or metallic thread if you want to do something graphical. Make a digitized version of the layout or sketch it by hand to fit within standard badge measurement ranges (about 2-3 inches). With the help of running or satin stitches, these designs could be applied with embroidery floss onto the fabric. Then cut ions on fabric, leaving some space to prevent from fraying. Finally, attach the pin at the back for wearing. The Capital Badges is a company which can create personalised badges in UK. It is a facility where one can engage their creativity or clients in terms of pin and personalised designs.
Crafting a personalised embroidered badge generally doesn't have to be burdensome; in fact, the creation can be fun. You can emblazon each piece for your team, event, or business, or you can easily take up your innate creativity with custom pin badges: they are all very easy and enjoyable. Here is a guide on how you can create your own unique personalized badge step by step.
1. Choose the Right Design
The first step is to choose a design. It is necessary to design it as complex as possible to have the ability that after it has been transferred to a fabric, it can be read clearly and thus effectively translate the ideas. Generally, if you are designing personalised badges in UK, then you will use the organization's logo or even easier ideas to drop the whole design.
2. Pick Your Materials
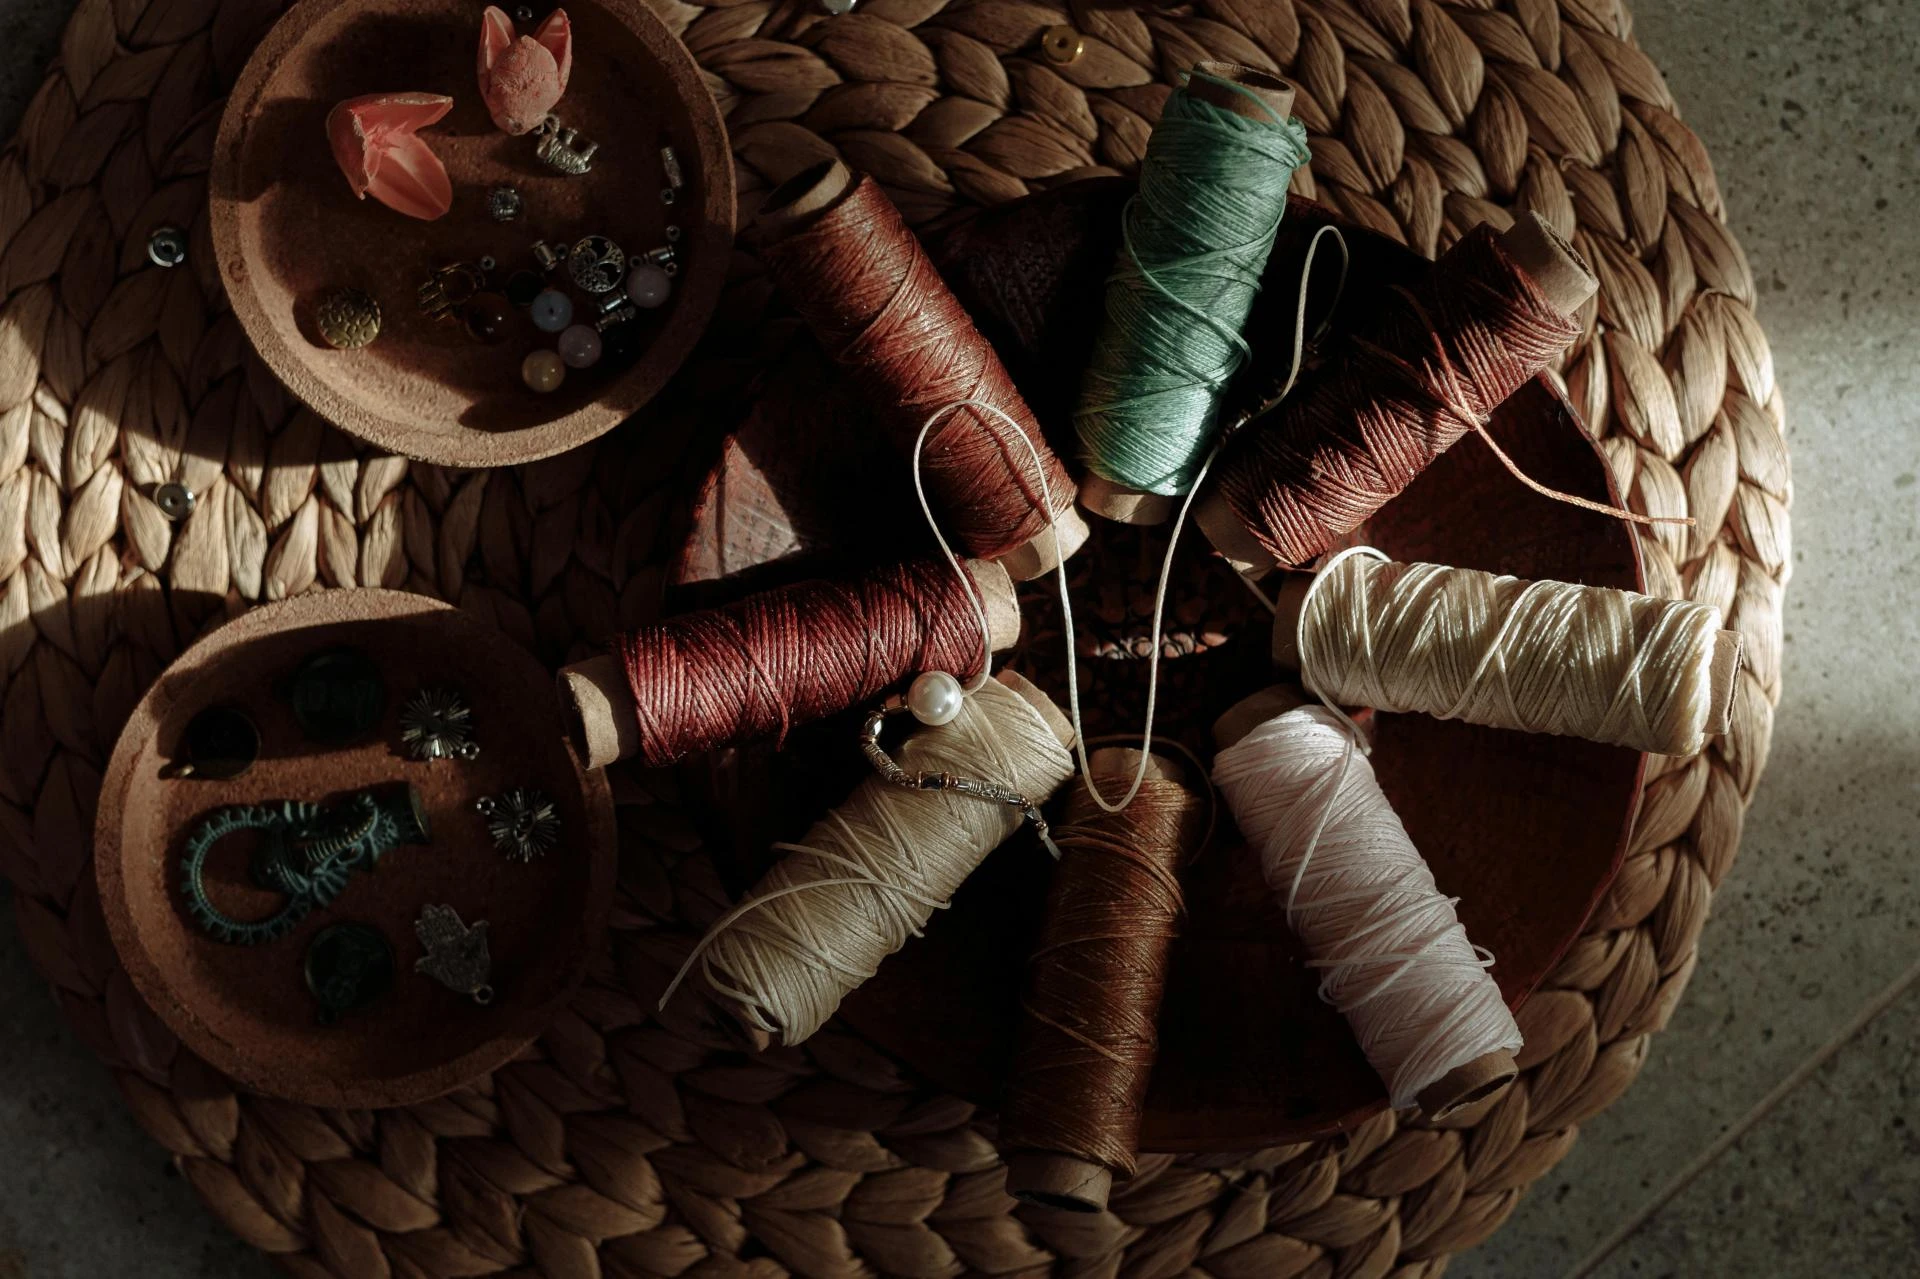
When creating a fully embroidered badge, fabric would be the most important element to consider. You need a material that is not only tough but also smooth enough to accommodate being embroidered. Some of the most common materials used for custom-made pins are felt, cotton, and twill. These are great choices, both for the embroidery and the backing of your pins.
Back material does play an important role here: in spite of providing structural durability, an efficient badge backing material should make it easy to pin the badge onto any kind of clothing or even a bag. A popular backing is mostly metal or plastic that securely holds the embroidered fabric.
Thread choice will affect the final appearance of your badge badge. How good of a contrast you can achieve with your quilting thread will impact the look of your bage, so err on the side of clarity. Smooth and even stitching is achieved with cotton thread, while a bit of brightness can be added to your design by metallic threads.
3. Create a Template
Before starting to stitch, one is recommended to sketch or construct their template. One can draw it or make a digital version with the help of design software. Custom badges in the UK need a design that can be scaled up or down to fit within the boundaries of a regular badge. Embroidered badges are typically two and three inches in diameter.
With a draft of the template linked to the fabric, you are ready to set up the entire thing. You can do so by printing the design on a transfer paper, which can then be ironed onto the fabric of your choice.
4. Start Embroidering
Now is the most entertaining part—to embroider your badge! If you have never tried it, try simple stitches such as the running or the satin stitch. A couple of these tips can help you stitch your customised pin badges:
Keep the fabric smooth and tight in an embroidery hoop.
Start stitching along the edges of your design and work your way in. The outcome will be neat and aligned effectively, avoiding overlapped lines.
It will be beneficial to be patient and not rush. After all, it would be best to understand that embroidering requires patience.
But if you've never done hand embroidery before, then you might opt for machine embroidery instead.
5. Cutting out the Badge
When you've finished embroidering and end up cutting out the badge from the cloth, mind exactly keeping it on the stitch margin to reduce the risk of material fraying. As an alternative to getting a little cleaner look, consider cutting the edges with pinking shears into a neat, zigzag finish.
6. Attach the pin backing
Changing an embroidery piece into a badge would require attaching one with a pin back. This could be done by the use of fabric glue or simply sewing a small pin onto the back part of the fabric. Make sure it's fixed securely so that nothing untoward happens when one is jogging around with their badge on.
There are a lot of varieties so that you can pick the most traditional butterfly clasp, magnetic backing, or whatever suits your needs.
Conclusion
Making your own customized badge is fun and fulfilling too. This also allows you to convey your character to others or use it for a business venture. Whether it is for making a special UK badge or simply a customized pin badge for your brand, the method involved is such a fun and satisfying craft work. All you have to do is to follow carefully and preparedly the necessary materials so you could create a badge of beauty, sensitivity, or significance in time. If you wish to take a look at some professional-grade products, then you could go to Capital Badges for the purpose, as they, for example, can deliver you your vision with perfect badges.


Sign in to leave a comment.