Painting your car yourself might sound intimidating, but with the right tools and a little patience, it’s completely doable — and incredibly satisfying. Whether you’re touching up a fender or giving your ride a full color makeover, learning how to properly use an automotive spray gun is the key to a professional-looking finish.
In this guide, we’ll walk you step-by-step through everything you need to know — from setup and surface prep to spray technique and cleanup. Let’s dive in!
Looking for : Top 5 Automotive Spray Guns
1. Understanding How an Automotive Spray Gun Works
An automotive spray gun uses compressed air to atomize paint into a fine mist, allowing you to apply even coats across a vehicle’s surface. There are two main types you’ll come across:
- HVLP (High Volume, Low Pressure): Great for beginners. It provides excellent control, minimizes overspray, and gives a smooth finish.
- LVLP (Low Volume, Low Pressure): Uses less air and works well with smaller compressors.
If you’re new to painting, start with an HVLP spray gun — it’s more forgiving and easier to master.
2. What You’ll Need Before You Start
Here’s your basic setup checklist:
- Automotive spray gun (HVLP recommended)
- Air compressor (make sure it matches your gun’s PSI and CFM needs)
- Paint (primer, base coat, clear coat)
- Reducer/thinner and hardener (follow paint manufacturer instructions)
- Paint mixing cups and strainers
- Air hose, moisture trap, and regulator
- Masking tape, paper, and plastic sheeting
- Safety gear: respirator, gloves, goggles, and coveralls
Having everything ready before you start will make the whole process smoother and safer.
3. Surface Preparation Is Everything
The secret to a great paint job isn’t the gun — it’s the prep work. Here’s how to get the surface ready:
- Clean: Wash with soap and water, then wipe with a wax and grease remover.
- Sand: Use 400–600 grit sandpaper if you’re painting over existing paint; 180–320 grit for bare metal or rust removal.
- Repair: Fix dents, rust, or cracks before you paint.
- Mask: Cover windows, tires, trim, and anything you don’t want to spray.
Take your time here — a well-prepped surface means smoother, longer-lasting paint.
4. Mixing the Paint
This step can make or break your results. Always follow the manufacturer’s mix ratio printed on the can (for example, 4:1:1 = 4 parts paint, 1 part hardener, 1 part reducer).
Use a paint strainer when pouring the mixture into your gun to remove any debris, and stir thoroughly until the consistency is smooth.
5. Setting Up Your Spray Gun
Once your paint is ready, it’s time to set up the gun:
- Connect the gun to your air compressor.
- Adjust the air pressure (usually around 25–35 PSI for HVLP guns).
- Set your fluid and fan controls — fluid for how much paint sprays, and fan for the width of your spray pattern.
- Test spray on a piece of cardboard. You should see an even, oval-shaped spray pattern with no heavy spots.
This short test saves you from ugly surprises once you start on the car.
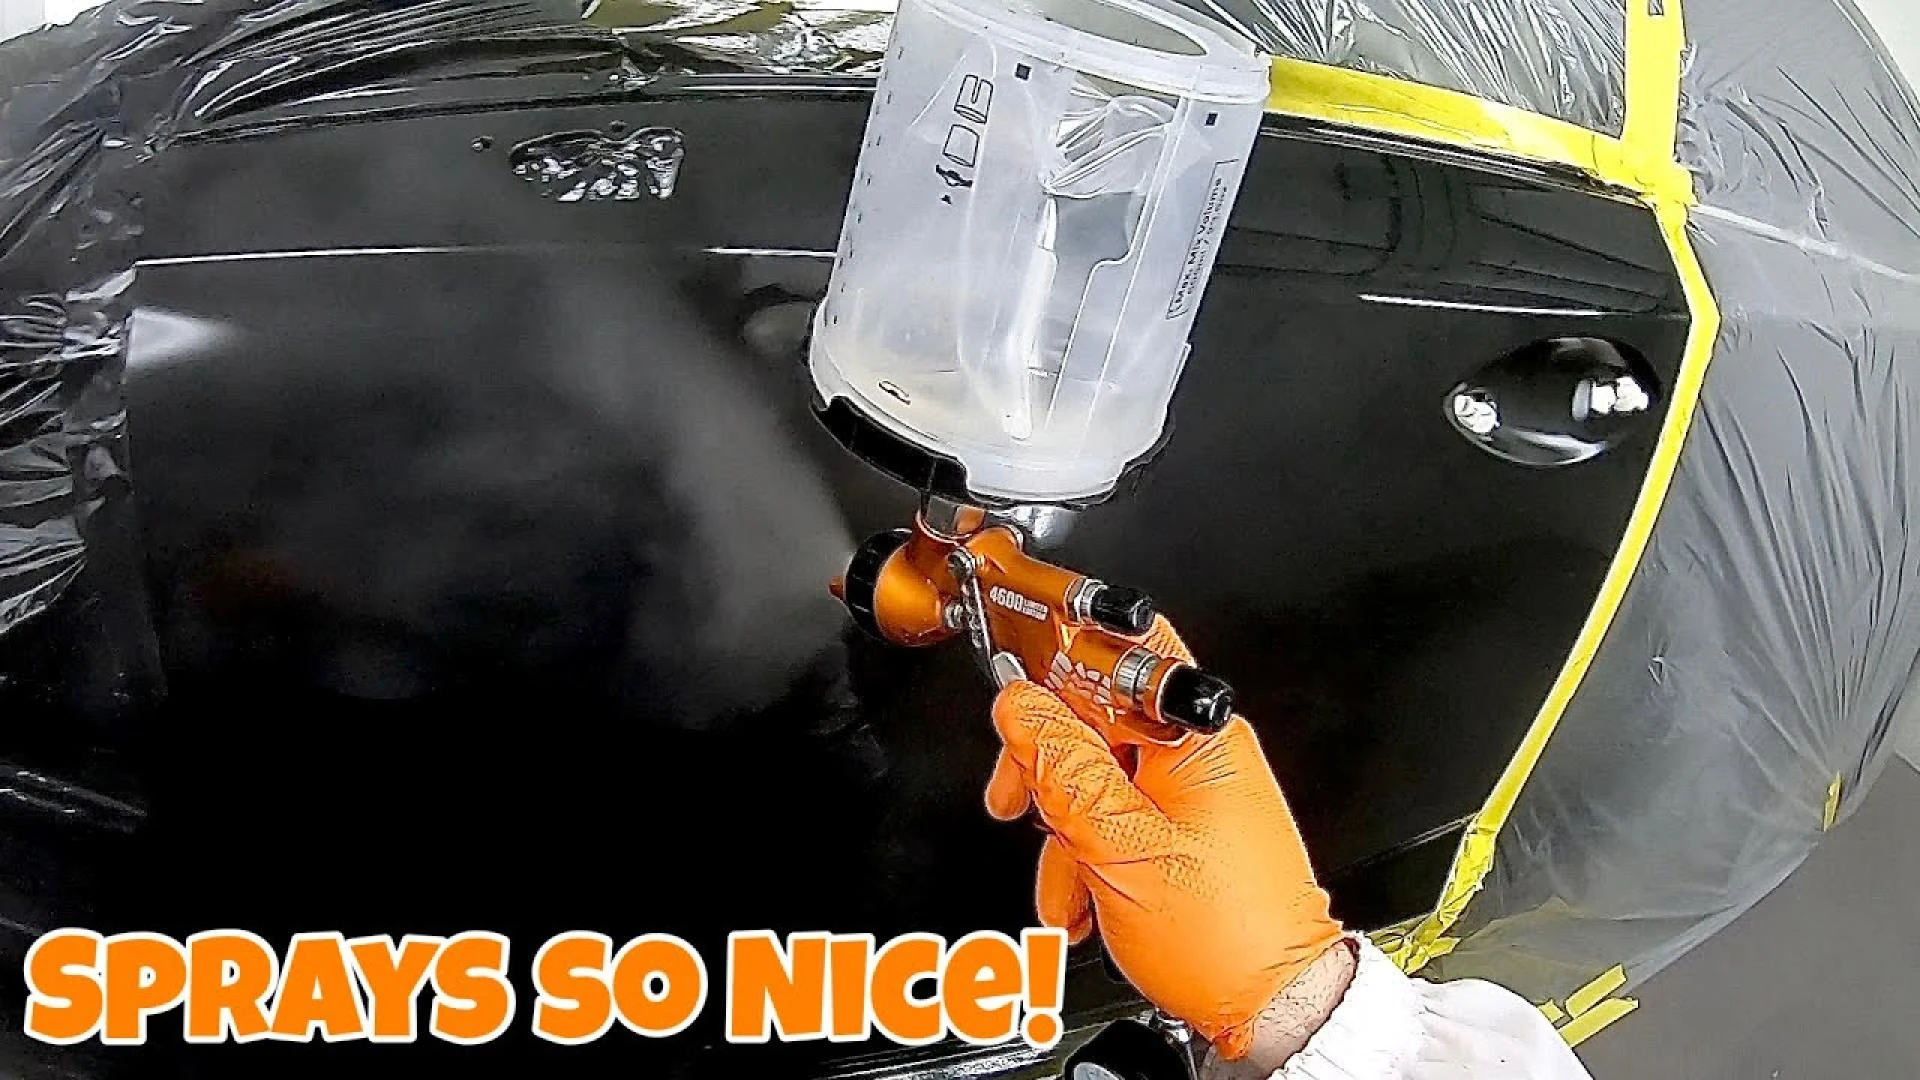
6. Spraying Technique 101
Here’s the part everyone wants to master. Follow these basic techniques for a clean, professional finish:
- Hold the spray gun 6–8 inches from the surface.
- Keep it perpendicular (90° angle) to the panel — no arcing.
- Move your hand smoothly and consistently.
- Overlap each pass by about 50%.
- Start spraying off the panel and release the trigger off the panel to avoid heavy spots.
If your paint looks patchy or runs, you’re either moving too slowly or holding the gun too close. If it looks dusty or dry, you’re too far away.
7. Applying the Coats
Painting is a layering process. Don’t rush it.
- Primer: Apply 2–3 coats to build a solid foundation. Let each coat dry (flash off) before the next.
- Base Coat: Spray 2–3 coats until you get even color coverage.
- Clear Coat: Apply 2–4 coats for depth, gloss, and protection.
Flash time — the drying period between coats — is usually around 10–15 minutes, but always check your paint’s specs.
8. After Painting: Curing and Finishing
Once your last coat is applied, let the paint cure for at least 24–48 hours. Avoid touching it or exposing it to dust.
After it’s fully cured:
- Wet sand with 1500–2000 grit sandpaper to remove imperfections.
- Polish to bring out a deep, glossy finish.
This final stage turns your paint job from good to showroom-worthy.
9. Cleaning the Spray Gun
Never skip cleanup — a dirty gun will ruin your next project.
- Flush the gun with thinner or cleaner.
- Remove the nozzle, needle, and cup, and clean each part.
- Store your gun in a dry place once it’s completely clean and dry.
10. Safety First
Automotive paint fumes and chemicals can be hazardous. Always:
- Paint in a well-ventilated area or spray booth.
- Wear a respirator — not just a dust mask.
- Keep flames and sparks away from your workspace.
- Dispose of paint waste safely.
Final Thoughts
Using an automotive spray gun for the first time might feel overwhelming, but with the right prep and patience, you’ll be surprised by how professional your results can look.
Start small — practice on scrap metal or an old panel before painting your car. Learn how the gun feels, how the paint flows, and how to maintain even coverage. Before long, you’ll be spraying like a pro.


Sign in to leave a comment.