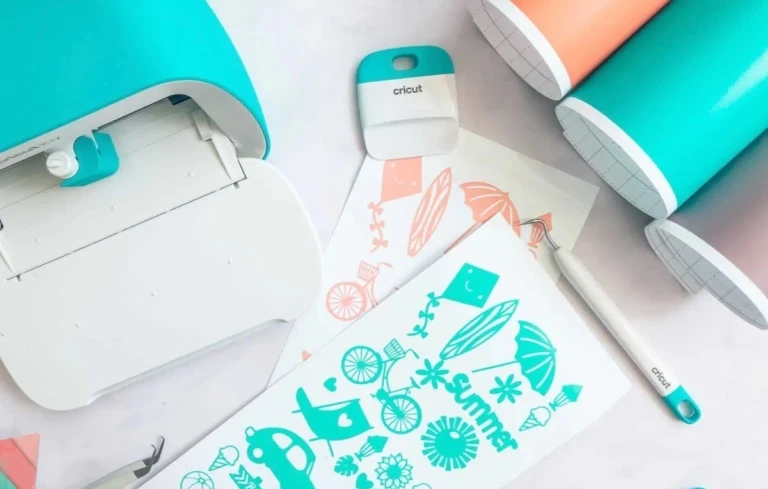
Have you bought the latest Cricut Joy 2? It’s an incredible machine for creating small crafts for hobbyists or small business owners. However, you may feel slightly confused about its setup and use. The appearance and functionality of this machine are somewhat similar to Cricut Joy, its predecessor. Still, a new machine may feel tricky and intimidating when you start using it. This ultimate guide will help you learn How to Use Cricut Joy 2 as a beginner. Let’s begin.
What Do You Need to Get Started?
There are a few things you’ll need while using your brand new Cricut Joy 2 machine:
- Compatible materials like Smart Vinyl, labels, or cardstock.
- A weeding tool for removing excess material.
- A device such as a laptop or mobile with ‘Cricut Design Space‘ installed.
Step 1: Set up Your Cricut Joy 2
The first step is to unbox your machine. You need to unbox your machine and remove all the packaging. Then, take the power cord from the box and connect it to the back of your machine. Connect the other end of the power cord to the wall outlet. Finally, turn on the machine from the main switch.
Step 2: Connect Your Machine to Your Device
Now, you need to connect your machine to your computer or mobile device via Bluetooth. Note that the Joy 2 doesn’t support a USB connection; hence, only the Bluetooth option is available. There is no Bluetooth button on the machine; Bluetooth is enabled when you power it on. Follow the steps below to pair your machine with your device.
Option 1: Connect to Computer (Windows/Mac)
- On Windows, go to the Start menu and search for Settings.
- Select Bluetooth & other devices from Settings, and click ‘Add Bluetooth or other device.”
- Select your Cricut Joy 2 when the computer displays a list of available devices.
- If prompted, enter “0000” as the passcode.
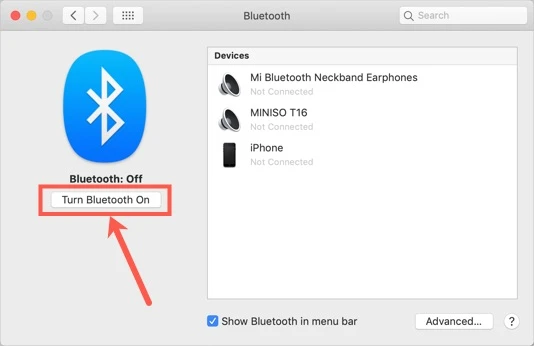
- If you’re a Mac user, go to the Apple menu.
- Select System Preferences, and then enable the Bluetooth option.
- Now, the Mac will start detecting nearby devices. Select your machine, and let it pair.
- Lastly, the screen will show a “Connected” or “Paired” message.
Option 2: Connect to Mobile (Android/iOS)
- Go to the Settings on your Android or iOS device, and search for the Bluetooth option.
- Enable the Bluetooth option when you find it.
- Select your machine model when you see it in the list.
- Enter “0000” as the passcode if prompted.
- Finally, your device will display a confirmation message that it’s paired with your machine.
Step 3: Select Your Design
Now that your Cricut machine is paired with your device, it’s time to create a project to test it. Follow these steps to select your design.
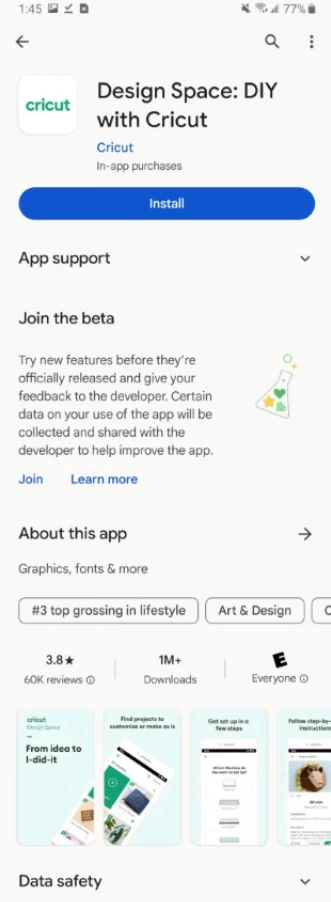
- Open the Cricut Design Space software on your device.
- If you haven’t signed in, sign in or create a new account.
- Now, go to Ready-to-Make Projects and select a quick design that suits your needs.
- You can adjust the size of your design if you want. Overall, it’ll be better to choose a simple design instead of a complex one.
Step 4: Load Material Into the Machine
Once your design is final, you can load the material into your machine. You can either use a smart cutting material or a regular one. If you use a smart material, you won’t need a cutting mat. On the other hand, regular materials require a cutting mat.
- Insert the material with or without a mat into the machine.
- Ensure the material is straight and wrinkle-free before loading.
Step 5: Cut and Weed the Final Project
That’s the final part cutting your material. Here, you’ll need to select your material in the Cricut Design Space and then set it for final cutting.
- Once your design is final, click the “Make It” button.
- Then, click “Browse All Materials” to select your correct material, such as vinyl or cardstock.
- Let the machine adjust the right cut settings.
- Hit the ‘Go button’ in the app, and your machine will start cutting.
- Once the cutting is over, weed off the excess material. It offers a more polished look.
Frequently Asked Questions (FAQs)
How Do I Setup Cricut Joy 2 for the first time?
Learn How to setup Cricut Joy 2 Machine steps guide
- Unbox and power on the machine.
- Install the Cricut Design Space on your System.
- Sign in or Create a Cricut Account.
- Select your Cricut Machine in Cricut Design Space.
- Connect your Cricut joy 2 Machine to a Computer or Mobile device via bluetooth.
How Do I load Material into Cricut Joy 2 Properly?
Confirm that your machine is turned on and connected to Cricut Design Space. Align your cutting mat or smart material under the machine’s guide so it touches the machine’s rollers. Finally, the machine will recognize the material and will measure it for cutting.
Why Is My Cricut Joy 2 Not Cutting Properly?
Your Cricut joy 2 machine may not cut properly for various reasons, such as dirty blades, incorrect pressure settings, or the wrong material selection. You can replace the blade and adjust the settings to fix this problem.
Why Is My Cricut Joy 2 Not Working with Cricut Design Space?
Learn how to fix Cricut Joy 2 machine not working with Cricut Design Space Software follow the steps below.
- Outdated software version
- Corrupted cache or app files
- Internet or server connection issues
- Restart your device and Cricut joy 2 machine
- Clear Cricut Design Space cache (fixes most loading issues)
- Uninstall and reinstall Cricut Design Space
- Check internet connection and login again
Why Is My Cricut Joy 2 Not Connecting via Bluetooth or Showing in Design Space?
Learn how to fix Bluetooth Connection Issue on Cricut Joy 2 Machine.
- Bluetooth connection failure
- Device not paired correctly
- Firmware update incomplete
Note: How to fix the connection issues
- Turn Bluetooth off and on again
- Restart the Cricut Joy 2 machine
- Reconnect the device in Bluetooth settings
- Update firmware through Cricut Design Space
Visit: cricut.com/setup
Source: https://cricutmakermachines.com/how-to-use-cricut-joy-2-beginner-step-by-step-guide/


Sign in to leave a comment.