If you’re like most people, then you probably have a mountain of cash on your plate. You probably spend thousands every year on mortgage payments, property taxes, insurance, etc.
It’s easy to see how that can lead to a mounting debt load and expensive living arrangements. Fortunately, there are many ways to cut back on your bills without adding to them! All you need is a little bit of spare cash and installation of a new rockwool flexi slab is the answer.
If you don’t already have Rockwool installed in your home it’s often the best way to reduce your tax bill while still giving you the flexibility to build your future home or office with the correct amount of resistance. Get busy reading this article and doing some research before making any decisions!
What Is Rockwool?
Rockwool is a synthetic material made from plastic and fibreglass. It’s an extremely light weight, inexpensive, and easy to build product.
Rockwool rainscreen duo slab is also a great alternative to concrete. Its main use is in floors, walls, and ceilings because it’s soft, lightweight and easy to apply on all types of fabric.
As you might know, concrete is the standard for building walls and ceilings, and it’s what most of us grew up with.
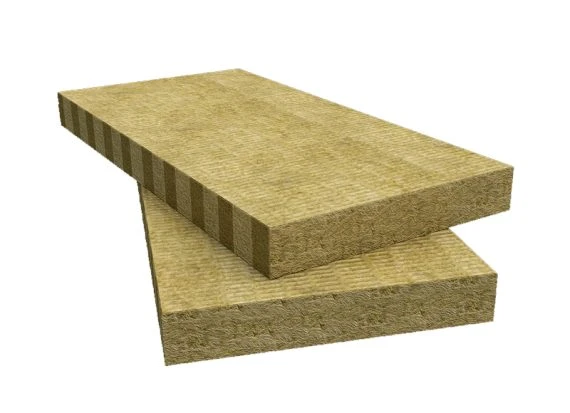
Rockwool flexi Slab is a new slab designed to help you save money on your bills.
The rockwool panels are made from high quality polyester and have a non-slip surface that can be used for all kinds of applications. The Rockwool slabs are easy to install and come in handy when installing new equipment, such as electrical wiring or plumbing fixtures.
The Rockwool slabs are also great for use with other types of insulation like fibreglass or ceramic tile. The Rockwool slabs will not only protect your home from water damage but will also keep the floors dry and prevent mould growth.
The Rockwool flexi Slab is available in two different sizes: 1" x 2" and 3" x 2". Each size comes with an included screwdriver set so you can easily install the Rockwool slab without having to purchase additional tools!
How Does It Work?
When you’re done reading this, I hope you’ll find that installing a new Rockwool slab is actually a pretty simple and easy project. It requires only a bit of pre-work, some nail holes, a bit of assembly and some final sanding.
However, installing the new Rockwool in your home doesn’t end there. There are a few other things you need to do in order to make the most of this project.
After you’ve put in some horizontal and vertical slabs and put in some roof framing and roof shingles, it’s time to finish the job with horizontal Rockwool roofing beam kits.
Yes, really. The same roofing materials you use for your garage or shed can be used to build beautiful roof beam kits. Just remember to keep them out of the weather!
What’s the Difference Between Rockwool And Concrete Slab?
When it comes to the difference between Rockwool and concrete, there are a few things to note. First, you won’t need to spend a lot of money on this project to get the most out of it.
The material is extremely cheap, and you can usually buy it in bulk from a local lumberyard. It’s not one of the most expensive styles of structural or structural-like materials, but it’s certainly not the least expensive either.
Additionally, when considering your new Rockwool slab, it's essential to factor in the need for a bit of extra clearance. Whether it's between your shelves, the back of your desk, or your chairs, opting for a Rockwool beam kit can make a significant difference. It provides ample space and easy accessibility without causing excessive weight or obstructing other construction or lighting systems.
This consideration is especially crucial when integrating features like rainscreen cladding into your project, as it ensures that your installation proceeds smoothly and efficiently.
Install New Rockwool in Your Home
The first thing you need to do is get an installation plan. This will help you plan out the work and how it will all look in Your Home. Before you start working on this project, make sure you’ve gotten your plan prepared.
This includes a drawing of the room you’ll be using for construction, floor plans, and a preliminary design. Once you have a plan for the space you’ll be building, you can start laying the groundwork for the project.
You can begin with the construction of the walls and the roof. This will give you room to put in additional horizontal and vertical slabs to fill in any gaps or add extra walls. This will also help minimise the amount of work your wife has to do while you’re in the house.
How To Instantly Improve Your Credit By Installing
If you have a close friend or family member who is struggling to get by, you may be able to help them out by helping you improve your credit. This is particularly helpful if you have bad credit or a low credit score.
It is easy to forget about your credit score when you’re trying to decide which home to buy or sell, but it is still important to keep track of your scores so you can take appropriate action if you see yourself getting into an awkward situation.
What Is Tyrolean Render
Are you a DIY enthusiast looking for a reliable and aesthetically pleasing render for your exterior walls? Tyrolean render is one of the most popular types of renders used in modern construction and renovation due to its durability, affordability and customizability.
In this article, we'll be taking a look at what tyrolean render is, how it's made, and why it’s the perfect choice for anyone who values aesthetic appeal and longevity when it comes to their building projects. We'll also discuss some of the advantages that come with using Tyrolean render over other types of wall finishes.
Tyrolean render is a type of plaster that is commonly use on walls and ceilings. It is from a mixture of lime, sand, and water, and it can be applie by hand or with a sprayer. Tyrolean render is typically texture to create a rough surface that can be paint or as-is.
What Are The Benefits Of Tyrolean Render?
There are many benefits of Tyrolean render, such as:
It is a highly durable finish.It is weather resistant and can protect the underlying structure from the elements.It is easy to apply and can be applie over most existing finishes.It provides a smooth, even finish that can be texture to create interesting visual effects.It comes in a range of colours and dries quickly.How To Apply Tyrolean Render
There are two ways to apply Tyrolean render: by hand or with a machine. If you are using a machine, you will need a Tyrolean gun, which can be hire from most builders’ merchants.
For a small area, applying render insulation is probably easiest done by hand. You'll need a hawk and trowel, along with a bit of patience. To get started, thoroughly mix the render following the instructions on the packet.
Once it's properly mixed, begin spreading it onto the wall using the trowel, starting from the bottom and working your way up. Utilize the hawk to keep some of the render in place as you work.
Continue this process until the entire area is covered, and then allow it to dry—again, following the instructions on the packet. Once it's dried, you can proceed with painting or wallpapering over it, depending on your preferences.
Bottom Line
If you have the money to lean on your savings or invest, any way you look at it, installing a new Rockwool fibre or beam kit in your home is going to give you some amazing results.
The materials are very cheap, the work is easy and the finished product is beautiful. You can expect to spend about $100 or less for this project. If you’re not feeling particularly tech-savvy, this project is for you.
The materials are inexpensive, the work is simple and the finished product is beautiful. For example, if you use your new Rainscreen duo slab in your home, you will save on your monthly electricity bill.
Or, you may be able to save on your heating or cooling bill. All in all, this project is going to give you some amazing results.


Sign in to leave a comment.