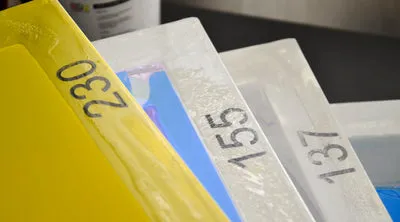

Mesh count is one of the most important and misunderstood decisions you'll make for every screen printing job. The wrong mesh can ruin a print before you even pull the squeegee.
In this blog, we're walking through what mesh count actually means, the most common mesh counts and when to use them, plus the questions we get most often from printers trying to dial in their screens.

| THE BASICS | What Mesh Count Actually Means |
Mesh count refers to the number of threads per linear inch in your screen mesh. A 110 mesh screen has 110 threads per inch. A 230 mesh screen has 230.
The basic rule:
- Lower mesh count = larger openings = more ink passes through
- Higher mesh count = smaller openings = less ink passes through
But ink deposit is only half the story. Mesh count also affects:
- Detail level - higher mesh holds finer detail
- Hand feel - more ink = thicker, stiffer print; less ink = softer feel
- Cure time - heavier ink deposits take longer to cure properly
- Emulsion exposure - higher mesh requires different exposure considerations
| BEFORE YOU CHOOSE | 3 Questions to Ask Yourself |
Before you pick a mesh count for a job, ask yourself three questions:
1. What ink are you using?
Different inks have different particle sizes and viscosities. Specialty inks (glitter, shimmer, puff) need lower mesh to pass through. Water-based inks need higher mesh to avoid flooding the screen.
2. What does the artwork look like?
Simple block designs and bold text can run on lower mesh. Fine lines, small text, halftones, and photographic prints need higher mesh to hold the detail.
3. What garment are you printing on?
Dark garments often need an underbase (heavier ink deposit on a lower mesh), then a top color on a higher mesh. Light garments usually only need one screen at a mid-range mesh.
| 💡 Pro Tip: Making these distinctions before you burn your screen saves time, ink, and frustration on press. It's much easier to pick the right mesh upfront than to troubleshoot a bad print later. |
| MESH GUIDE | Mesh Counts & When to Use Them |
Here's a breakdown of the most common mesh counts and when to use each.
40 mesh is a specialty mesh - not something you'll use every day. The openings are large enough to let big-particle inks like glitter, shimmer, and chunky specialty inks pass through.
Best for: Glitter ink, shimmer ink, high-build specialty inks, foil adhesives
Skip it for: Standard plastisol or any detailed work. Way too much ink will pass through.
86 Mesh
A step up from 40 mesh, still considered specialty. Good for slightly finer specialty inks or extra-heavy ink deposits on darker garments.
Best for: Finer glitter inks, puff additives, extra-thick underbase deposits
The go-to for bold prints and heavy ink coverage. 110 mesh lays down a lot of ink, which makes it perfect for underbasing or hitting light colors on dark garments.
Best for: White underbase on dark garments, bold block text, simple large designs, athletic-style prints
Trade-off: Heavier ink deposit means a thicker, stiffer print. Hand feel won't be as soft as with higher mesh.
137 is the perfect middle ground for most standard plastisol jobs. It puts down enough ink for solid coverage while still holding decent detail.
Best for: General-purpose plastisol printing, multi-color jobs on light garments, most everyday production work
If you can only have one mesh count in your shop, 137 is a strong contender.
Similar to 137 but with finer openings. 155 mesh holds more detail and lays down a thinner ink deposit, which means a softer hand feel on the finished print.
Best for: Standard plastisol with finer detail, water-based ink (this is the minimum recommended mesh), discharge ink, mid-detail multi-color jobs
This is the sweet spot for shops printing a mix of plastisol and water-based.
200 Mesh
A solid step up in detail. 200 mesh is great for finer detail work and water-based inks where you need a tighter screen but still want decent ink flow.
Best for: Water-based and discharge inks, medium-detail artwork, soft-hand plastisol prints
The detail king. 230 mesh holds the finest detail - halftones, small text, photorealistic prints, and complex artwork.
Best for: Halftones and simulated process printing, photo-realistic designs, very fine line work, high-detail water-based prints
Trade-off: The thin ink deposit means colors won't be as vibrant or opaque, especially on dark garments. Often used as part of a multi-screen setup with an underbase on a lower mesh.
305 Mesh & Higher
Specialty territory for ultra-fine detail, four-color process, and high-resolution work. Most production shops won't need this regularly, but it's available for jobs that demand it.
| CHEAT SHEET | Quick Mesh Reference |
Here's a quick reference for common ink and design pairings:
| Ink Type / Job | Recommended Mesh |
|---|---|
| Glitter, shimmer, specialty inks | 40-86 mesh |
| White underbase on dark garments | 110-156 mesh |
| Standard plastisol, bold designs | 110-137 mesh |
| Standard plastisol, average detail | 137-156 mesh |
| Water-based and discharge inks | 156-230 mesh |
| Halftones and fine detail | 230-305 mesh |
| Photorealistic / process printing | 305+ mesh |
| MESH COLOR | Yellow vs White Mesh |
Most mesh comes in two colors: white and yellow.
White mesh is the standard. It works for most jobs and is what you'll see most often in lower mesh counts.
Yellow mesh is dyed to reduce light reflection inside the screen during exposure. This means:
- Sharper edges on your stencil
- Better detail retention
- Less undercutting from light bouncing around the mesh
| ⚠️ Watch Out: Yellow mesh requires longer exposure times than white mesh - sometimes 1.5x to 2x longer depending on your light source and emulsion. If you expose yellow mesh the same as white, you'll end up with an under-exposed screen that breaks down during washout or printing. |
At Screen Print Direct, our 230 mesh frames come pre-stretched with yellow mesh for better halftone reproduction. If you're stepping up to fine detail work, plan on adjusting your exposure times accordingly.
| COMMON MISTAKES | Avoid These Mesh Selection Pitfalls |
Even experienced printers slip up on mesh selection. Here are the most common mistakes we see:
Mistake 1: Using too low a mesh for fine detail
A 110 mesh won't hold halftones or small text cleanly. You'll lose detail and get blurry edges. If your design has fine elements, step up to 200+ mesh.
Mistake 2: Using too high a mesh for heavy coverage
Trying to print white ink on a dark shirt with a 230 mesh? You'll get a thin, gray-looking print that won't pop. Drop to 110-156 mesh for proper opacity.
Mistake 3: Same mesh for every job
Different jobs need different mesh counts. Stocking only one mesh limits what you can produce. Most production shops keep at least three on hand: a lower mesh for underbases, a mid-range for standard work, and a higher mesh for detail.
Mistake 4: Ignoring ink viscosity
Thick inks need lower mesh. Thin inks need higher mesh. Match your mesh to your ink, not just your design.
This content is originally posted at :- https://screenprintdirect.com/blogs/screen_printing_101/screen-mesh-101-for-dummies



















Sign in to leave a comment.