When most homeowners think about threats to their family’s safety, they picture storms, burglars, or faulty wiring. But one of the most dangerous risks isn’t visible at all — it seeps silently from the ground beneath your home and can harm your health without you ever knowing. That hidden danger is radon gas, and it’s far more common — and dangerous — than many realize.
The good news? There’s a proven, effective way to protect your home and loved ones: radon system installation. In this guide, we’ll break down everything you need to know about radon, why it’s such a threat, and how installing the right mitigation system can keep your home safe for decades to come.
What Exactly Is Radon — and Why Should You Care?
Radon is a naturally occurring radioactive gas that forms when uranium in soil, rock, and water breaks down. It’s invisible, odorless, and tasteless — which means you can’t detect it without proper testing. Once released from the ground, radon can enter your home through cracks in the foundation, gaps around pipes, sump pumps, crawl spaces, and even through well water.
Why is this a big deal? Because radon is the second leading cause of lung cancer in the United States, right behind smoking. According to the U.S. Environmental Protection Agency (EPA), radon is responsible for over 21,000 lung cancer deaths every year.
Even worse, you won’t feel sick right away. Radon exposure builds up slowly over time, damaging lung tissue with radioactive particles. That means a home that “feels safe” could still be exposing your family to long-term health risks.
Where Does Radon Come From?
Radon gas is part of the natural decay process of uranium found in soil, rocks, and groundwater. It’s present almost everywhere, but it becomes dangerous when it accumulates indoors. Because homes are sealed to keep heat in and air out, radon that seeps in often gets trapped and concentrated, sometimes to hazardous levels.
Here’s how radon typically enters a home:
- Foundation cracks and gaps – Even tiny hairline cracks in your basement or slab can allow radon to flow inside.
- Construction joints and floor-wall gaps – Natural settling and construction seams can create easy entry points.
- Open sump pits or crawl spaces – These unsealed areas often provide direct pathways from soil gas into your living space.
- Well water – If groundwater is contaminated, using that water for showers or laundry can release radon gas indoors.
Every home is at risk, regardless of age, style, or location. Even houses next to each other can have vastly different radon levels — making testing essential.
Why Radon Is More Dangerous Than You Think
The real danger with radon lies in its stealth and cumulative impact. Unlike carbon monoxide, which can cause immediate symptoms, radon quietly builds up in your lungs over years. Its radioactive particles damage the cells lining your lungs, increasing the risk of cancer with long-term exposure.
Some key facts that underscore the risk:
- Radon is the #1 cause of lung cancer among non-smokers.
- The EPA considers any level above 4.0 pCi/L (picocuries per liter) unsafe — but even lower levels can pose risks.
- Long-term radon exposure significantly increases lung cancer risk, especially for smokers.
The scary part? Many homeowners never realize their home has high radon levels until it’s too late. That’s why proactive testing and mitigation are so critical.
How to Know If Radon Is Lurking in Your Home
Since radon is invisible and odorless, the only way to detect it is through testing. Fortunately, testing is simple and affordable. You have two main options:
- Short-term tests – These are placed in your home for 2 to 7 days and provide a quick snapshot of your radon levels. They’re ideal for an initial check.
- Long-term tests – These stay in place for 90 days or more and give a more accurate picture of your home’s year-round radon exposure.
You can purchase DIY radon test kits online or at hardware stores, or hire a certified radon professional to conduct a more thorough test. If results show 4.0 pCi/L or higher, the EPA recommends taking immediate action.
Radon System Installation: The Proven Solution
If testing reveals elevated radon levels, don’t panic. The most effective solution is radon mitigation system installation, which reduces indoor radon levels by safely venting the gas out of your home before it can accumulate.
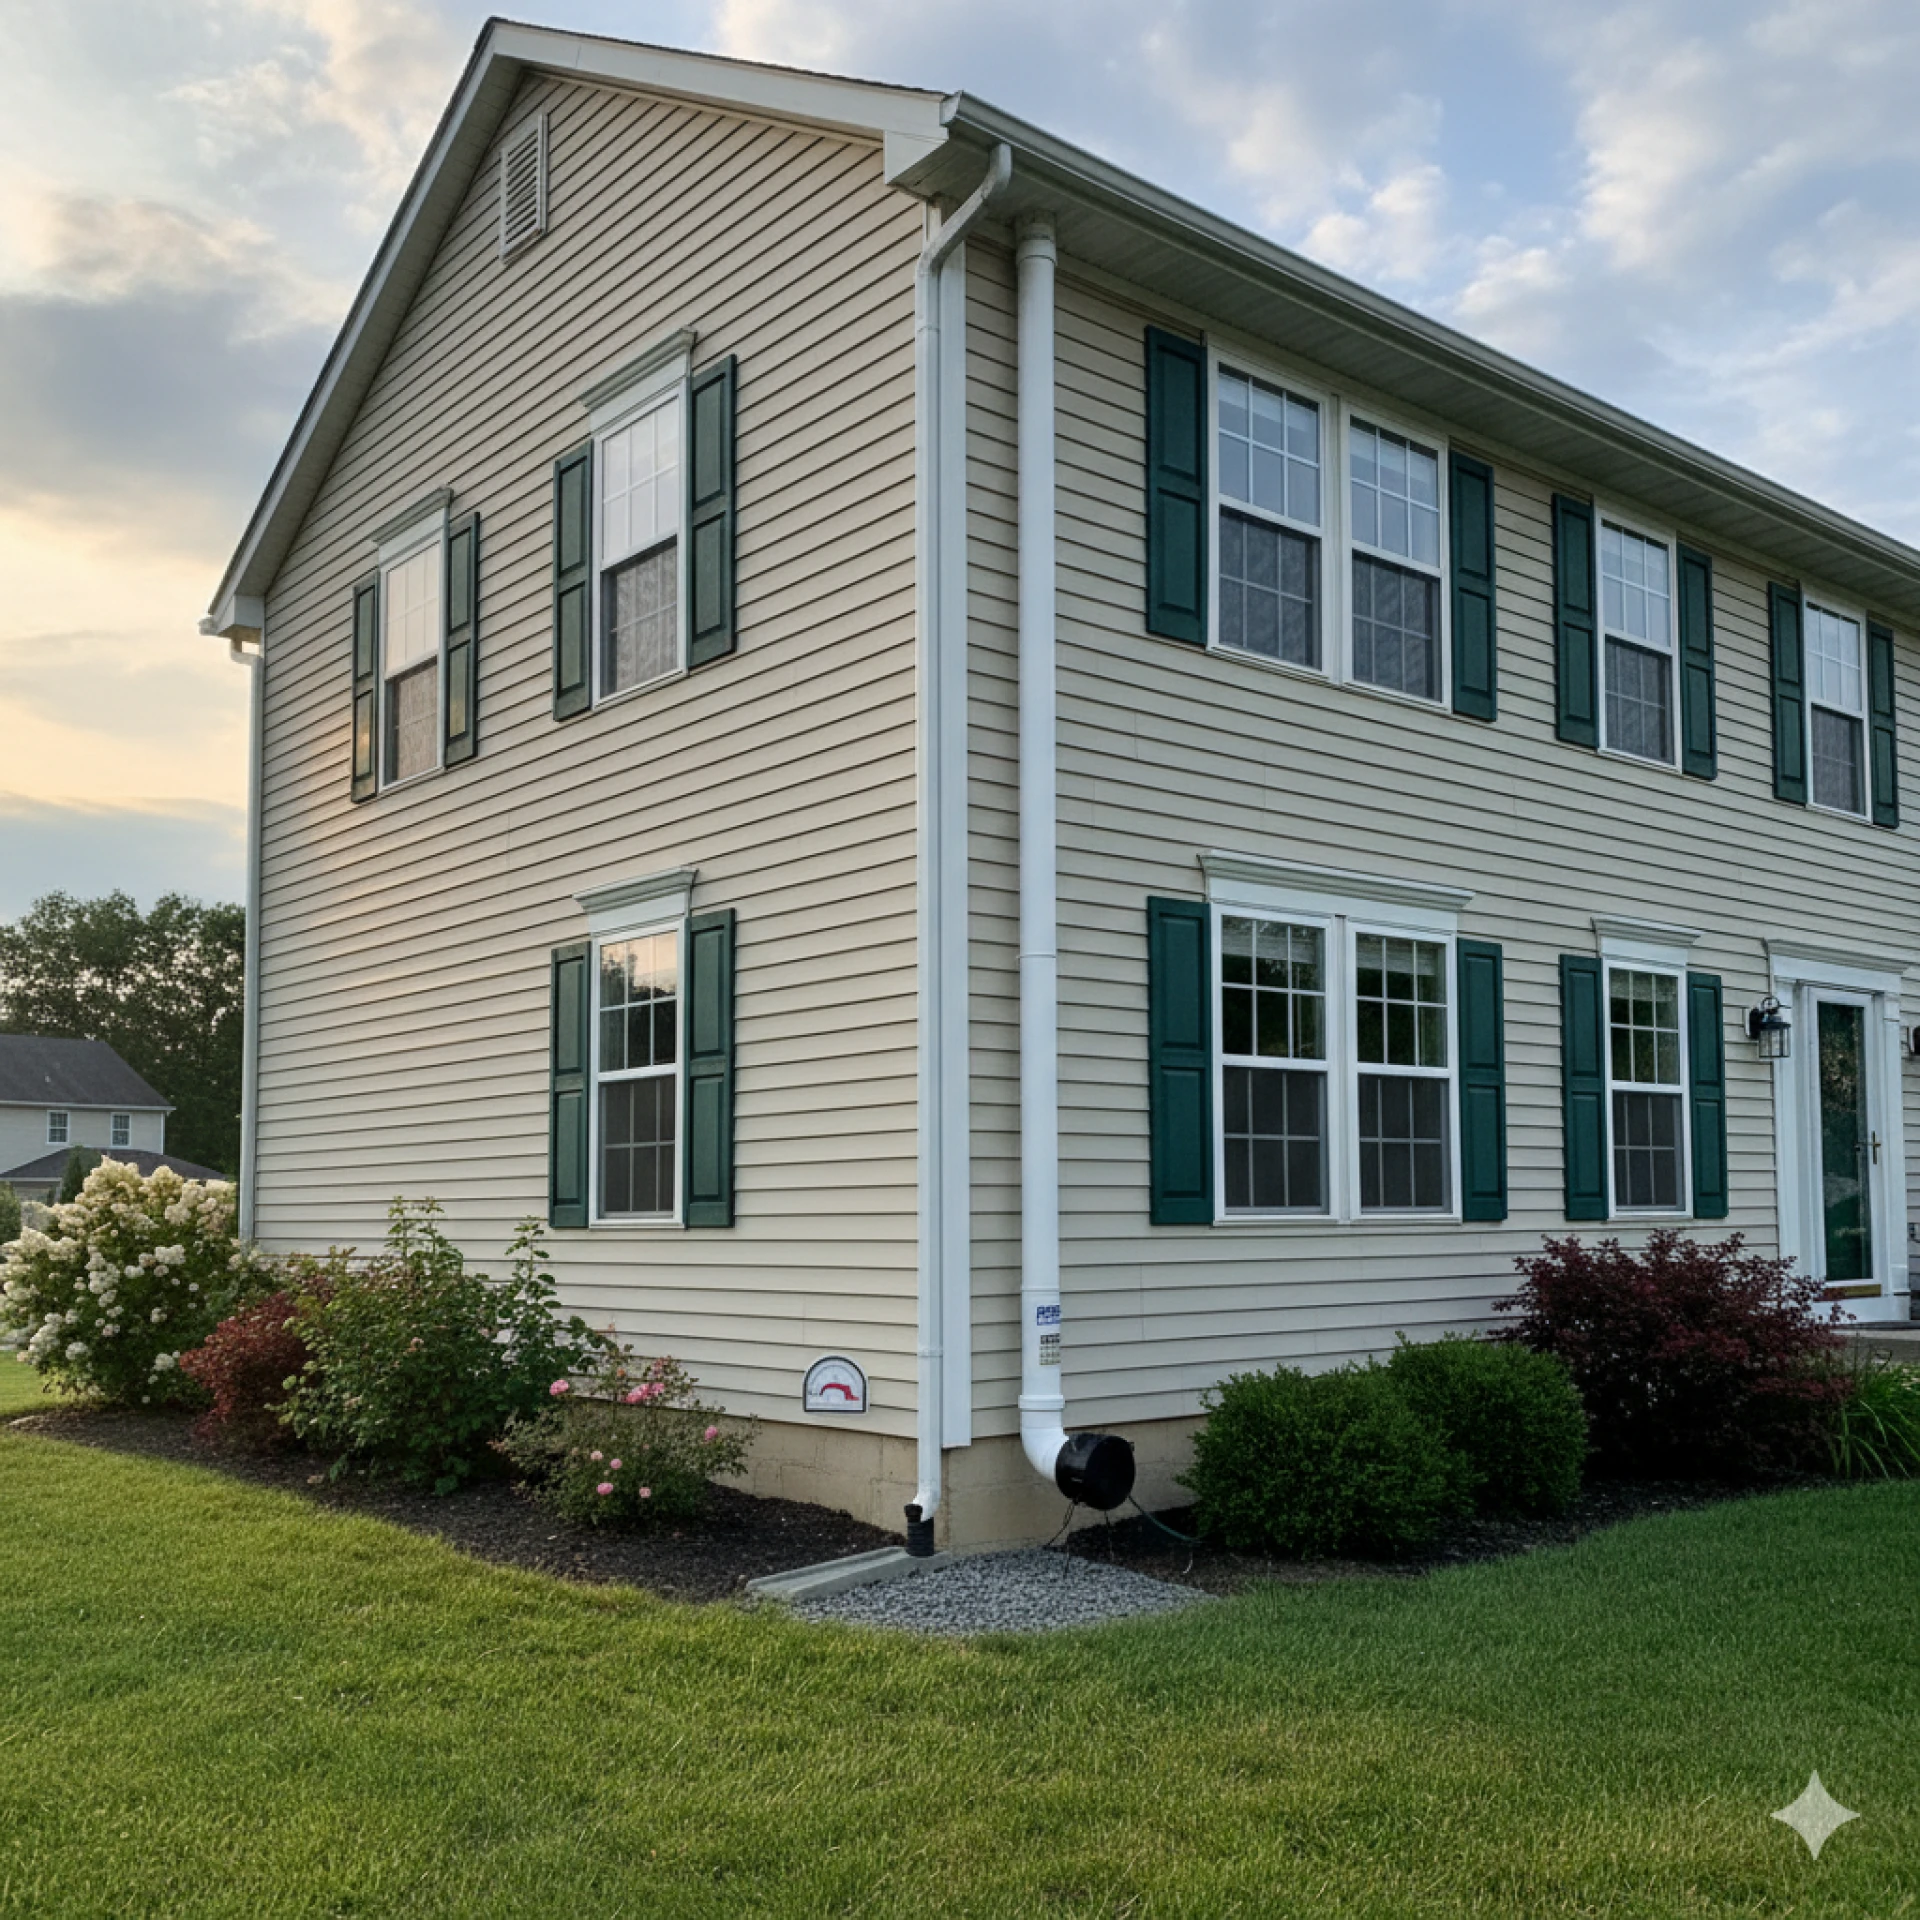
There are several types of radon mitigation systems, but the most common and effective is the sub-slab depressurization system. Here’s how it works:
- A suction point is drilled into the foundation slab or beneath a crawl space.
- PVC piping is installed from the suction point, running through the house or along the exterior wall.
- A specialized radon fan is attached to create negative pressure, pulling radon gas from beneath the home.
- The gas is vented safely above the roofline, where it disperses harmlessly into the atmosphere.
With proper installation, these systems can reduce radon levels by up to 99%.
Step-by-Step Guide to Radon System Installation
While professional installation is always recommended, understanding the process helps you know what to expect:
1. Site Evaluation
A certified radon specialist inspects your home’s foundation, layout, and soil conditions to determine the best location for the suction point and vent system.
2. Drilling the Suction Hole
A small hole (typically 4–6 inches) is drilled through the basement floor or slab to create the suction point.
3. Installing the PVC Piping
PVC pipes are installed from the suction point and routed vertically through the house or outside wall to release the gas above the roofline.
4. Mounting the Radon Fan
A radon-specific fan is installed (usually in the attic, garage, or outside) to continuously pull radon gas from beneath the foundation.
5. Sealing Cracks and Gaps
Any visible cracks or openings in the foundation are sealed to improve system efficiency and prevent new entry points.
6. Testing the System
After installation, the home is retested to ensure radon levels have been reduced to safe levels — ideally below 2.0 pCi/L.
DIY vs. Professional Installation: Which Is Best?
While some homeowners attempt DIY radon system installation, it’s a job best left to certified professionals. Here’s why:
- Proper design matters. A poorly designed system may not reduce radon levels effectively — or at all.
- Safety is critical. Mistakes in vent placement or sealing can lead to radon re-entering your home.
- Compliance with codes. Professionals ensure your system meets local building and safety codes.
- Accurate testing. Certified installers verify the system’s performance with post-installation testing.
DIY kits may seem cheaper upfront, but professional installation offers peace of mind, guaranteed performance, and long-term protection.
How Much Does Radon System Installation Cost?
Costs vary depending on your home’s size, foundation type, and location, but on average, professional radon mitigation system installation ranges from $800 to $2,500. That might sound like a lot — but when compared to the cost of cancer treatment or the peace of mind of knowing your home is safe, it’s a small price to pay.
Many homeowners also see added benefits, such as:
- Higher property value – Homes with radon mitigation systems are more attractive to buyers.
- Better indoor air quality – The ventilation system can also help reduce moisture and other soil gases.
- Lower energy bills – Proper sealing and ventilation can improve home efficiency.
Maintenance Tips for a Long-Lasting Radon System
Once installed, radon systems require minimal maintenance, but a few simple steps keep them running efficiently:
- Check the system indicator regularly to ensure the fan is working properly.
- Listen for unusual noises from the fan, which could indicate a problem.
- Inspect vent pipes annually for blockages, damage, or loose fittings.
- Test radon levels every 2 years to ensure continued effectiveness.
A well-installed system can last 15–20 years or more with proper care.
Why You Should Act Now
Radon is often called the “silent killer” for a reason — you won’t see, smell, or feel it creeping into your home. But the longer you wait to test and mitigate, the higher your family’s risk becomes. Because radon exposure damage builds over time, every month without a mitigation system increases your lifetime cancer risk.
Taking action now means:
- Immediate peace of mind knowing your home is safe.
- Health protection for your family for years to come.
- Increased property value with a system future buyers will appreciate.
Conclusion: Protect What Matters Most
The truth is, radon isn’t just another household hazard — it’s a deadly, invisible threat that could be hiding beneath your home right now. But the solution is simple and proven: radon system installation.
With proper testing, professional installation, and occasional maintenance, you can dramatically reduce radon levels and keep your home safe for decades. Don’t wait for symptoms or warning signs — by then, the damage could already be done.
For expert help and trusted service, https://www.radonindianapolis.com/ offers comprehensive radon mitigation solutions tailored to your home. Protect your home. Protect your health. Install a radon mitigation system today — and breathe easier knowing your family is safe from the hidden danger beneath your feet.


Sign in to leave a comment.