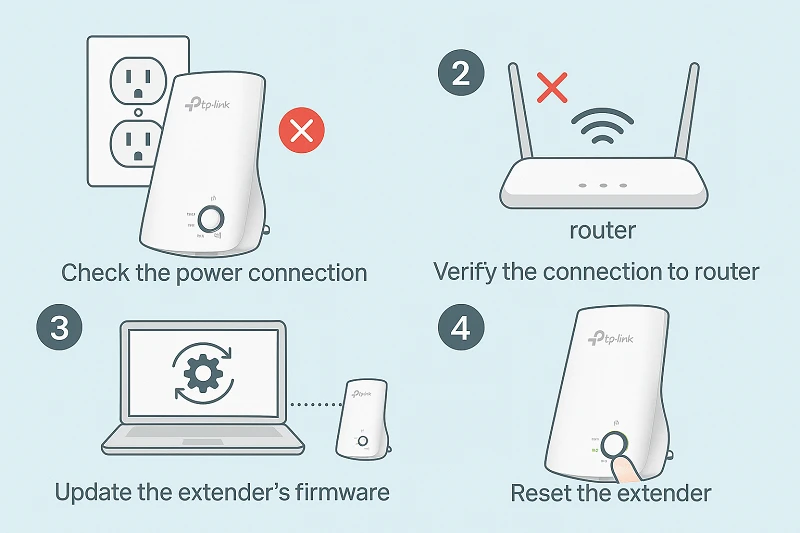
Changing your range extender to TP-Link Extender Access Point mode can make a big difference if you're having trouble with poor Wi-Fi signals in some parts of your house or place of business. Access Point mode uses a connected Ethernet connection to establish a new wireless hotspot, offering faster speeds, reduced latency, and better reliability than normal repeater mode, which just rebroadcasts your current Wi-Fi. Here's a quick guide to help you set up your TP link extender.
Detailed Instructions
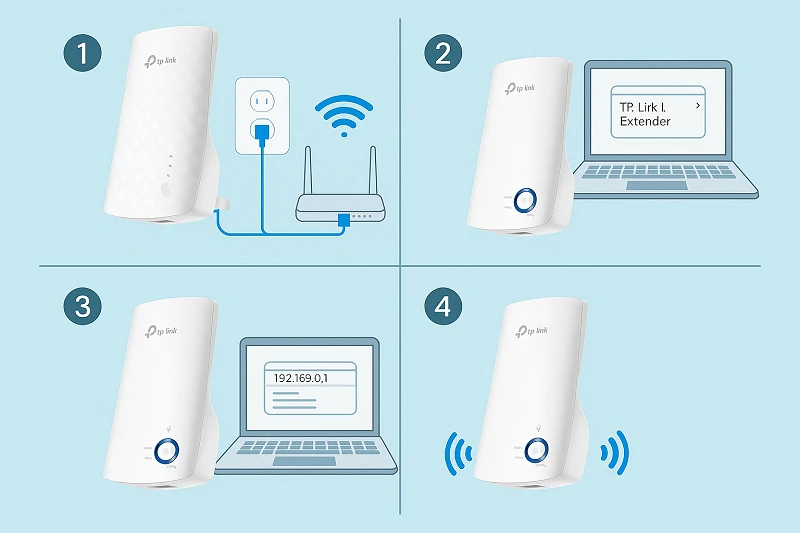
- Attach the router to your extender.
- Connect your TP-Link extender to your primary router using an Ethernet connection. The Access Point mode and improved network performance are powered by this cable connection.
- Turn on the TP-Link extender.
- After plugging the extender into a power outlet, watch for the LED indications to steady.
- Open the setup portal and log in.
- Open a browser on your device and type http://tplinkrepeater.net or the default IP address of the extender. Next, use your admin credentials to log in.
- Change the mode to Access Point.
- Choose Access Point after navigating to the Operation Mode section. Once you've chosen, save and verify the modifications.
- Set up your new wireless network.
- You can either prolong your current password or provide a new network name (SSID). Users may now connect more easily without having to remember several passwords.
- Finish the setup
- After pressing Save, let the extender restart. Connect your devices to the newly established Access Point network when you're ready.
Smart homes, streaming, gaming, and workplaces may all benefit from the dependable boost that a TP-Link Extender Access Point arrangement provides to your Wi-Fi network. Although it just takes a few minutes to set up, the TP Link Extender greatly improves connection quality. If you've been annoyed by dead zones, the quickest way to have smooth connectivity everywhere could be to switch to Access Point mode. To know more about tp link extender setup visit our webpage.


Sign in to leave a comment.