The roar of the wind, the crash of a falling tree branch, the relentless drumming of a hailstorm—these are the sounds that strike fear into the heart of any homeowner. A sudden roofing emergency can be a terrifying and overwhelming experience. Your home, your most significant investment and a sanctuary for your family, is suddenly vulnerable to the elements.
When a disaster strikes, you need to act fast, but you also need to act smart. Rushing into a situation without a plan can lead to further damage, personal injury, and a complicated insurance claim process. This comprehensive guide will walk you through the essential steps to take after a roofing emergency, from the immediate aftermath to getting your roof professionally repaired.
Step 1: Prioritize Safety Above All Else
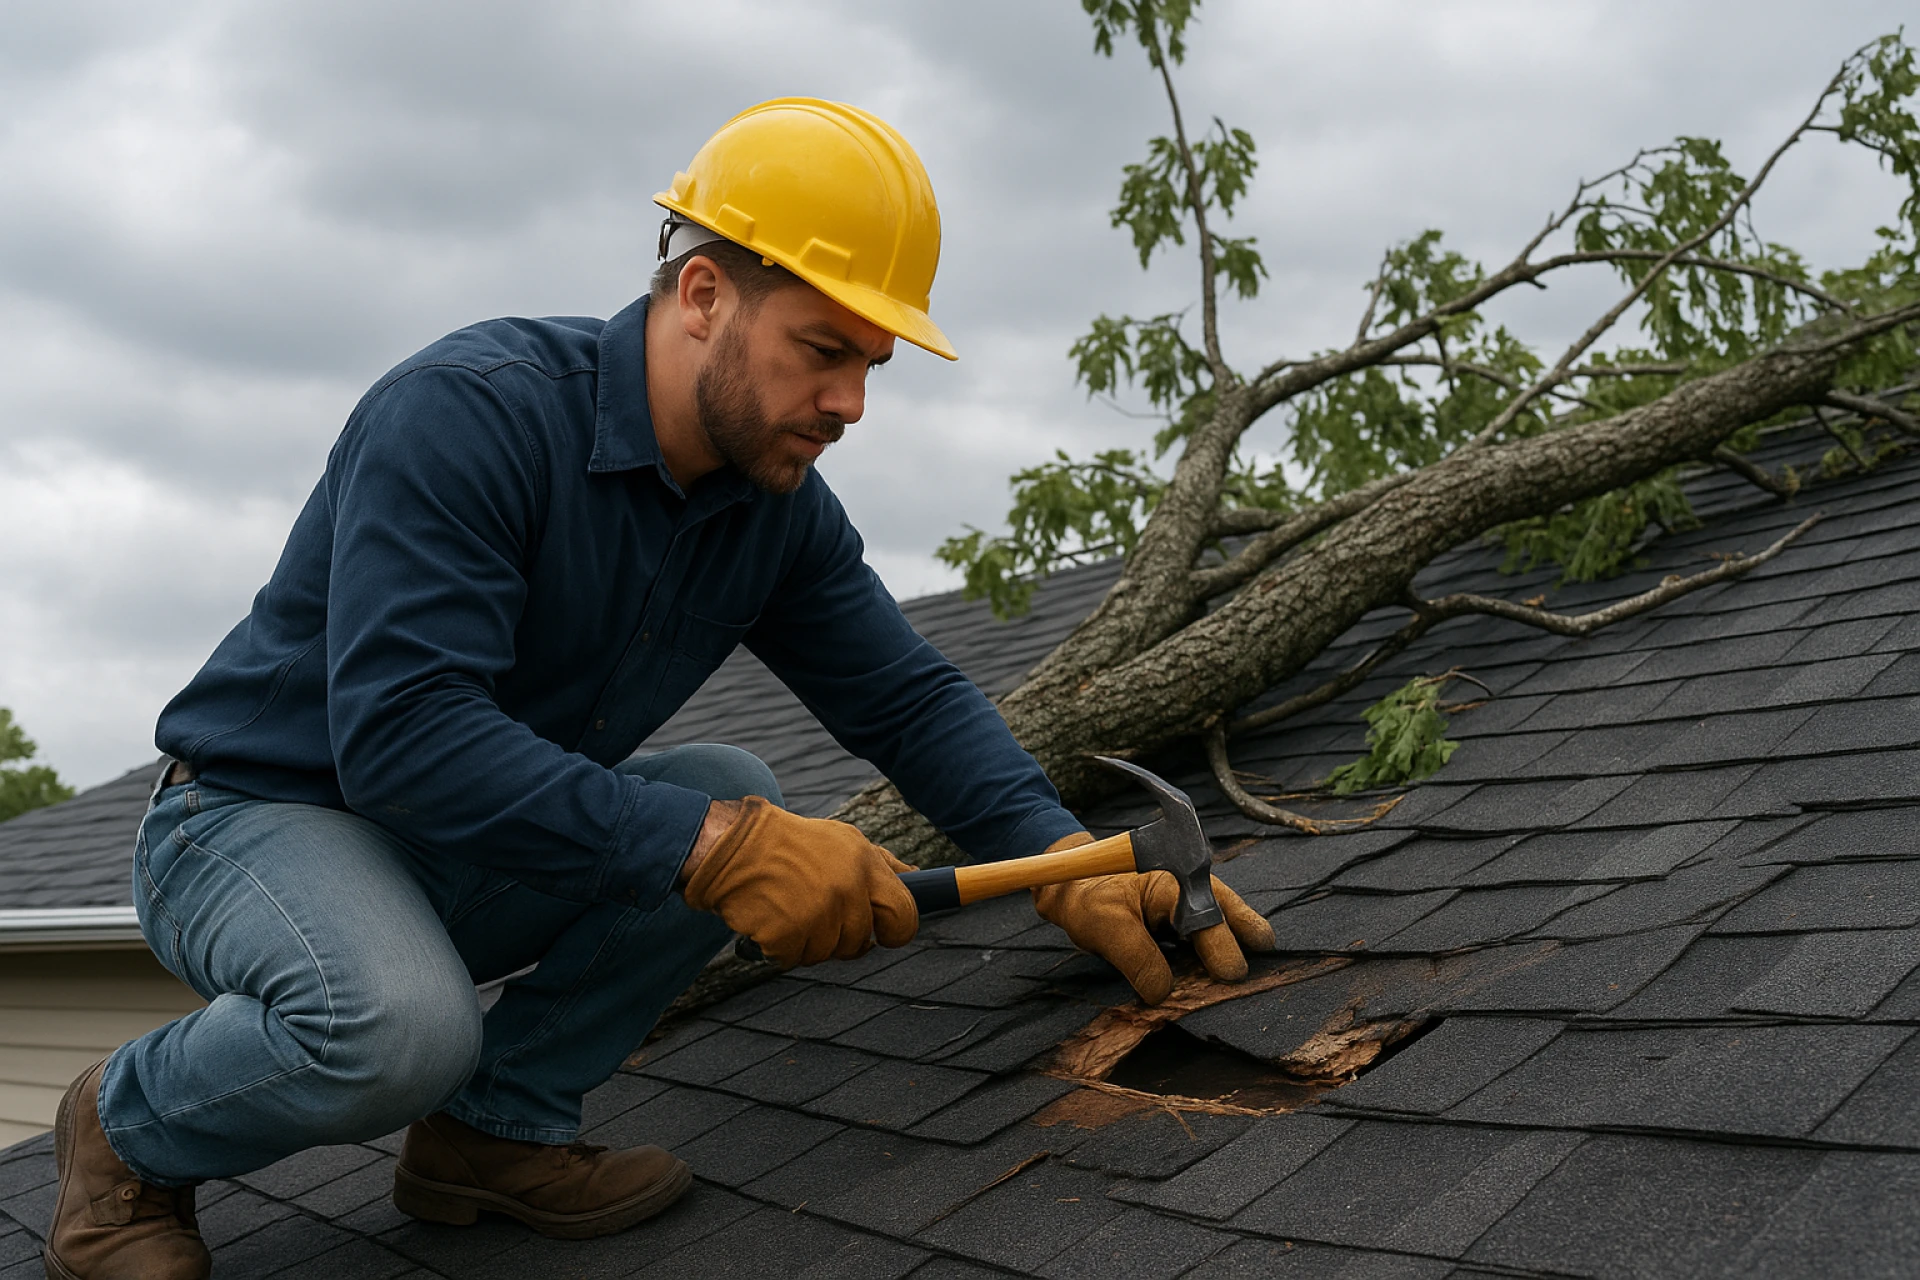
This is the most critical step. Your safety and the safety of your family and pets must be your absolute number one priority. Do not, under any circumstances, attempt to climb onto a damaged roof yourself, especially if the weather is still active or the roof appears unstable.
- Stay Calm and Assess from a Distance: As soon as the storm or event has passed, take a visual assessment of your roof from the ground. Use binoculars if you have them to get a closer look. Look for obvious signs of damage, such as:
- Missing, torn, or curled shingles.
- Visible holes or punctures in the roof.
- Fallen tree limbs or other debris.
- Damage to gutters, flashing, or vents.
- Sagging or sagging areas of the roof.
- Check for Interior Damage: Once you've safely assessed the exterior, check the interior of your home for leaks. Look for water stains on ceilings and walls, puddles on the floor, or wet spots in your attic. If you find water intrusion, take immediate action to mitigate the damage.
- Place buckets or other containers under any active leaks.
- Move furniture, electronics, and other valuables away from the affected area.
- If a ceiling is bulging with water, you can carefully poke a small hole in the lowest point with a screwdriver to allow the water to drain into a container, preventing a larger, more destructive collapse.
- Evacuate if Necessary: If the damage is extensive, such as a major structural failure, a collapsed ceiling, or exposed electrical wiring, it is crucial to evacuate your home immediately. Contact your local emergency services and do not re-enter the building until a professional has declared it safe.
Step 2: Document Everything for Your Insurance Claim
Proper documentation is vital for a smooth and successful insurance claim. The more detailed your records are, the easier it will be to prove the extent of the damage to your insurance adjuster.
- Take High-Quality Photos and Videos: Use your smartphone or a digital camera to capture clear, well-lit photos and videos of all the damage.
- Take wide shots to show the overall condition of the roof and the surrounding area.
- Get close-up shots of specific damage points, such as a missing shingle, a punctured area, or damaged flashing.
- Document interior damage as well, including water stains, sagging ceilings, and damaged personal property.
- Capture the time and date of the event. Many smartphones have a timestamp feature on their photos, which can be very helpful.
- Make Detailed Notes: Keep a written record of the damage. Note the date and time the disaster occurred, the type of weather event (e.g., windstorm, hail, hurricane), and a description of the damage you've observed.
- Save All Receipts: Keep receipts for any temporary repairs you make, such as a tarp, as these costs may be covered by your insurance policy.
Step 3: Make Temporary Repairs to Prevent Further Damage
While a professional roofer is the only one who can provide a permanent solution, a temporary fix is often necessary to protect your home from additional damage while you wait for help to arrive. This is especially important during an ongoing weather event.
- Tarping: The most common and effective temporary solution is to cover the damaged area with a heavy-duty waterproof tarp.
- Only attempt this if it is safe to do so. If the roof is too high, the weather is still active, or the roof is unstable, wait for a professional.
- Secure the tarp tightly over the damaged area, making sure it extends several feet beyond the problem spots.
- Use furring strips or wooden boards to secure the tarp, avoiding nailing directly into the damaged roof deck, which could create more holes.
- Other Temporary Fixes: For smaller, less severe issues, you might be able to use a temporary sealant or roofing tape. However, be aware that these are very short-term solutions and are no substitute for professional repair.
Step 4: Contact Your Insurance Company and a Professional Roofer
With the immediate danger mitigated and the damage documented, you can now begin the official process of getting your roof repaired. This involves two key players: your insurance company and a professional roofing contractor.
- Call Your Insurance Provider: Contact your homeowners insurance provider as soon as possible to report the damage and initiate a claim. Provide them with the documentation you've gathered. The insurance company will typically send an adjuster to your home to assess the damage and determine the covered costs.
- Find a Reputable Emergency Roofing Contractor: Don't just hire the first company that knocks on your door after a storm. Do your research and choose a reputable, local company.
- 24/7 Availability: Look for a company that offers 24/7 emergency services, as they are equipped to handle urgent situations.
- Licensed and Insured: Verify that the contractor is fully licensed and insured. This protects you from liability if a worker is injured on your property.
- Experience with Storm Damage: A roofer who specializes in storm damage will have the expertise to identify all types of damage, including subtle issues that an untrained eye might miss.
- Reviews and References: Check online reviews and ask for references from past clients. A good reputation is a strong indicator of quality and reliability.
Step 5: Understand the Repair Process
Once you have a professional roofer on board, they will conduct a thorough inspection and provide you with a detailed estimate. They will also likely help you with the insurance claim process, providing the necessary reports and documentation to your adjuster.
- Assessment: The roofer will assess the full extent of the damage, both visible and hidden. This might involve checking the roof deck, the underlayment, and the attic for signs of water intrusion.
- Temporary vs. Permanent Repairs: They will confirm if the initial repair was sufficient or if a more permanent solution is needed. In many cases, severe storm damage may necessitate a full roof replacement.
- Repair or Replacement: The contractor will work with you and your insurance company to determine the best course of action. They will then schedule and complete the necessary work, ensuring that your home is once again safe and protected.
Preventing Future Emergencies
While you can't prevent a natural disaster, you can take steps to minimize the risk of a roofing emergency.
- Regular Inspections: Have your roof professionally inspected at least once a year, especially after major storms.
- Maintenance: Keep your gutters clean and free of debris. Trim tree branches that hang over your roof.
- Upgrade to Durable Materials: When it’s time for a new roof, consider materials that are more resilient to common weather events in your area, such as high winds or hail.
When disaster strikes, your roof can be the first line of defense. By staying safe, documenting everything, and enlisting the help of a trusted, professional emergency roofing service, you can navigate the crisis with confidence and get your home back to a state of security and protection.


Sign in to leave a comment.