Once you 3d print an object, the next step is post-processing. It is a crucial step to follow because it can make a big difference in the quality of your final product.
3D printing post-processing is a necessary process involving several techniques, such as sanding, painting, and more. We've got you covered if you wonder which method is suitable for your product manufacturing. Let's dive into different available ways.
What Is Post-Processing?
In simple terms, post-processing is the final step in the 3D printing process. It is the step where you make any changes or enhancements to your product to get the desired results. For example, post-processing can improve the surface finish, remove any imperfections, and more.
There are several different post-processing techniques available, and each one has its advantages and disadvantages. In this article, we'll look at the most popular ones.
Top Post-Processing Methods for Excellent Results
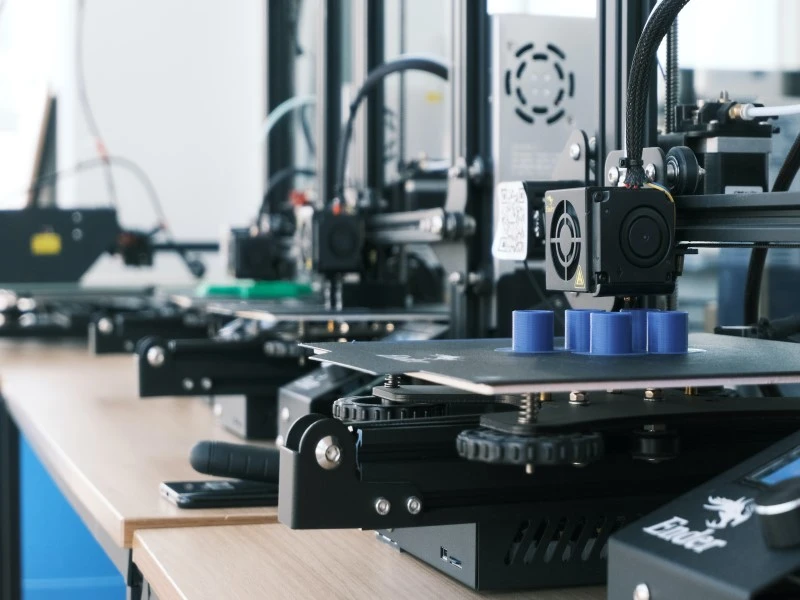
Photo by ZMorph All-in-One 3D Printers on Unsplash
Similar to different 3D printing technologies, many post-processing methods are available depending on the materials and surface finishing. Some of the quick and efficient processes are:
1. Support Removal
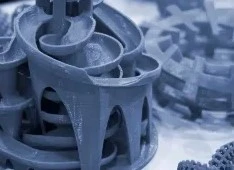
Some 3D printed parts require support while developing, and once they are ready for post-processing, they need to be removed. Removing these supports doesn't require much effort, and it is a quick process that can be done using pliers, saws, or knives. However, if the supports are in tight corners, it might be challenging to remove them without damaging the part.
Supports can be insoluble or soluble, depending on the filament used for printing. Insoluble supports are made up of the same material as the primary component. And, to remove them, you only need to cut or break them off. Soluble supports are made of a dissolvable material, such as PVA (polyvinyl alcohol), and they are designed to be washed away with water. This process is common among various 3d printing solutions.
2. Sanding
Sanding is a common post-processing technique used to smooth the surface of 3D prints. It is a simple process, but it can be time-consuming if you want to achieve a perfect finish. Start with coarse sandpaper and progress to a finer grit. Be cautious and don't sand too much, or you might remove too much material and weaken the part.
Sometimes, a few visible blobs are left on the surface, and you can remove them using sandpaper. However, ensure that you only remove the clumps and don't sand the entire surface. Also, don't force-press the sandpaper onto the surface. Instead, use a circular motion to achieve the best results.
3. Welding
Don't confuse welding with a metal 3d printing process. In plastic 3D printing also, you can perform welding using Acetone. If you're printing objects with materials like ABS, Acetone is used for welding the parts together.
It is a simple process that doesn't require any special tools. All you need is a container, Acetone, and the printed parts. First, place the pieces in the container and then pour Acetone over them. Next, make sure that all the surfaces are covered with Acetone and leave them for a few minutes. After that, use a plier to clamp the parts together and leave them for a few hours. Finally, the Acetone will start to dissolve the plastic and weld the pieces together.
4. Glueing
If you're not using ABS, glueing is an ideal method for joining two parts together. In general, you should use a cyanoacrylate adhesive for this purpose. It is a fast-acting adhesive that dries quickly and forms a strong bond.
If you use materials like PLA or PETEG in your 3d printing service, then glueing is a perfect method for joining two parts together. First, make sure that the surfaces to be glued are clean and free from any contaminants. Then, apply a thin coat of adhesive to both surfaces and press them together. Hold them in position for a few seconds until the adhesive sets. However, note that cyanoacrylate adhesives can be harmful if it comes into contact with your skin. So, always wear gloves when using this adhesive.
5. Priming & Painting
Priming and painting are two of the most popular post-processing techniques. Both the methods are ideal for improving the appearance of the 3D print and making it look more realistic. In general, priming is used to prepare the surface for painting, and it helps in hiding any imperfections.
You can use a few methods for priming: spraying, dipping and brushing. However, spraying is the most popular method as it provides even coverage. Ensure to use an appropriate primer for your material. For example, if you're using ABS, you should use a primer designed for ABS plastic.
After priming, you can start painting the object using a variety of paints, such as acrylics or enamels. Make sure that you use the appropriate paint for your material. For example, if you're using ABS, you should use acrylic paint designed for ABS plastic.
6. Smoothing
Smoothing is a process used to remove any imperfections from the surface of the 3D print. In general, you can use two methods for smoothing: sanding and polishing.
Sanding is a simple process used to remove slight imperfections from the surface. It is a quick and easy method, but it can be time-consuming if you want to achieve a perfect finish. Don't sand too much, or you might remove too much material and weaken the part. If the component is made up of ABS, using Acetone can be a helpful method for smoothing the surface.
7. Hydro Dipping
Hydro dipping is a process used to apply a water-based coating to the surface of the 3D print. It is an easy process, and it doesn't require any special tools or equipment.
First, you need to choose the desired colour for your object. There are a variety of colours present, so you can choose the one that best suits your needs. Then, you need to find a hydro dipping tank. The size of the tank will depend on the size of your object.
Once you have found a tank, fill it with water and add the desired colour. Make sure that the water is at room temperature before adding the colour. Next, place the object in the tank and wait for it to be coated with the desired colour. Once the thing is painted, remove it from the tank and allow it to dry.
Wrapping Up!
Post-processing can be a daunting task, but with a little bit of practice, you'll get excellent results. Pick a suitable post-processing technique for your material and start experimenting. You'll be able to achieve various finishes by using different post-processing techniques. With the growing popularity of 3d print in Perth, Brisbane and across the globe, you can easily find a professional 3d printing hub that can help you with designing, printing, and post-processing.
0
0


Sign in to leave a comment.