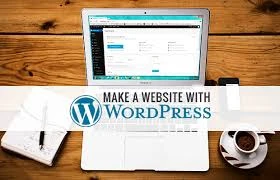
WordPress is used to construct about 60 million websites or around 35% of all websites on the internet. It began as a blogging platform in 2003 and has since grown to become the world's largest content management system. WordPress is now one of the most user-friendly and powerful content management systems available. The programme is free to download and use, but you'll require good WordPress hosting to utilize it on the web.
What is WordPress hosting, and how does it work?
In a nutshell, it's a WordPress-friendly web server. CMS must be installed on a webserver to work. WP is a content management system that allows users to construct and publish websites with nothing more than a name and a hosting service. Several types of web hosting are available, including shared, VPS, Dedicated, Managed, and Free, all of which allow you to install WordPress. It has grown in popularity to the point where most hosts now provide a 1-click setup option and at least fulfill the baseline WP requirements.
HOW TO BUILD A WORDPRESS WEBSITE WITHOUT HOSTING IN A STEP-BY-STEP APPROACH
Creating a WordPress website without hosting is a lot easier than you think. There is no need to install any hosting. All you need is a computer, and a few mouse clicks to have your website up and running.
Here's a step-by-step tutorial on building a WordPress website without hosting.
Step 1: Register
Create a WordPress account as the initial step. As shown above, go to WordPress.com and click the "Start Your Website" icon. It will take you to a sign-up page, where you must complete a registration form. You'll have to fill out some information on the form. Your desired username, password, email address, and blog address are all included (Domain name).
Your blog URL will be suffixed with WordPress.com because you used WordPress to build this free website. If you name your blog "XYZ," it will automatically become "XYZ.wordpress.com".
Step 2: Make Your Website Active
You must validate your email address to activate your WordPress website. As you can see in the image below, you will receive an email notification. It's as simple as opening your email, reading the instructions, and clicking "Confirm Blog."
Step 3: Create a Website
The next stage is to mold and construct your website. Choose a site title, emblem, and slogan that you like. Then, for your website, select a free theme. You have some alternatives to pick from. You may also link your WordPress website to your Facebook and Twitter accounts.
Step 4: Personalize Your Website
After that, personalize your website by choosing a font style and any elements you want to include. Custom domains, SEO tools, plugins, picture storage, ad-free, shop, and video storage are some of the features available.
Step 5:Let's celebrate the end!
Finally, choose a completely free membership plan. Then, in your browser, input the address of your WordPress website, see it, and see how it looks. Then, after making any necessary changes to your website, click "Launch"! In your inbox, you'll get an email welcoming you to the WordPress family.
So there you have it! You've launched a WordPress website without having to pay for hosting. Isn't it simple? The complete setup procedure takes only a few minutes, and your website is ready to use. You may manage and upload material on your WordPress website at any time. Let's look at how you may use the icons on your dashboard's left black sidebar.
Dashboard: For updates to WordPress, Plugins, and Themes.
Stats: To see your site's insights and metrics, go to Stats.
Upgrades: Upgrades to premium membership plans with additional features are available.
Posts: Use this feature to create, modify, and delete blog posts on your website.
Upload, delete, and manage media assets like photographs and videos.
Pages: Create and edit pages on your website.
Comments: Use this feature to moderate comments on your website. You may approve, remove, and react to reader and visitor comments here.
Appearance: This is used to personalize your website. You may use this to experiment with various themes and alter the appearance of your website.
Settings: These are the options for setting and maintaining your website.
0
0
0


Sign in to leave a comment.