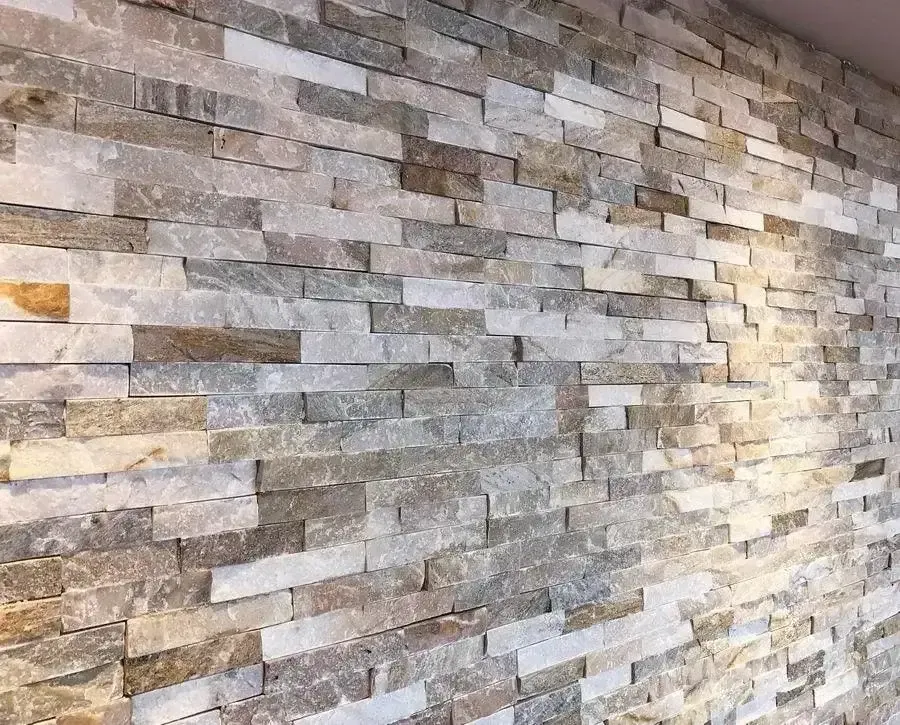

Considerations for Choosing Split Face Tiles
Split face tiles and stone cladding have become a go‑to choice for architects, designers, and homeowners who want to create striking feature walls, façades, or interior accents. Their rugged, three‑dimensional texture adds depth and character, while the natural stone composition ensures authenticity and durability. At PSD, we take pride in supplying split face tiles that balance aesthetics, performance, and sustainability.
Handcrafted Assembly
Each panel is made from genuine natural stone strips, manually bonded into interlocking panels. Because every stone piece is irregular in shape, the assembly process is performed by hand to ensure a secure fit. This craftsmanship guarantees the structural integrity of the 3D textured surface, making each panel unique.
- Manual bonding process: Skilled workers align and secure each strip.
- Irregular stone shapes: Adds authenticity and natural variation.
Interlocking panels: Simplifies installation while maintaining strength.
Quality Control Standards
As a direct importer, PSD enforces rigorous quality control (QC) measures. Our partner factories follow deliberate bonding procedures to ensure stability.
- Adhesive application: A sufficient amount of adhesive is used to prevent strips from loosening.
- Visible adhesive: Occasionally, small traces may appear on the surface — this is normal and accepted in the global stone industry.
QC inspections: Panels are checked for bond strength, alignment, and durability before shipment.
Durability vs. Aesthetics
One of the most important considerations is the balance between appearance and performance.
- Strong bonding: Ensures long‑term durability and prevents dislodgement.
- Minor glue exposure: Considered an acceptable trade‑off for structural longevity.
Sustainability factor: Demanding a glue‑free finish would waste large amounts of natural stone, making production unsustainable.
Installation Benefits
Once installed, split face tiles deliver a seamless, natural look.
- Glue residue disappears: From a standard viewing distance, adhesive traces blend into shadows and textures.
- Feature walls & façades: Ideal for large areas where rugged aesthetics are desired.
Low maintenance: Natural stone requires minimal upkeep compared to decorative alternatives.
Architectural Standards
Split face stone should be judged by architectural paving standards, not decorative ornament standards.
- Authentic masonry product: Built for real‑world applications.
- Large‑scale suitability: Perfect for commercial projects, exterior façades, and expansive feature walls.
Performance focus: Stability, supply reliability, and durability are prioritised over art‑grade perfection.
Customer Guidance
At PSD, we advise customers to consider the following when choosing split face tiles:
- Purpose of installation: Feature wall, exterior façade, or interior accent.
- Viewing distance: Minor adhesive traces are invisible once installed.
- Long‑term performance: Durability outweighs cosmetic perfection.
Sustainability: Accepting natural variations reduces waste and supports eco‑friendly production.
Split face tiles are not just about aesthetics — they are about authenticity, craftsmanship, and durability. At PSD, we ensure premium material selection, competitive pricing, and supply stability, making our products suitable for both residential and commercial projects.
Step‑by‑Step Installation Guide for Split Face Tiles
Installing split face tiles requires careful preparation and attention to detail to ensure both durability and aesthetics. Here’s a comprehensive guide:
1. Preparation
- Surface check: Ensure the wall is clean, dry, and structurally sound.
- Flatness: The substrate should be even; uneven surfaces may cause gaps or weak bonding.
- Priming: Apply a suitable primer if the wall is porous (e.g., plaster or concrete).
2. Tools & Materials
You’ll need:
- Split face tiles or stone cladding panels
- Tile adhesive (high‑strength, flexible)
- Notched trowel
- Spirit level
- Tile spacers (if required)
- Wet saw or angle grinder with diamond blade
- Safety equipment (gloves, goggles, dust mask)
3. Adhesive Application
- Use a high‑quality stone adhesive suitable for heavy cladding.
- Apply evenly with a notched trowel to create ridges.
- Back‑butter each tile panel (apply adhesive directly to the back) for maximum bond strength.
4. Panel Placement
- Start from the bottom corner and work upwards.
- Press each panel firmly into place, sliding slightly to ensure full contact.
- Use a spirit level to maintain alignment.
- Stagger joints for a natural, seamless look.
5. Cutting & Adjustments
- Use a wet saw or angle grinder with a diamond blade for clean cuts.
- Measure carefully before cutting to fit edges, corners, or around fixtures.
- Always wear protective gear when cutting stone.
6. Drying & Curing
- Allow adhesive to cure for at least 24–48 hours before applying any load or finishing.
- Avoid disturbing the panels during this period.
7. Finishing Touches
- Wipe off excess adhesive before it hardens.
- Seal the stone if recommended (especially for exterior applications).
- Inspect for loose panels or uneven joints and adjust immediately.
8. Long‑Term Care
- Clean with mild soap and water — avoid harsh chemicals.
- Periodically check for loose panels, especially in outdoor installations.
- Reseal every few years if exposed to weather.
Split face tiles are designed to deliver a rugged, natural aesthetic. Proper installation ensures they remain secure, durable, and visually stunning for years to come. At PSD, we supply premium materials backed by rigorous QC, making installation smoother and results more reliable.
For more details, visit: Consideration of Split Face Tiles.





























Sign in to leave a comment.