
Build Stronger, Longer-Lasting Ground with the Right Installation Process
Proper installation is the key to getting the best performance from any geocell system. Whether you're building roads, parking lots, construction access routes, or industrial sites, following the correct steps helps create a stronger and more stable surface. This geocell installation guide for contractors explains the process in simple terms, helping you avoid common mistakes and achieve long-lasting results.
Why Proper Geocell Installation Matters
Geocells are three-dimensional cellular structures made from high-density polyethylene (HDPE). Once expanded and filled with aggregate, soil, or other materials, they create a stable layer that distributes heavy loads evenly across the ground.
For contractors, proper installation offers several benefits:
- Improves load distribution
- Reduces rutting and surface movement
- Helps control erosion
- Extends the life of roads and work areas
- Reduces maintenance costs
- Speeds up project completion
Even the highest-quality geocell system can underperform if it is not installed correctly. That's why every step in the process is important.
Step 1: Evaluate the Project Site
Every successful project starts with understanding the job site.
Before installation, inspect the ground conditions carefully. Look for soft soil, drainage issues, slopes, or areas with weak support. This information helps determine the right geocell depth, infill material, and installation method.
Planning ahead can prevent costly delays and improve the final result.
Step 2: Prepare the Ground Surface
A clean and level surface creates the best foundation for geocell installation.
Remove:
- Vegetation
- Loose debris
- Large rocks
- Standing water
- Unstable material
Grade the area so it matches the project design. If needed, compact the soil to create a firm base before placing the geocells.
Good site preparation improves the overall performance of the system.
Step 3: Install a Geotextile Layer (When Needed)
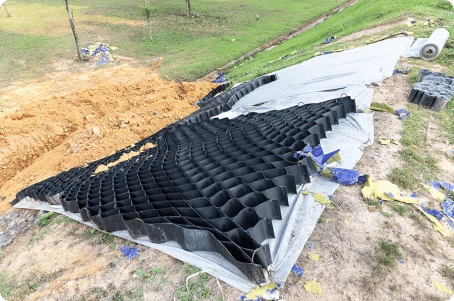
Some projects require a geotextile fabric beneath the geocells.
This layer helps:
- Separate soil from aggregate
- Improve drainage
- Prevent material mixing
- Increase long-term stability
Although not every application needs geotextile fabric, it is commonly recommended for weak or soft soil conditions.
Step 4: Expand and Position the Geocells
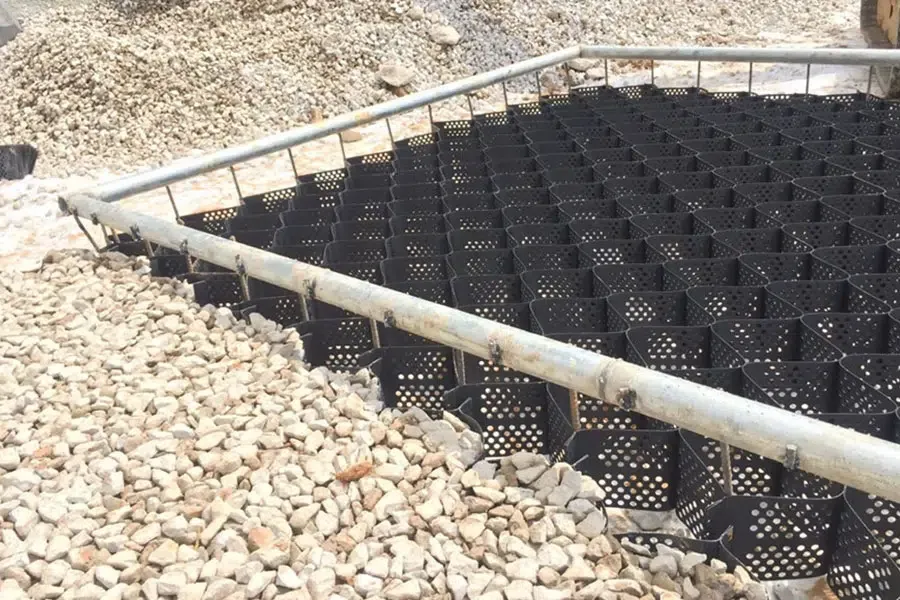
Next, unfold the geocell panels across the prepared area.
Stretch each panel evenly until it reaches its full design dimensions. The cells should remain uniform without twisting or folding.
Proper alignment ensures the load is distributed evenly after the cells are filled.
Many contractors temporarily anchor the expanded panels before filling them to keep everything in position.
Step 5: Secure the Geocell System
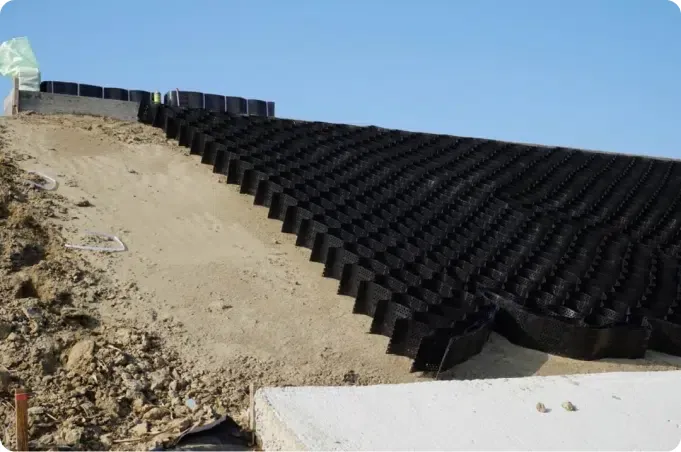
Anchoring is especially important on slopes and uneven ground.
Depending on the project, contractors may use:
- Steel stakes
- Rebar
- Ground anchors
- Other approved fastening systems
The anchor spacing depends on the project design and site conditions.
Proper anchoring prevents movement during filling and compaction.
Step 6: Fill the Geocells with the Right Material
Choosing the correct infill material is just as important as selecting the right geocell.
Common fill materials include:
- Crushed stone
- Gravel
- Sand
- Recycled aggregate
- Local fill material (when appropriate)
Spread the material evenly across the geocells instead of dumping it into one location. This helps prevent the panels from shifting.
The fill should completely occupy every cell before compaction begins.
Step 7: Compact the Filled Cells
Once the cells are filled, compact the material using equipment suitable for the project.
Proper compaction:
- Increases strength
- Reduces future settlement
- Creates a smooth finished surface
- Improves long-term durability
If additional fill is needed after compaction, repeat the filling and compacting process until the required grade is achieved.
Common Installation Mistakes Contractors Should Avoid
Even experienced contractors can make small mistakes that reduce system performance.
Some of the most common issues include:
- Poor site preparation
- Uneven geocell expansion
- Incorrect anchor placement
- Using unsuitable fill material
- Skipping proper compaction
- Ignoring drainage conditions
Following a reliable geocell installation guide for contractors helps avoid these problems and ensures consistent project quality.
Tips for Better Installation Results
Professional contractors often follow a few best practices to improve every installation:
- Review project plans before starting.
- Use quality materials for every layer.
- Check alignment throughout installation.
- Maintain proper drainage around the project.
- Compact each layer evenly.
- Inspect the finished work before opening the area to traffic.
Small improvements during installation can make a significant difference in long-term performance.
Where Geocells Are Commonly Used
Geocell systems support many commercial and industrial applications, including:
- Construction access roads
- Industrial parking lots
- Equipment yards
- Temporary roads
- Gravel driveways
- Erosion control projects
- Slope stabilization
- Pipeline access routes
- Military applications
Their versatility makes them a dependable solution for projects that require strong ground reinforcement.
Why More Contractors Are Choosing Geocells
Traditional ground stabilization methods often require more material, more labor, and higher costs.
Geocells provide an efficient alternative by improving soil strength while reducing excavation and aggregate requirements. They also install quickly, making them ideal for projects with tight schedules.
As construction projects continue to demand durable and cost-effective solutions, more professionals are turning to this proven technology. Using a trusted geocell installation guide for contractors ensures each project delivers the strength, stability, and long-term performance expected by clients.
Conclusion
Correct installation is the foundation of every successful geocell project. From site preparation to final compaction, each step plays an important role in achieving lasting ground stability. If you're looking for dependable ground stabilization solutions, BaseCore in Scottsdale, Arizona, provides high-quality geocell systems and expert support to help contractors complete projects with confidence.
Frequently Asked Questions
1. What is a geocell system?
A geocell system is a three-dimensional HDPE cellular structure that stabilizes soil by confining aggregate or fill material, creating a stronger and more durable surface.
2. Do all geocell projects require geotextile fabric?
No. It depends on the soil conditions and project requirements. Soft or weak soils often benefit from a geotextile layer.
3. What materials can be used to fill geocells?
Common options include crushed stone, gravel, sand, recycled aggregate, and other approved fill materials suitable for the project.
4. Why is compaction important after filling geocells?
Compaction improves strength, reduces settlement, increases stability, and helps the surface perform better under heavy loads.
5. Where are geocells commonly used?
Geocells are widely used for roads, parking lots, construction sites, slopes, erosion control, industrial facilities, access roads, and heavy equipment areas.




















Sign in to leave a comment.