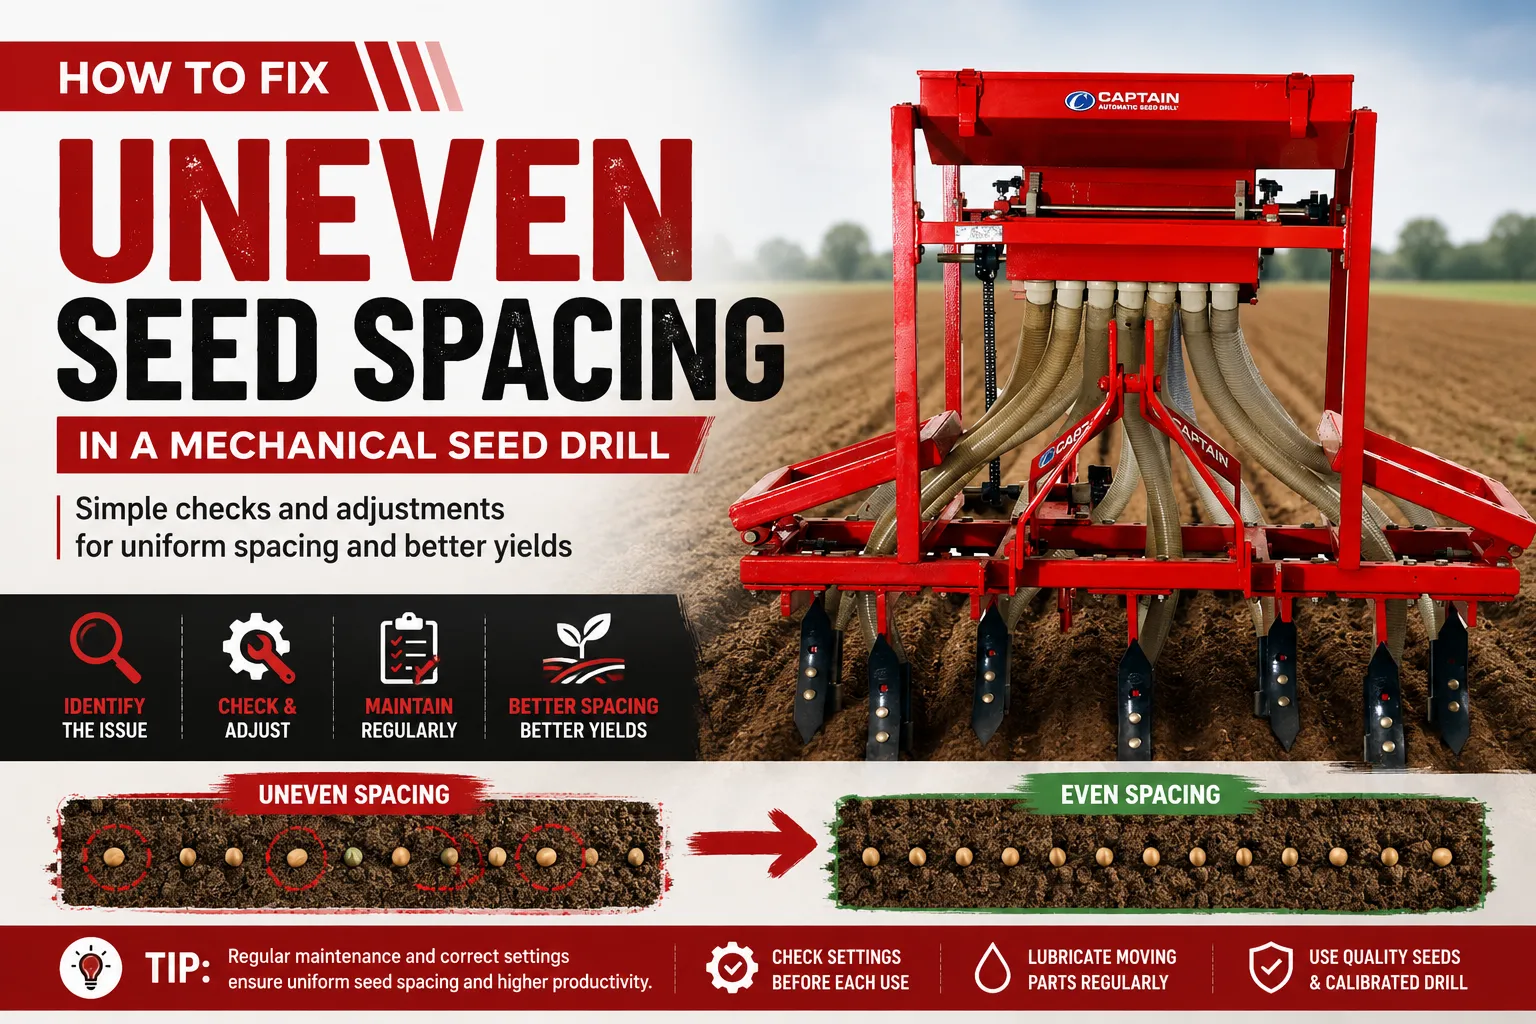

Uneven seed spacing is a common problem during sowing. Some seeds fall too close together, while others leave larger gaps. This creates an inconsistent plant population and affects how efficiently crops use available water, nutrients and sunlight.
A mechanical seed drill is designed to place seeds at a controlled depth and spacing. However, correct results depend on proper calibration, seed quality, metering-system adjustment and field conditions.
If your seed drill is producing uneven spacing, do not immediately assume the machine is faulty. Start with a systematic inspection.
What Causes Uneven Seed Spacing?
Uneven seed spacing usually comes from one or more of these factors:
- Incorrect seed-meter calibration
- Wrong seed plate or metering component
- Damaged or worn metering parts
- Poor seed quality
- Incorrect seed size
- Blocked seed tubes
- Incorrect ground-wheel operation
- Excessive forward speed
- Loose or improperly adjusted chains
- Uneven seedbed conditions
- Incorrect machine setup
Slipping or inconsistent ground-wheel contact
Finding the actual cause is important because changing one setting without identifying the problem might not solve uneven spacing.
1. Calibrate the Mechanical Seed Drill Before Sowing
Calibration should be your first step.
The purpose of calibration is to determine how much seed the drill delivers over a known distance or area.
A basic calibration process involves:
- Clean the seed box and metering mechanism.
- Fill the hopper with the intended seed.
- Check the metering components.
- Set the desired seed rate according to the crop and agronomic recommendation.
- Rotate the drive mechanism or ground wheel according to the manufacturer's calibration procedure.
- Collect the discharged seed.
- Weigh the collected seed.
- Compare the result with the target seed rate.
- Adjust the metering system if required.
Repeat the test until the desired output is achieved.
Always follow the specific calibration procedure provided by the seed drill manufacturer because metering systems differ between machines.
Captain Tractors provides mechanical seed drills designed for controlled seed placement. Check the model-specific operating instructions before making adjustments.
2. Check the Seed Metering Mechanism
The metering system controls the movement of seed from the hopper into the seed tubes.
If the mechanism does not operate smoothly, seed flow becomes inconsistent.
Inspect for:
- Worn components
- Damaged metering parts
- Dirt or crop residue
- Loose components
- Incorrect adjustment
Seeds getting trapped inside the mechanism
Clean the metering system before making adjustments.
If components show significant wear, replace them according to the manufacturer's specifications rather than trying to compensate through excessive adjustment.
3. Use Uniform Seed
Seed size and shape have a direct effect on mechanical metering.
If the seed lot contains a mixture of very small, large, broken or irregular seeds, the metering system might not handle every seed consistently.
Before sowing:
- Check seed size
- Remove obvious debris
- Follow recommended seed grading practices
- Use seed suitable for the drill's metering system
Avoid mixing substantially different seed sizes unless the equipment is designed for it
The seed drill should be calibrated using the same seed lot that will be planted in the field.
Changing seed varieties or seed sizes after calibration might change the metering result.
4. Inspect the Seed Tubes
Seed tubes provide the path between the metering mechanism and the soil.
A partially blocked or damaged tube can cause delayed or inconsistent seed delivery.
Check each tube for:
- Soil buildup
- Seeds stuck inside
- Plant residue
- Cracks
- Deformation
- Loose connections
Incorrect positioning
Make sure the seed tube sits correctly and does not create unnecessary bends.
If one row is consistently showing poor spacing while the other rows perform normally, inspect that row's metering unit and seed tube first.
5. Check the Ground Wheel
Many mechanical seed drills use ground-wheel movement to drive the seed-metering system.
If the ground wheel slips or does not maintain consistent contact with the soil, the metering mechanism might not receive consistent drive.
Inspect:
- Tyre condition
- Wheel pressure, where applicable
- Wheel alignment
- Drive-chain movement
- Sprockets
- Bearings
Soil contact
A worn or damaged drive system needs attention before further calibration.
6. Inspect Chains and Sprockets
Mechanical seed drills depend on mechanical power transmission between components.
A loose chain can introduce inconsistent movement into the seed-metering system.
Check for:
- Excessive chain slack
- Damaged sprocket teeth
- Misalignment
- Stiff chain links
- Excessive wear
- Poor lubrication
Follow the manufacturer's recommended chain tension and lubrication procedure.
Do not overtighten the chain. Excessive tension also increases component wear.
7. Reduce Excessive Forward Speed
Operating speed affects seed placement.
When you drive too quickly, the opener has less time to create a suitable seed placement environment, and seed movement through the system can become less consistent.
Higher speed also increases the possibility of:
- Seed bouncing
- Poor soil contact
- Uneven furrow formation
- Increased vibration
Inconsistent seed depth
Use the operating speed recommended for your seed drill and crop.
If spacing improves when you reduce speed, speed was likely contributing to the problem.
8. Prepare a Uniform Seedbed
Even a properly calibrated seed drill cannot compensate for severely uneven field conditions.
Large clods, deep ruts and loose soil affect the movement of the drill and its openers.
Before sowing, aim for a seedbed with:
- Suitable soil tilth
- Adequate moisture
- Reduced large clods
- Consistent surface conditions
- Appropriate firmness
A uniform seedbed helps the seed drill maintain consistent depth and contact with the soil.
For soil preparation, farmers often use implements such as a rotavator where appropriate for the crop and soil conditions.
9. Check Seed Depth Along With Seed Spacing
Uneven spacing often gets noticed first, but seed depth also needs attention.
If the drill is moving up and down because of uneven terrain or incorrect adjustment, both seed depth and horizontal placement could vary.
Check:
- Opener adjustment
- Depth-control settings
- Ground conditions
- Three-point linkage position
Machine levelling
The drill should operate in the position recommended by the manufacturer.
10. Check the Three-Point Linkage
A tractor-mounted seed drill depends on correct three-point linkage adjustment.
If the implement is not level, seed placement across different rows might vary.
Inspect:
- Lower links
- Top link
- Stabiliser components
- Linkage pins
- Hydraulic lift settings
Before entering the field, ensure the drill sits correctly behind the tractor.
Captain Tractors' tractor implements range includes equipment designed for different agricultural operations. Always check tractor-implement compatibility before operation.
11. Avoid Overfilling or Poorly Managing the Seed Hopper
The seed level inside the hopper changes during operation.
Some metering systems respond differently as the seed level changes. Follow the manufacturer's operating instructions regarding hopper filling and seed management.
During field operation, watch for:
- Seed bridging
- Empty sections in the hopper
- Uneven seed distribution
Seed buildup around the metering components
Do not allow a row to run empty while other rows continue sowing.
12. Perform a Field Test Before Full-Scale Sowing
Never depend entirely on workshop calibration.
After calibration, conduct a short field test.
Operate the tractor and seed drill over a representative section of the field. Stop the machine and carefully inspect the seed placement.
Check:
- Distance between seeds
- Seed depth
- Row spacing
- Seed rate
- Missing seeds
Double seeds
If the results are inconsistent, stop and adjust the machine before continuing across the entire field.
How to Measure Seed Spacing in the Field
You do not need sophisticated equipment for a basic field check.
Choose several representative rows and expose a short section of planted soil carefully.
Measure the distance between consecutive seeds.
Repeat this across multiple rows rather than checking only one location.
For example:
Row 1: 12 cm, 13 cm, 12 cm, 14 cm
Row 2: 12 cm, 12 cm, 13 cm, 12 cm
Row 3: 8 cm, 17 cm, 11 cm, 18 cm
The third row shows much greater variation and deserves further inspection.
For professional crop establishment, farmers should follow crop-specific agronomic recommendations rather than relying on a single universal spacing target.
Uneven Seed Spacing: Troubleshooting Table
| Problem | Possible Cause | What to Check |
| Seeds too close together | Incorrect metering adjustment | Recalibrate metering system |
| Large gaps between seeds | Blocked seed tube or inconsistent metering | Clean tube and inspect metering unit |
| One row performs differently | Damaged or blocked row component | Inspect that row |
| Spacing changes with speed | Excessive forward speed | Operate within recommended speed |
| Irregular output after changing seed | Different seed size or shape | Recalibrate with new seed |
| Seed depth varies | Uneven seedbed or incorrect opener setting | Check field preparation and depth adjustment |
| All rows show inconsistent output | Drive-system or calibration issue | Inspect wheel, chains and metering |
| Seed delivery stops temporarily | Seed bridging or blockage | Inspect hopper and seed tubes |
Common Mistakes to Avoid
Skipping Calibration
A seed drill should not be taken directly to the field without checking its seed output.
Calibrating With the Wrong Seed
Calibration results change when seed size and shape change.
Increasing Speed to Cover More Area
Higher speed does not always mean better productivity. Poor seed placement could create greater losses later.
Ignoring Worn Components
A worn metering component, chain or sprocket can create inconsistent performance.
Checking Only One Row
If the drill has multiple rows, inspect several rows during calibration and field testing.
Making Too Many Adjustments at Once
Change one setting at a time and test the result. This makes it easier to identify which adjustment solved the problem.
How to Maintain a Mechanical Seed Drill for Consistent Sowing
Preventive maintenance reduces the risk of uneven seed placement.
After use:
- Empty remaining seed
- Clean the hopper
- Clean seed tubes
- Remove soil and crop residue
- Inspect metering components
- Check chains and sprockets
- Lubricate components according to the manual
- Inspect bearings and moving parts
- Store the drill in a dry, protected location
Before the next sowing season, complete a full inspection and calibration.
You can also read our Mini Tractor Maintenance Guide for practical maintenance checks when using a compact tractor with agricultural implements.
When Should You Contact a Technician?
If calibration and basic adjustments do not solve the problem, professional inspection is advisable.
Contact a qualified technician if you notice:
- Repeated metering failure
- Damaged drive components
- Excessive vibration
- Broken shafts
- Severe chain or sprocket wear
- Hydraulic problems
- Persistent differences between rows
Do not modify the seed-metering mechanism beyond the manufacturer's recommended settings.
FAQ
Why is my mechanical seed drill dropping seeds unevenly?
Common causes include incorrect calibration, inconsistent seed size, worn metering components, blocked seed tubes, excessive operating speed and ground-wheel or drive-system problems.
How do I calibrate a mechanical seed drill?
Follow the manufacturer's calibration procedure. Typically, you collect seed discharged over a known number of wheel rotations or distance, weigh it and adjust the metering system until the target output is achieved.
Does tractor speed affect seed spacing?
Yes. Excessive speed affects seed placement and the consistency of the drilling operation. Follow the recommended operating speed for your machine and crop.
Can different seed sizes affect seed spacing?
Yes. Seed size and shape affect mechanical metering. Recalibrate the drill whenever the seed type or characteristics change significantly.
Why is one seed drill row planting differently?
Inspect that row's seed tube, metering mechanism, opener, drive connection and related components. A problem limited to one row often points to a local blockage, adjustment issue or worn component.
Final Takeaway
Uneven seed spacing is usually a setup, calibration, maintenance or operating-condition issue rather than something you should accept as normal.
Start with calibration. Then inspect the seed quality, metering mechanism, seed tubes, ground wheel, chains, sprockets and opener settings. Check your forward speed and seedbed condition as well.
Most importantly, conduct a field test before completing the full sowing operation.
A properly calibrated and maintained Mechanical Seed Drill helps farmers achieve more consistent seed placement and establish a more uniform crop stand.
About Captain Tractors
Captain Tractors is an Indian manufacturer of compact tractors and agricultural implements, with a product range covering tractors, seed drills, rotavators and other farm machinery. Its compact tractors are designed for applications where manoeuvrability and implement compatibility are important.
For accurate product specifications, operating procedures and implement compatibility, farmers should consult the relevant Captain Tractors product documentation or an authorised dealer before making adjustments.

























Sign in to leave a comment.