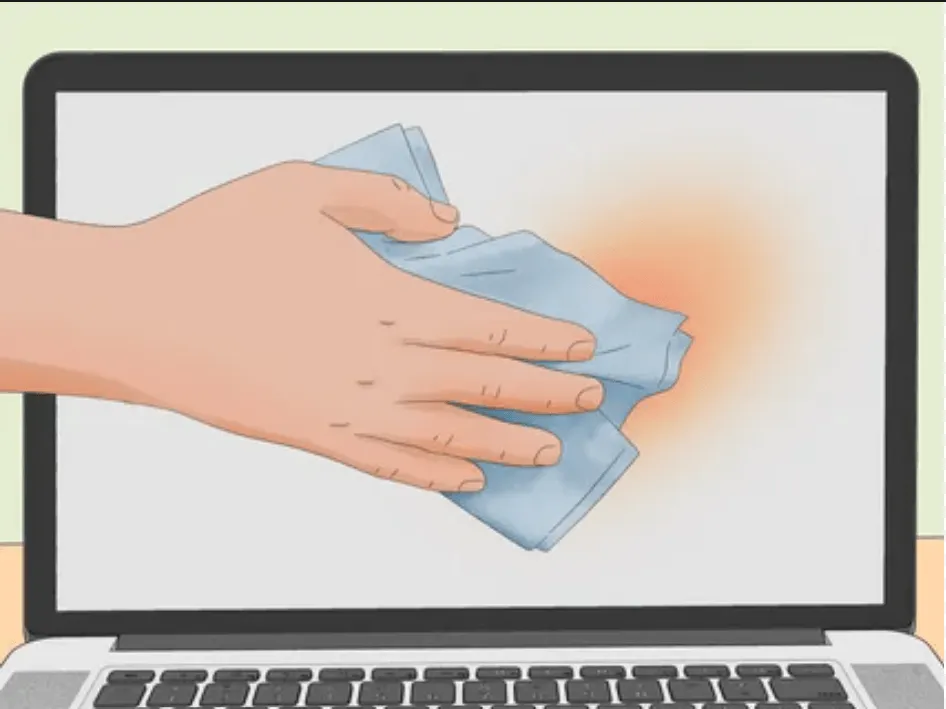


Screen discoloration is one of the most common display issues people notice on laptops, monitors, tablets, and smartphones. It can appear as yellow patches, blue tint, pink areas, green spots, dark shadows, washed-out colors, or uneven brightness across the screen. Sometimes the issue is minor and caused by display settings, but in other cases, it may point to pressure damage, backlight problems, panel aging, liquid damage, or hardware failure.
The good news is that screen discoloration is usually easy to identify if you know what to look for. By checking your display on plain backgrounds and comparing color behavior, you can quickly understand whether the issue is temporary, software-related, or a physical screen problem.
What Is Screen Discoloration?
Screen discoloration means the colors on your display do not appear evenly or accurately. Instead of showing clean whites, deep blacks, and balanced colors, the screen may show strange tints, faded areas, or patches that look different from the rest of the display.
For example, a white screen may look yellow in one corner. A black screen may show cloudy gray patches. A blue background may reveal purple or green spots. These signs usually mean that something is affecting the way the screen produces or reflects light.
Discoloration can happen on many types of screens, including LCD, LED, OLED, laptop displays, desktop monitors, tablets, and mobile phones.
Common Signs of Screen Discoloration
The first step is to identify what type of discoloration you are seeing. Different signs may point to different causes.
Yellow or Warm Tint
A yellow tint often appears on white or light backgrounds. It may cover the entire screen or only appear in certain areas. Sometimes this is caused by night mode, blue light filter settings, color temperature settings, or display calibration. If the yellow tint is only in one corner or one patch, it may be a hardware issue.
Blue, Green, or Pink Tint
A blue, green, or pink tint can happen when the display’s color balance is off. It may also appear because of a damaged display cable, graphics issue, panel defect, or aging screen. If the tint changes when you move the laptop lid, it could be related to the display connector.
Dark Spots or Shadows
Dark patches may look like bruises, stains, or shadowy areas behind the screen. These can be caused by pressure damage, liquid damage, backlight problems, or internal layer damage. If the spot does not move and remains visible on different backgrounds, it is likely a physical screen issue.
White Patches or Cloudy Areas
Cloudy white areas are often visible on plain backgrounds. They may be caused by pressure marks, backlight bleeding, panel defects, or uneven screen layers. A full-screen white background is one of the easiest ways to notice these patches.
You can use a simple screen testing tool such as https://whitescreenstester.com to display a clean white screen and inspect your display more clearly.
Uneven Brightness
If one side of the screen looks brighter or darker than the other, the problem may be related to backlight uniformity. This is common in older monitors and laptops, but strong uneven brightness can also indicate a failing display panel.
Color Fading
If colors look dull, washed out, or less vibrant than before, it may be due to display settings, aging hardware, poor color calibration, or a damaged panel. OLED screens may also lose color accuracy over time.
How to Test for Screen Discoloration
You do not need advanced tools to check screen discoloration. A few simple tests can help you identify the problem.
Step One: Clean the Screen First
Before assuming the screen is damaged, clean it gently with a microfiber cloth. Dust, fingerprints, oil marks, and smudges can sometimes look like discoloration. Avoid pressing hard because pressure can damage the screen further.
Step Two: Check Display Settings
Many devices have settings that intentionally change screen color. Before checking for hardware damage, turn off features such as:
Night mode
Blue light filter
Eye comfort mode
Color inversion
High contrast mode
Adaptive brightness
True Tone or automatic color adjustment
After turning these settings off, check the screen again. If the discoloration disappears, it was likely caused by software settings rather than physical damage.
Step Three: Use a Plain White Screen
A white background helps reveal yellow tint, cloudy patches, pressure marks, and uneven brightness. Open a full-screen white page and look carefully at the display from different angles.
For this test, whitescreenstester.com can be useful because it gives you a plain white screen without distractions. This makes it easier to spot discoloration, shadows, and uneven areas.
Step Four: Test Different Solid Colors
After checking white, test other solid colors such as black, red, green, and blue. Each color can reveal a different type of issue.
White helps reveal yellowing, cloudy areas, and brightness problems.
Black helps reveal backlight bleeding, glow, and gray patches.
Red, green, and blue help reveal color distortion, stuck pixels, and tint problems.
If the same mark appears on every color, it is likely a physical display issue. If it only appears in one app or on one image, the problem may not be your screen.
Step Five: Take a Screenshot
This is one of the easiest ways to separate software problems from hardware problems.
Take a screenshot of the screen where you notice discoloration. Then open the screenshot on another device. If the discoloration appears in the screenshot on another screen, the problem may be software, graphics, or image-related.
If the discoloration does not appear in the screenshot but is still visible on your physical display, the issue is most likely with the screen hardware.
Screen Discoloration vs Dead Pixels
Screen discoloration and dead pixels are not the same.
A dead pixel is usually a tiny black dot that does not change. A stuck pixel may appear as a small red, green, blue, or white dot. Screen discoloration is usually larger and appears as a patch, tint, shadow, or uneven color area.
If the issue is a single tiny dot, it may be a pixel problem. If it is a larger faded or tinted area, it is more likely discoloration.
Screen Discoloration vs Pressure Marks
Pressure marks are caused when force is applied to the screen. They often look like cloudy areas, white spots, dark bruises, or rainbow-like marks. Screen discoloration is a broader term that can include pressure marks, tint issues, backlight problems, or panel damage.
If the mark appeared after the laptop was pressed, dropped, cleaned too hard, or kept under heavy objects, pressure damage is a strong possibility.
What Causes Screen Discoloration?
Screen discoloration can happen for many reasons. Some of the most common causes include:
Display color settings
Blue light or night mode
Loose or damaged display cable
Pressure on the screen
Liquid damage
Backlight bleeding
Aging display panel
Overheating
Graphics driver problems
Manufacturing defects
OLED burn-in
The exact cause depends on how the discoloration appears and when it started.
Can Screen Discoloration Be Fixed?
Some types of discoloration can be fixed, while others require repair or replacement.
If the issue is caused by display settings, color calibration, night mode, or software, you can usually fix it by adjusting your settings or updating your graphics drivers.
If the discoloration is caused by pressure damage, liquid damage, panel aging, or backlight failure, it may not be fully repairable at home. In those cases, professional repair or screen replacement may be needed.
Avoid using risky DIY methods such as pressing hard on the screen, applying heat, using strong chemicals, or opening the display without experience. These can make the damage worse.
How to Prevent Screen Discoloration
You can reduce the risk of screen discoloration by handling your device carefully.
Do not place heavy objects on a laptop.
Do not close the laptop with items on the keyboard.
Avoid pressing hard while cleaning the screen.
Keep liquids away from your device.
Use a padded sleeve for laptops and tablets.
Avoid exposing the screen to high heat.
Keep your display brightness at a reasonable level.
Turn off static images when not in use, especially on OLED screens.
Good screen care can help prevent pressure marks, tint problems, and long-term display damage.
Final Thoughts
Screen discoloration can appear as yellow tint, dark spots, cloudy patches, faded colors, or uneven brightness. The best way to spot it is to test your display on plain white, black, red, green, and blue backgrounds. A white screen test is especially useful because it makes shadows, stains, and color changes easier to see.
You can use https://whitescreenstester.com as a simple resource to check your screen on a clean white background. If the discoloration appears only on your physical display and not in screenshots, it is likely a hardware-related issue. If it appears in screenshots too, the cause may be software, graphics, or display settings.
By testing carefully, you can better understand whether your screen discoloration is a simple settings issue or a sign of deeper display damage.





























Sign in to leave a comment.