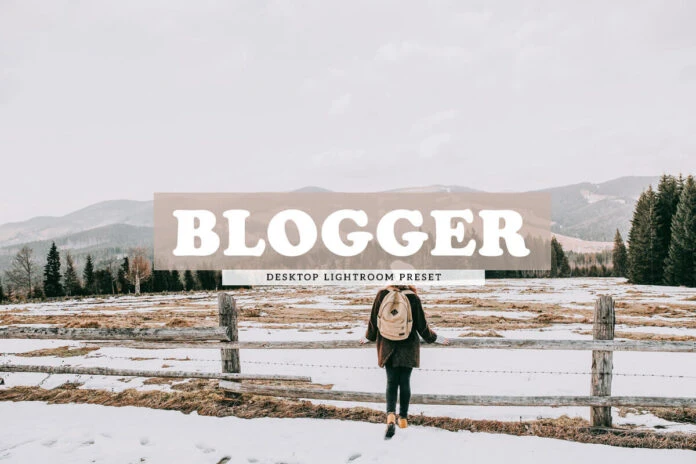

Adobe Lightroom is an essential tool for photographers looking to efficiently process and enhance their images. One of its most powerful features is presets—pre-configured settings that can instantly transform your photos with a single click. Whether you're looking to speed up your workflow, achieve a specific style, or maintain consistency across multiple images, Lightroom presets can be a game-changer.
In this guide, we’ll explore everything you need to know about Lightroom presets, how to use them, and how they can elevate your photography.
1. What Are Lightroom Presets?
A Lightroom preset is a collection of adjustments that have been saved as a file and can be applied to any photo in Lightroom. These adjustments can affect various aspects of your image, such as exposure, contrast, color balance, tone curves, sharpness, and more. Essentially, a preset is a shortcut that applies a specific style or effect to your photo, without you needing to manually adjust the settings each time.
Presets can be used for:
- Editing individual photos.
- Batch editing multiple photos in a consistent style.
- Achieving specific looks or moods (e.g., vintage, black-and-white, cinematic, etc.).
2. Types of Lightroom Presets
There are various types of Lightroom presets that cater to different editing needs:
2.1. Basic Adjustment Presets
These presets typically make changes to the basic editing panel settings, including:
- Exposure
- Contrast
- Highlights and Shadows
- Whites and Blacks
- Clarity and Vibrance
- Saturation
Basic adjustment presets can instantly fix exposure issues, enhance color, or add a general tonal balance to your images.
2.2. Creative Effect Presets
Creative effect presets allow you to add artistic touches to your photos, such as:
- Vignettes: Darken or lighten the edges of the image.
- Grain: Add noise for a film-like appearance.
- Color Grading: Adjust the colors in shadows, midtones, and highlights to create a specific mood.
- Split Toning: Add color to highlights and shadows separately.
2.3. Black-and-White Presets
These presets convert your color photos into black-and-white images with specific contrast, tone, and texture adjustments. Some black-and-white presets are designed for high contrast, while others may offer a softer, more moody feel.
2.4. Film Emulation Presets
Film emulation presets are designed to replicate the look of various types of film stocks, like Kodak Portra or Fujifilm Velvia. These presets often mimic the characteristic grain, color shifts, and other qualities found in traditional film photography.
2.5. Portrait Presets
Portrait presets are specifically designed to enhance skin tones, soften lighting, and add a flattering mood to portraits. These can smooth skin, brighten eyes, and create a polished, professional look for people photos.
2.6. Landscape Presets
Landscape presets enhance the natural beauty of outdoor scenes. They typically boost colors in the sky, bring out details in the foreground, and improve overall clarity and sharpness for scenic shots.
2.7. Wedding and Event Presets
These presets are created with weddings, parties, and other events in mind. They typically provide soft tones, warm lighting, and elegant contrasts to make wedding photos stand out.
3. How to Use Lightroom Presets
Using Lightroom presets is simple and can significantly speed up your editing process. Here's how to apply them:
3.1. Apply a Preset in Lightroom (Classic & Lightroom CC)
- Open your photo in the Lightroom Develop module.
- On the left panel, find the Presets panel. You’ll see default Lightroom presets, as well as any custom or third-party presets you’ve installed.
- Click on a preset to instantly apply it to your photo. You’ll see the adjustments reflected in the photo and in the editing panels on the right side.
3.2. Sync Presets Across Multiple Photos
You can apply a preset to more than one image by using Lightroom’s Sync feature:
- After editing one photo, apply your desired preset.
- Select all the photos you want to apply the preset to (use Ctrl/Cmd + Click to select multiple).
- Click Sync at the bottom of the Develop panel.
- Choose the settings you’d like to sync, or select All Settings to apply the same preset to all the selected images.
This is particularly useful for batch editing photos taken in similar lighting conditions (e.g., wedding photos or a portrait session).
4. How to Create Your Own Lightroom Preset
Creating your own preset in Lightroom is a great way to establish a personalized editing workflow. Here’s how to create a custom preset:
- Make adjustments to your photo: Open an image and use the editing sliders to achieve the look you want. This might include adjusting exposure, contrast, color, tone, etc.
- In the Develop module, find the Presets panel.
- Click the + icon at the top right of the Presets panel and choose Create Preset.
- In the New Develop Preset dialog box, give your preset a name, and select which settings you want to include in the preset. For example, you might want to save exposure and white balance but exclude things like crop settings.
- Once you’ve selected your settings, click Create.
Your custom preset will now appear in the Presets panel for easy application to other photos.
5. How to Install and Manage Lightroom Presets
Presets are available in .xmp or .lrtemplate file formats. Here’s how to install and manage presets in Lightroom:
5.1. Install Lightroom Presets in Lightroom Classic
- Download or obtain the preset files from a trusted source.
- In Lightroom Classic, go to the Develop module.
- In the Presets panel, click the + icon and select Import.
- Locate and select the preset files you downloaded, and click Import.
The presets will now be available in your Presets panel.
5.2. Install Presets in Lightroom CC (Cloud-Based)
- Download the preset files.
- In Lightroom CC, open the Edit panel and select Presets.
- At the bottom, click the three dots and choose Import Presets.
- Select your downloaded preset files and import them.
6. Where to Find Lightroom Presets
You can find Lightroom presets in various places, both free and paid:
- Adobe’s Official Preset Marketplace: Adobe offers a range of high-quality presets that can be easily added to your Lightroom library.
- Third-Party Websites: Websites like Creative Market, Etsy, and Preset Love provide many high-quality presets from professional photographers and designers.
- Photography Blogs & Communities: Many photographers share free presets on their blogs, YouTube channels, or social media accounts.
- Create Your Own: As mentioned, creating custom presets is a fantastic way to get exactly the look you want.
7. Pros and Cons of Using Lightroom Presets
Pros:
- Time-Saving: Presets can significantly speed up your editing process, especially when working with a large batch of images.
- Consistency: Presets allow you to apply the same look across multiple photos, maintaining a consistent style for portfolios, blogs, or social media.
- Creative Freedom: While presets can speed up your editing, they also provide a starting point that you can tweak for a personalized result.
- Professional Results: High-quality presets are created by professionals and can help your photos look polished and cohesive.
Cons:
- Over-Reliance: Relying too heavily on presets can result in generic-looking photos. It’s important to learn how to customize presets for each image.
- Limited Flexibility: Some presets might not work well for every photo. They might require adjustment, especially if the lighting or color balance of your image is drastically different from the one the preset was designed for.
8. Conclusion
Lightroom presets are an incredibly valuable tool for photographers, offering a quick way to enhance photos, maintain consistency, and experiment with different styles. Whether you’re using presets for basic adjustments, creative effects, or professional workflows, they can save time and help you achieve stunning results.
Remember, while presets are a great starting point, the best photos often come from tweaking those presets and making them your own. Explore, experiment, and create your own presets to develop your unique photographic style. Happy editing!
























Sign in to leave a comment.