
Let’s be honest, outdated tiles can make your home look tired and stuck in the past. Whether it’s a retro kitchen floor, a bathroom wall from the ’80s, or a backsplash that just doesn’t match your current style, it might be time for a change. But if the thought of removing those tiles sends a shiver down your spine, don’t worry.
Tile removal doesn’t have to be back-breaking work. With the right tools, techniques, and a little patience, you can lift away old tiles cleanly and easily—without wrecking your walls or floors, or exhausting yourself in the process.
Ready to ditch the dated look? Here’s how to remove tiles without breaking a sweat.
Why Remove Outdated Tiles?
Outdated tiles aren’t just a style issue—they can also be:
- Cracked or chipped, creating safety hazards
- Grimy or stained, despite constant cleaning
- Poorly installed, leading to loosened or hollow tiles
- Hard to match, making small repairs a nightmare
Removing them opens the door to modern, durable materials that better fit your space—and your lifestyle.
What You’ll Need (Gather These First!)
Before you start pulling up tiles, get your tools in order. This will save you energy and prevent unnecessary mistakes.
Essential Tools:
- Grout saw or oscillating multi-tool
- Hammer
- Cold chisel or stiff putty knife
- Utility knife
- Shop vacuum or broom
- Work gloves and eye protection
- Bucket and sponge
Optional but helpful:
- Heat gun or hair dryer
- Suction cup tile lifter
- Knee pads (your future self will thank you)
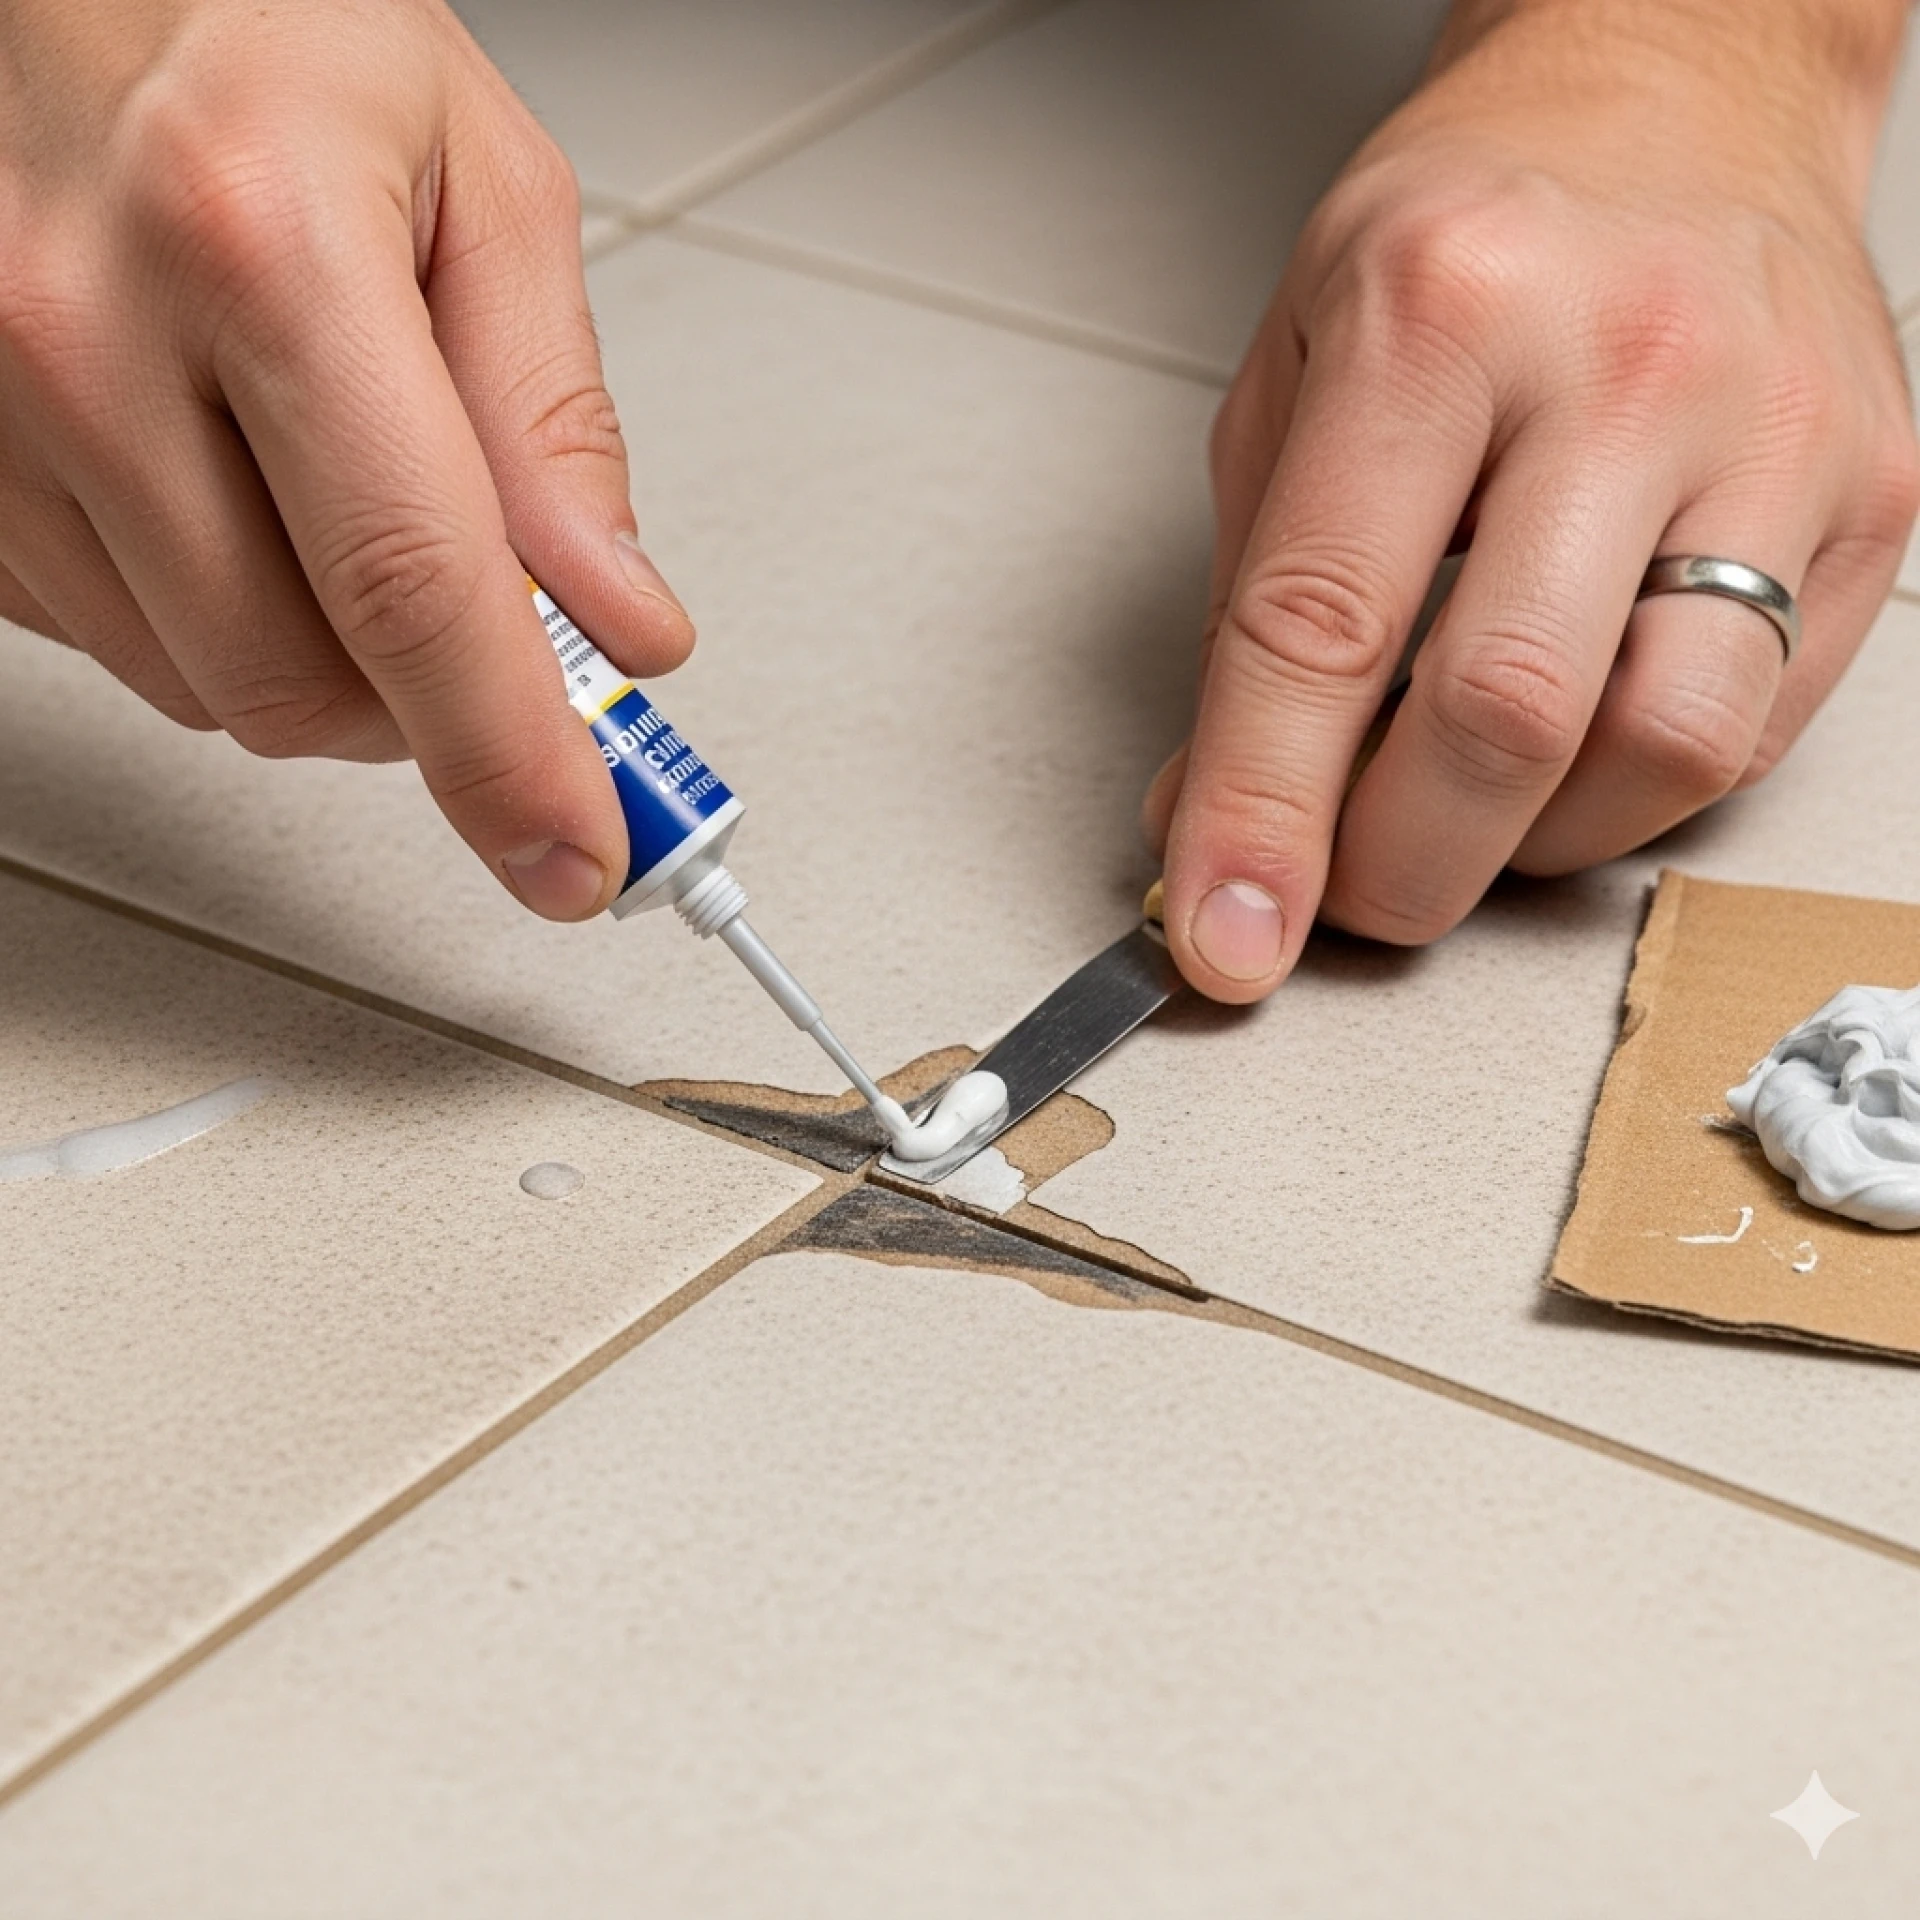
Step 1: Remove the Grout Like a Pro
Grout holds your tiles together. Removing it first allows you to lift tiles cleanly.
Here’s how:
- Use a manual grout saw or a multi-tool with a grout removal blade.
- Carefully cut along all four sides of each tile.
- Vacuum away the dust and debris as you go.
Why this matters: Removing grout first reduces pressure on neighboring tiles, preventing accidental breakage.
Step 2: Soften the Adhesive with Heat
Want your tiles to practically lift themselves? Heat is your best friend.
Try this:
- Use a heat gun or hair dryer to warm each tile for 30–60 seconds.
- Focus on one tile at a time.
- Heat loosens the adhesive, making removal easier and reducing breakage.
Pro tip: Don’t overheat. You’re softening, not cooking the tile!
Step 3: Gently Pry the Tile
Now the fun part—getting those tiles up.
Do it right:
- Slide a putty knife or cold chisel under one edge.
- Tap gently with a hammer until the tile begins to lift.
- Continue around the tile, working slowly to avoid cracking.
Want to reuse your tiles? Use a suction lifter to pull them up whole.
Step 4: Clean Off Leftover Adhesive
After lifting the tiles, you’ll likely find leftover adhesive (mortar or mastic) on the surface.
To clean it:
- Scrape it off using a scraper tool or chisel.
- For stubborn residue, apply an adhesive remover or heat it again.
- Wipe with a damp sponge to remove dust.
A clean surface = a successful new tile installation.
Step 5: Inspect and Prep the Surface
Don’t skip this step. It’s your chance to make your next floor or wall even better.
Check for:
- Cracks or soft spots in the subfloor or wall
- Water damage or mold
- Uneven patches
Fix any issues now for a smoother, longer-lasting tile job later.
Bonus Tip: Removing Just a Few Tiles? Here’s How to Avoid Damage
Want to remove only a couple of tiles (maybe to repair or restyle)? Here’s how:
- Use your grout saw to isolate the tiles.
- Drill small holes in the center of the tile to weaken it.
- Chisel the tile inward, not outward, to avoid shifting nearby tiles.
- Work piece by piece until it’s gone.
This method helps preserve the surrounding tile—and your sanity.
Mistakes to Avoid During Tile Removal
Want to keep your home and your energy intact? Avoid these rookie errors:
❌ Don’t skip grout removal—it’s essential.
❌ Don’t pry up tile from the middle first—always start at the edge.
❌ Don’t forget protective gear—sharp shards can fly.
❌ Don’t rush. Patience = clean results.
When It’s Time to Call a Pro
While DIY tile removal is doable for most homeowners, sometimes it makes sense to bring in a contractor—especially if:
- You’re dealing with large or high-traffic areas
- The tile is over radiant heating systems
- There’s asbestos or mold risk
- You just don’t want the mess or stress
A professional can complete the job quickly, safely, and with all the right tools.
Conclusion: Say Goodbye to the Old, Without the Stress
Removing outdated tile doesn’t have to mean mess, damage, or days of frustration. With the right steps and tools, you can clear out that tired tile and get your space ready for something new—cleanly, safely, and with minimal effort. And if you’d rather leave the heavy lifting to the pros, Salem Tile Setters is ready to help with expert removal and installation services.
From loosening grout to lifting tile and clearing adhesive, this simple method works for kitchens, bathrooms, entryways, and more. So go ahead—say goodbye to the old and hello to your dream floor or wall.


Sign in to leave a comment.