Late at night, when the house quiets down, the smallest noises become impossible to ignore. The creak of a floorboard, the muffled thud of footsteps upstairs, or the persistent beat of a neighbor’s music leaking through a shared wall. For anyone trying to sleep, record music, or simply enjoy peace at home, these sounds are more than a nuisance. They chip away at comfort and concentration.
Many people try quick fixes: heavy curtains, foam panels, or extra drywall. Yet, these often disappoint. The real issue is not only airborne sound but vibration traveling through studs, screws, and ceilings. This is where sound isolation clips step in. They separate walls or ceilings from the structure itself, breaking the path of vibration and reducing how much noise makes it through.
This article explores how isolation clips work, why they matter, and when they are worth considering. Along the way, we’ll uncover practical advice, real-world challenges, and expert guidance to help you make informed choices.
Why Noise Travels Through Walls and Ceilings
Noise is not only something we hear through the air. It also moves as vibration through solid surfaces. When someone stomps upstairs, the energy doesn’t stop at the floor. It travels into the joists, through screws, and into the ceiling below. That’s why even thick walls sometimes fail to keep sound out.
Traditional soundproofing methods focus on adding mass, like extra drywall or dense insulation. While this helps with higher-pitched sounds, it often struggles with bass notes, footsteps, and deep voices. These low frequencies ride through solid connections like a highway. To stop them, you need a way to disconnect one surface from another without leaving gaps. That’s exactly what isolation clips are designed to do.
What Are Sound Isolation Clips?
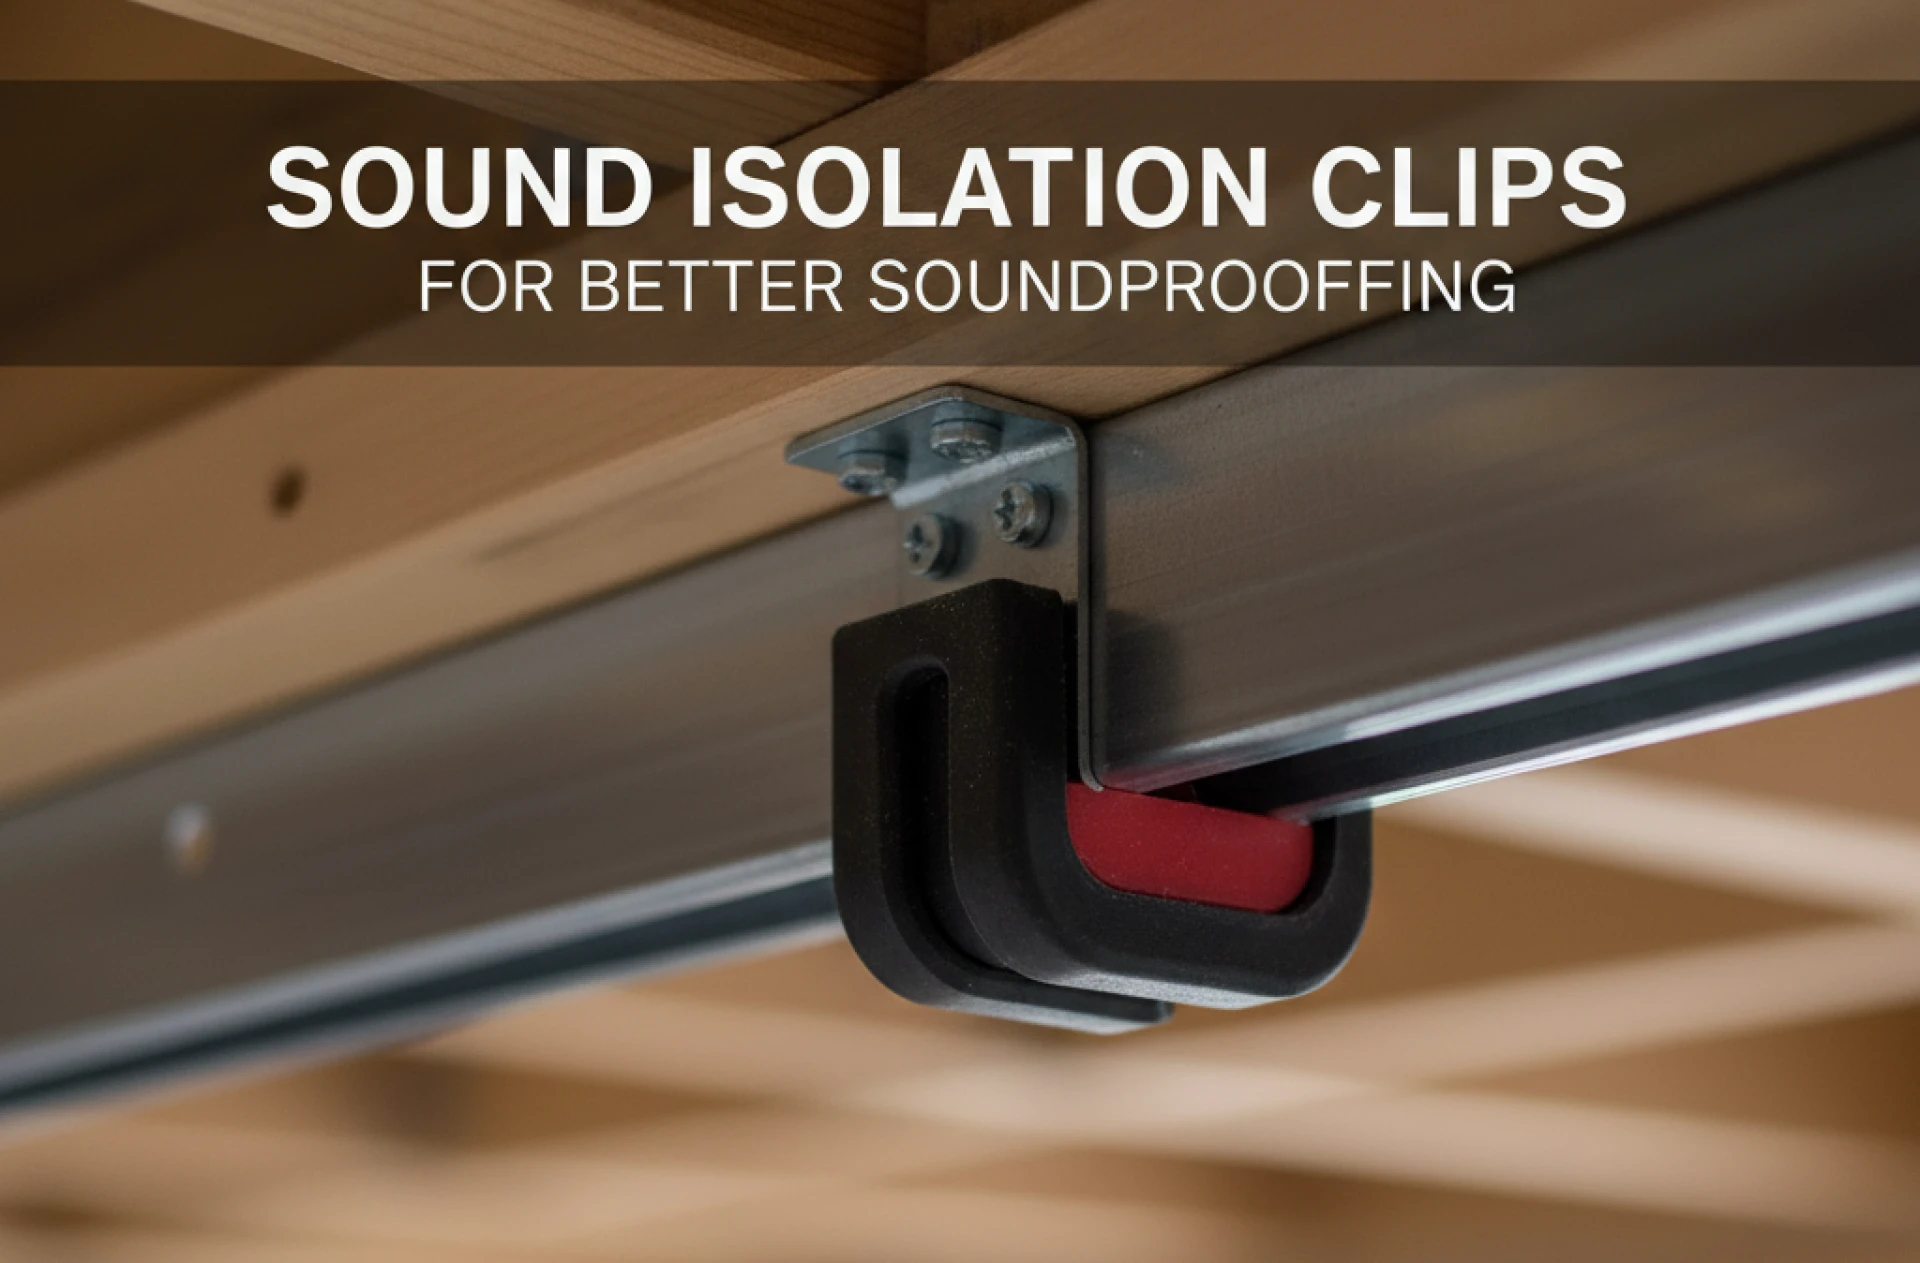
Sound isolation clips, sometimes called resilient clips, are small but powerful devices made of metal and rubber. They attach to the wall or ceiling studs, and then hold furring channels where drywall is mounted. Instead of drywall being screwed directly to the framing, it now floats on these clips.
The genius is in the separation. The rubber absorbs and dampens vibration, preventing it from moving freely from one surface to the next. In practice, this can add up to 15 or even 20 points to a wall’s Sound Transmission Class (STC), a measure of how well it blocks sound.
Compared to resilient channels alone, clips are more reliable because they prevent “short circuits.” With channels, one misplaced screw touching a stud can ruin the system. Clips reduce that risk while also supporting heavier walls with multiple drywall layers.
When Isolation Clips Make the Most Sense
Not every project calls for isolation clips, but there are times they shine.
For new construction, they’re ideal. Installing them during framing means you can plan spacing, add multiple drywall layers, and get consistent results. For remodeling, they’re more complicated but still possible with the right planning.
Clips are especially valuable in:
- Home theaters and recording studios, where clarity matters and noise can distract.
- Apartments or condos, where walls and ceilings separate living spaces.
- Bedrooms and nurseries, where quiet is essential for sleep.
They may be less practical in tight budgets, small spaces, or quick retrofits where walls can’t be opened.
Choosing the Right Isolation Clips
Not all clips are built the same, and choosing the right type is crucial.
- Material quality matters. Look for clips with durable rubber that won’t harden or crumble over time.
- Load capacity counts. Heavy walls with two or more layers of drywall need clips rated to carry the weight.
- Compatibility with channels is key. Always pair clips with recommended furring channels, as mismatched parts can lead to failure.
Some clips are made for new builds, while others are designed for retrofits, attaching over existing drywall. The latter can be useful in limited cases but sometimes risk creating a “triple leaf effect,” where sound bounces between too many layers.
The cost usually ranges from a few dollars per clip, and the number you need depends on the room size. On average, you may need one clip for every five square feet of drywall.
Installing Sound Isolation Clips the Right Way
Installation is not overly complex, but it demands care. A single mistake, like a screw hitting the framing instead of the channel, can ruin the effect.
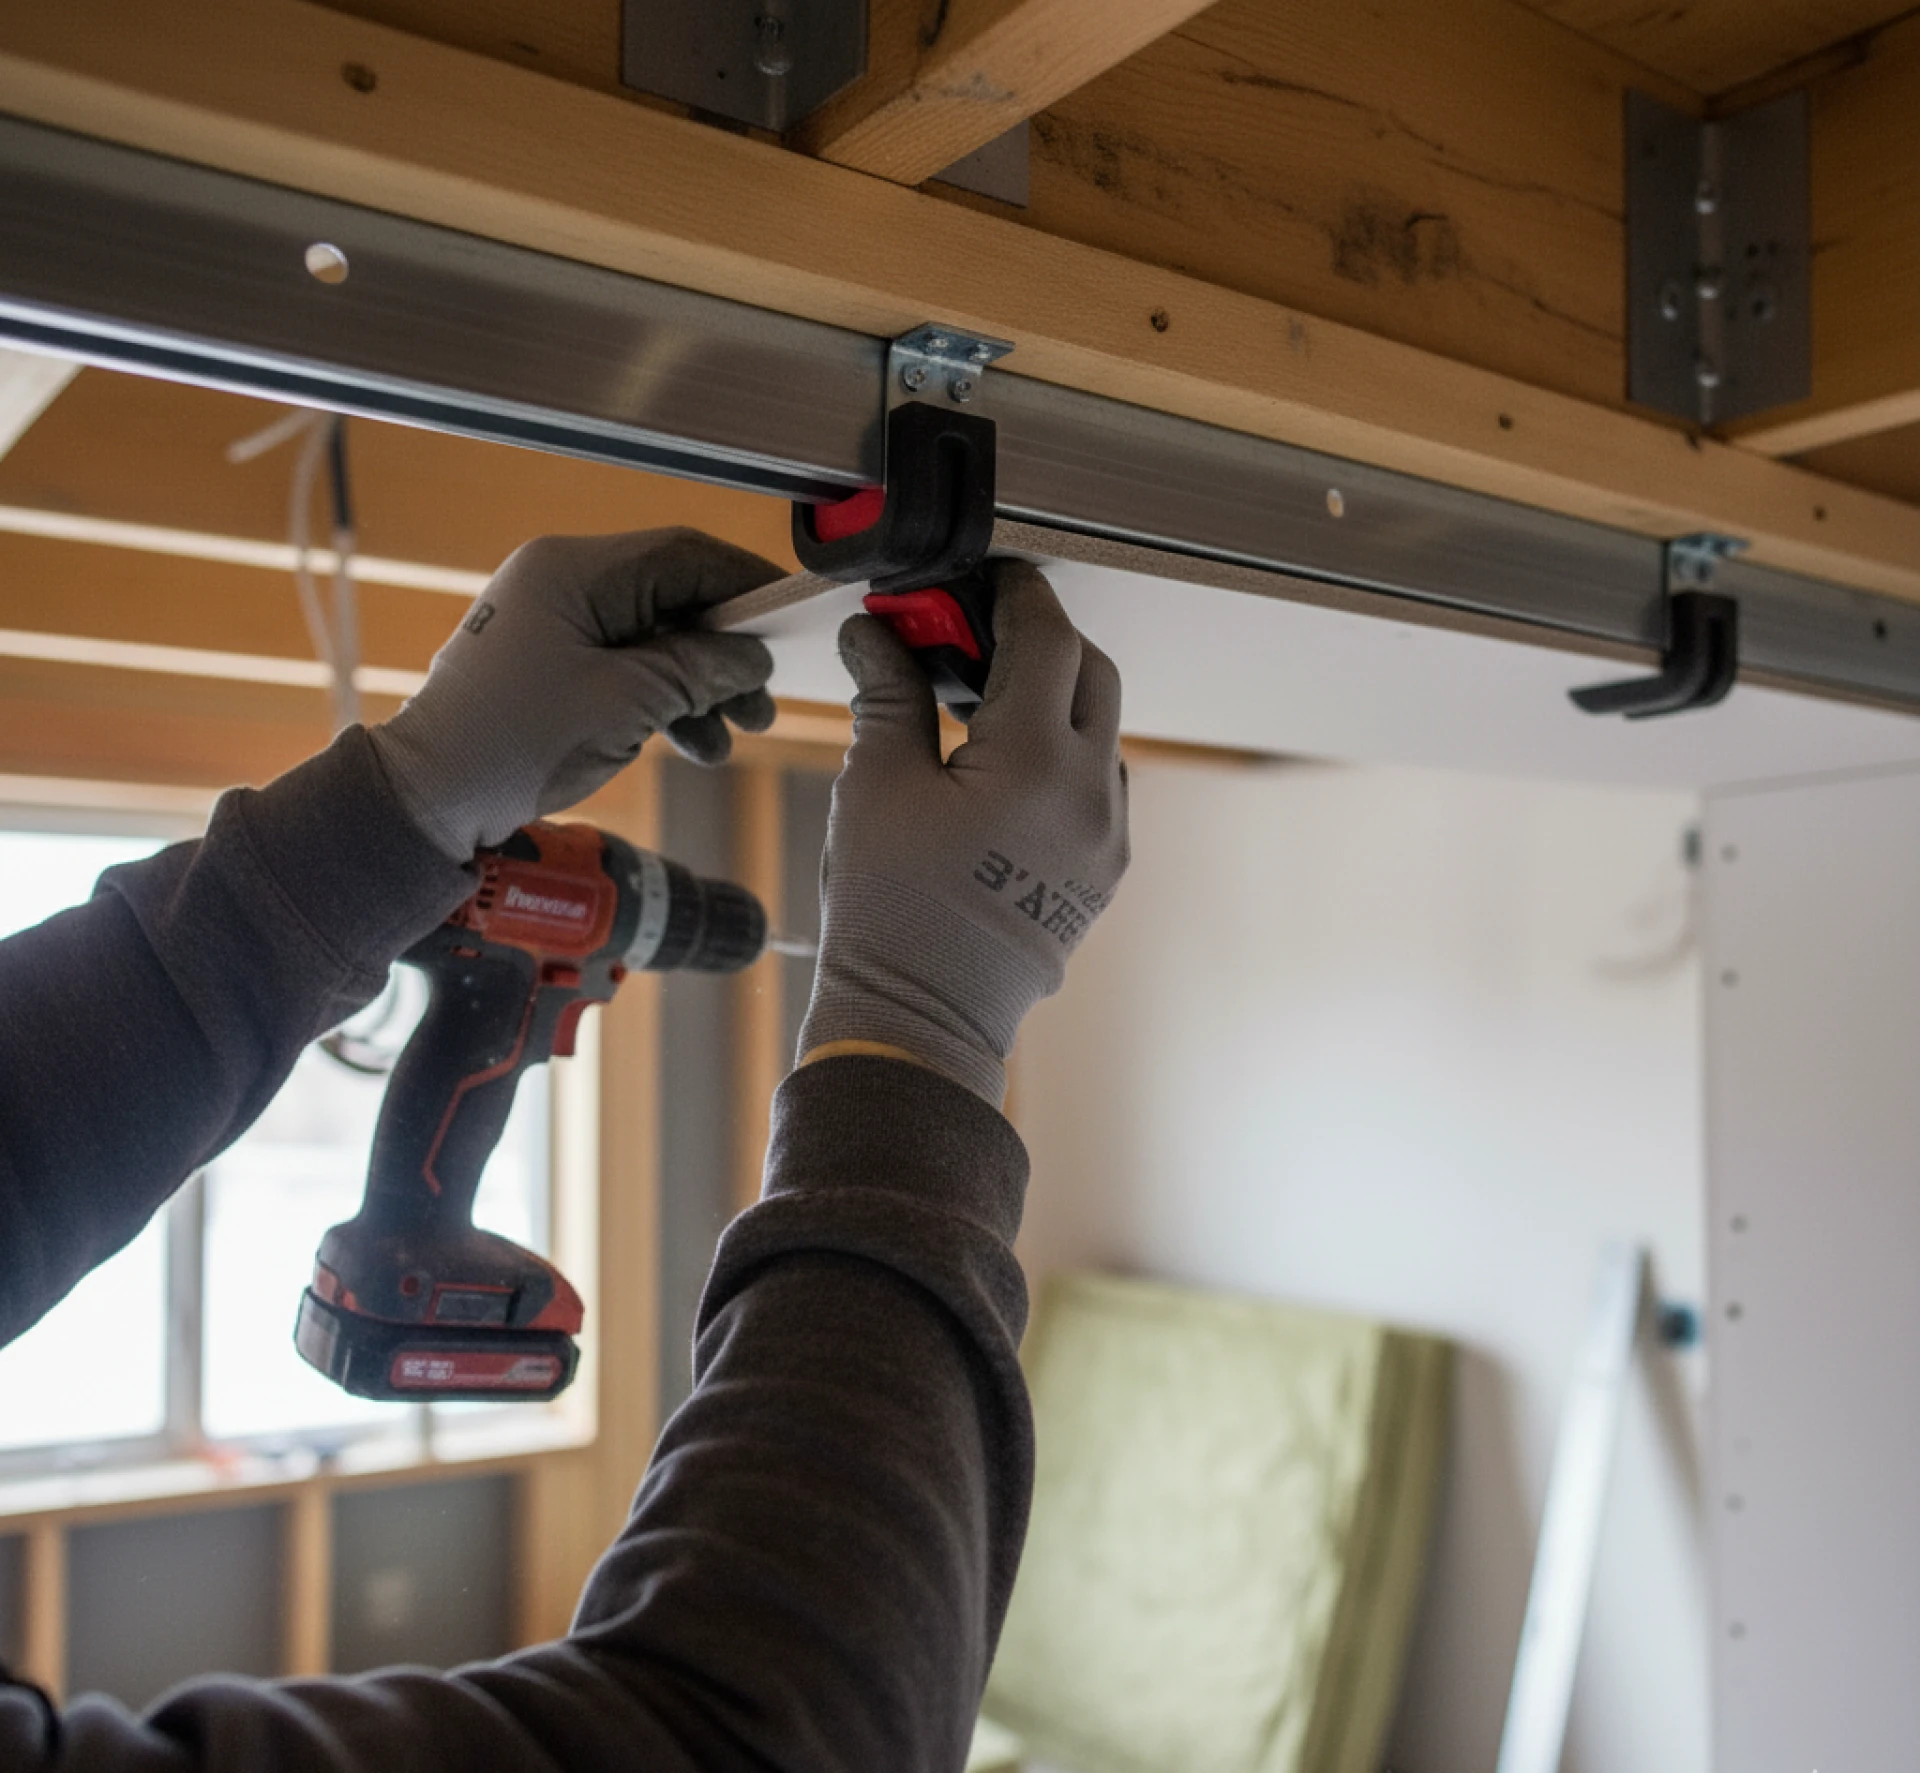
The process typically follows these steps:
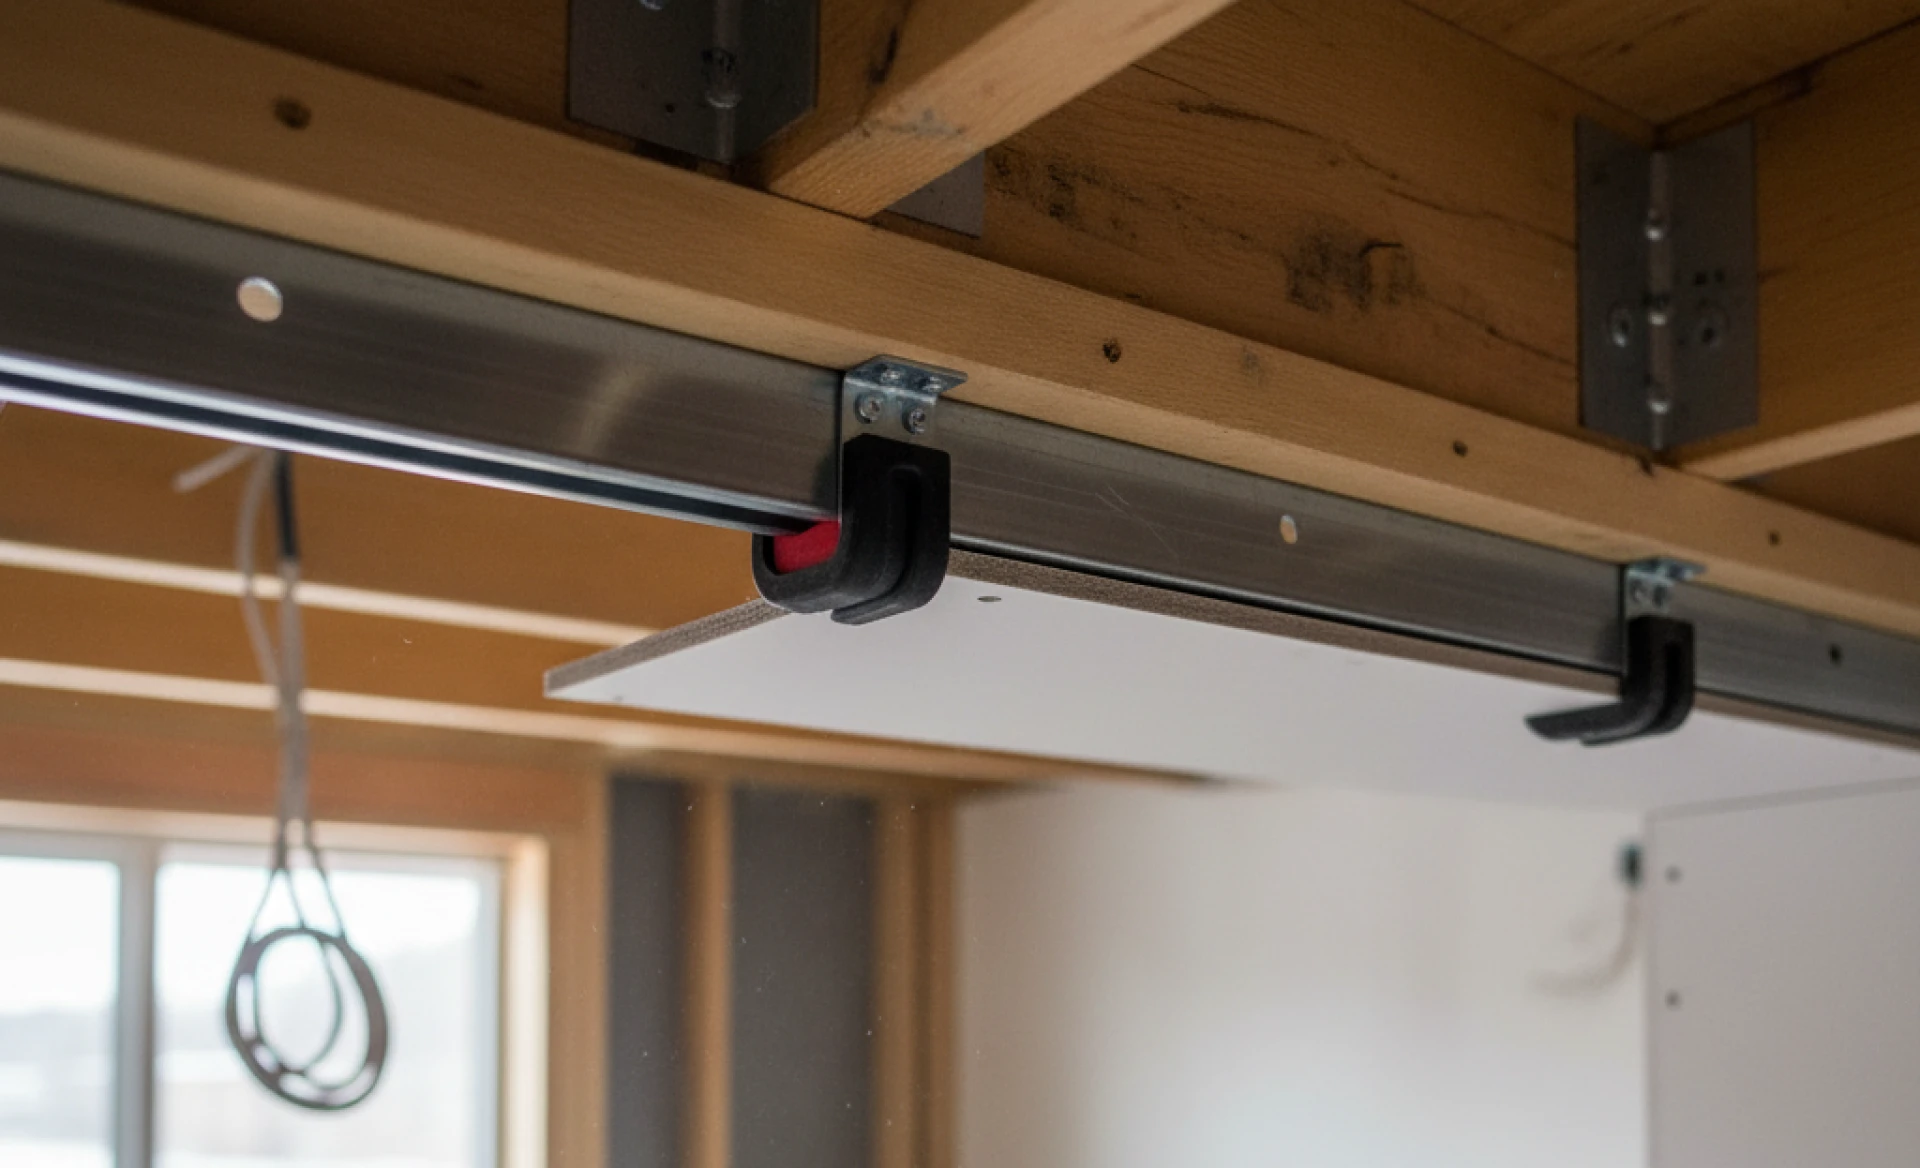
- Mark layout lines on studs or joists. Clips are usually spaced every 24 inches horizontally and every 48 inches vertically.
- Secure clips with proper screws. Different fasteners are needed for wood, steel, or concrete.
- Snap hat channels into the clips. These channels run horizontally across the wall or ceiling.
- Mount drywall to the channels. Only attach to the channel, never the studs behind.
- Seal the perimeter. Use acoustic caulk around edges, outlets, and any gaps to stop sound leaks.
Careful sealing matters. Even the best clip system won’t stop noise if air escapes around a wall’s edges or through ducts.
What Kind of Results Can You Expect?
Lab tests show impressive improvements, but real homes are different. Clips often boost STC ratings significantly, reducing clear speech to a muffled murmur and footsteps to faint thuds.
Still, expectations should stay realistic. Bass-heavy sounds like subwoofers remain difficult to block. Flanking paths, like sound traveling through ducts or shared framing, can also reduce effectiveness.
The best results come when clips are used as part of a broader strategy, including insulation, multiple drywall layers, and sealing leaks. When combined, these steps can make a room feel dramatically more private.
Alternatives and Comparisons
Some people weigh clips against other methods.
- Resilient channels are cheaper but risk failure if installed incorrectly.
- Double stud walls are effective but take more space and money.
- Mass-loaded vinyl (MLV) adds density but does not solve vibration problems.
- Green Glue compound reduces vibration between drywall layers but doesn’t decouple surfaces.
Clips stand out because they balance performance, space savings, and reliability. Still, in extreme cases like professional recording studios, combining methods may be necessary.
FAQ
Do sound isolation clips replace insulation?
No. Clips work best with insulation inside the wall cavity. Insulation absorbs sound inside the wall, while clips stop vibration between surfaces. Used together, they create a much stronger barrier.
Can I use clips on an existing wall without removing drywall?
Not usually. Attaching clips over drywall often causes the “triple leaf effect,” which can make performance worse. For serious retrofits, removing drywall or using special retrofit clips is better.
How many clips do I need for a standard room?
On average, you’ll need one clip for about every five square feet of drywall. For a 10x12 room, that usually means around 24 to 30 clips. Always check manufacturer spacing guidelines.
Will clips stop footsteps from upstairs?
They help reduce impact noise, but footsteps are tricky. For the best results, combine ceiling clips with carpet or underlayment on the floor above.
Conclusion
Sound isolation clips are not flashy. They’re small, hidden inside walls and ceilings, yet their effect can be transformative. By breaking the path of vibration, they solve one of the hardest parts of soundproofing—structure-borne noise.
For homeowners, musicians, or anyone craving quiet, clips offer a proven way to reclaim peace of mind. They work best when part of a complete system that includes insulation, extra drywall, and careful sealing.
The choice comes down to this: how much is silence worth in your daily life? If unwanted noise is eating into your comfort, these small devices may be the missing piece between frustration and true quiet.


Sign in to leave a comment.