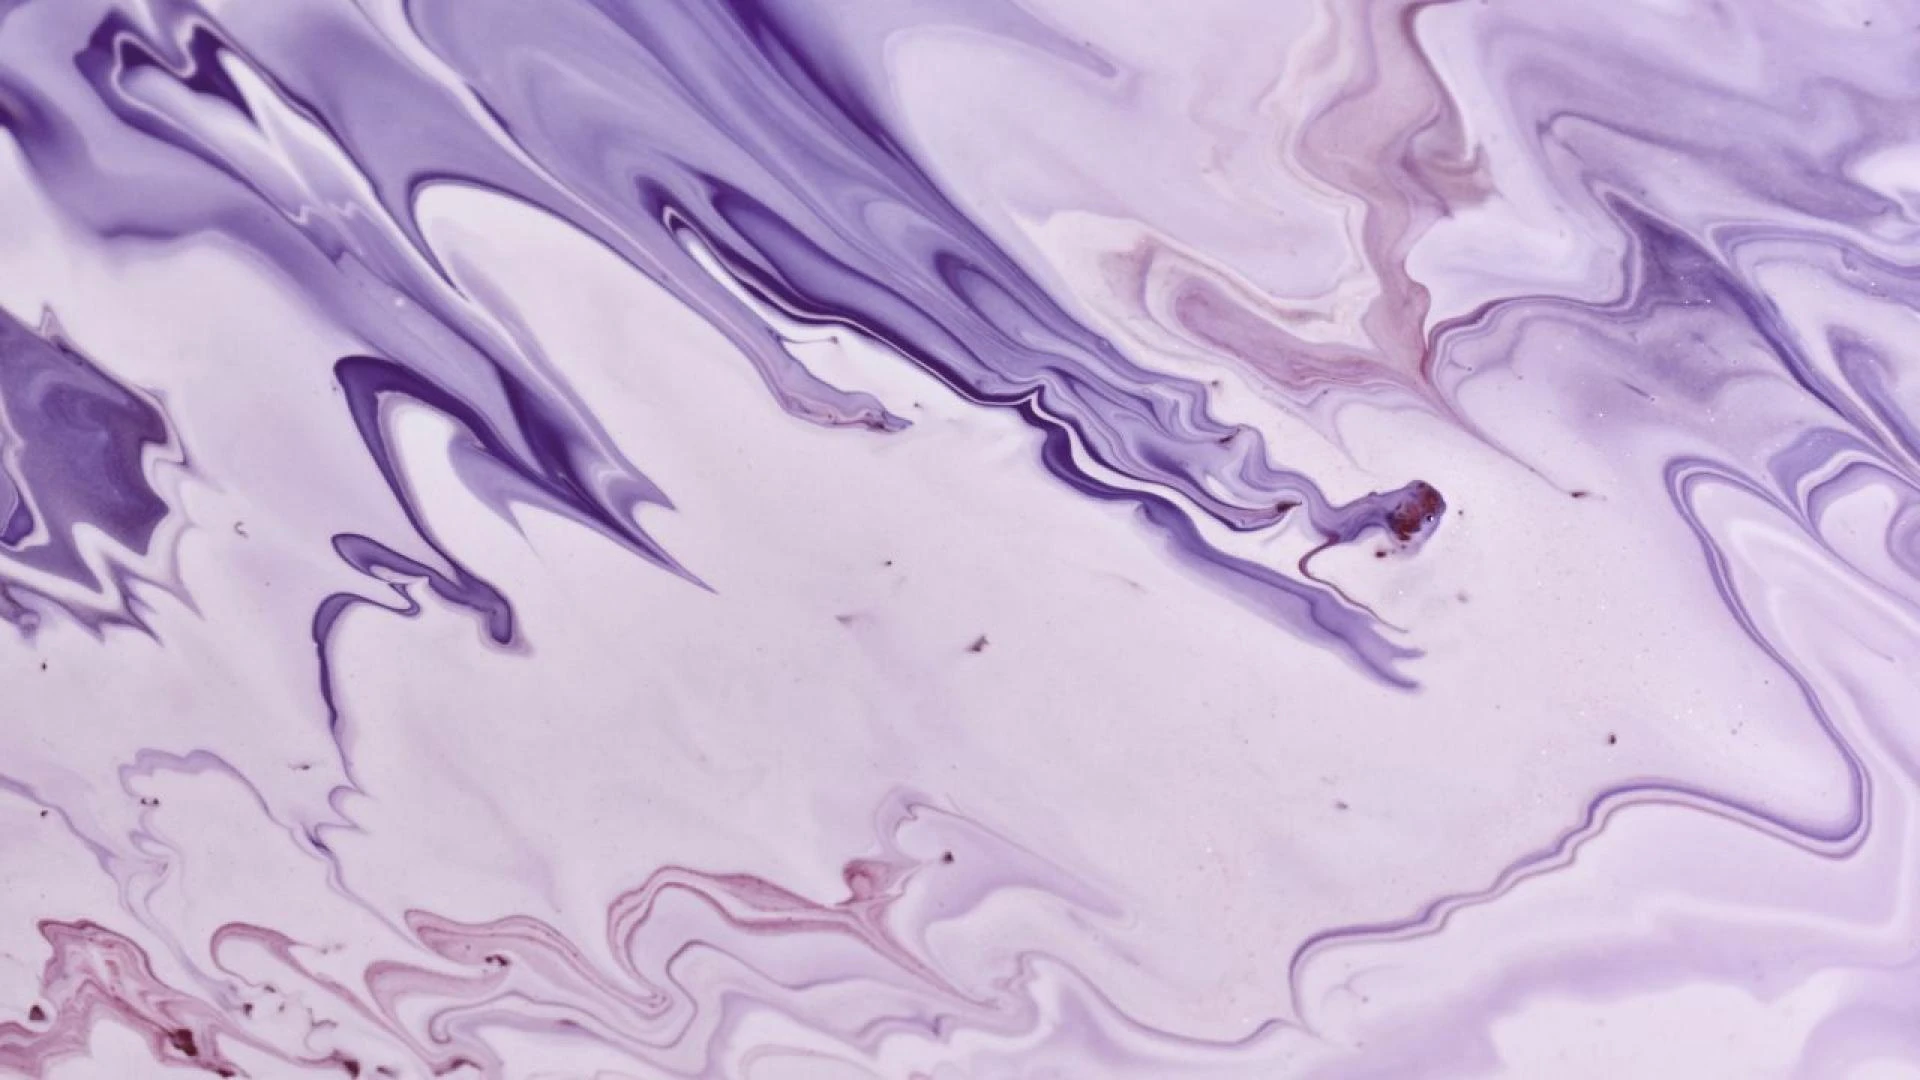
Assuming we need to talk about one of the greatest Fashion patterns of 2020, then, at that point, it must be Tie-Dye. This pattern which was famous in the US, harking back to the 1960s as a piece of the 'Flower child' and Psychedelic Cult, has made a wild rebound.
Big names, Fashion Houses, Influencers - it has been an outright top pick of quite a large number. What's more, because of the Pandemic and the resulting
Lockdown, it has turned into even more well-known among the Masses given how effectively it tends to be DIY-ed. Look at the aftercare, how to wash splash-color garments with care. You can likewise apply the accompanying splash-color procedures in turn around splash-color with blanch.
In this blog, we will be not simply giving more bits of knowledge into this significant Fashion Trend yet, in addition, give you an extremely simple instructional exercise on the best way to DIY this procedure at your home
Splash-color Techniques
With the rising prominence of Tie-Dying, there are a few strategies and methods to it, bringing about a few excellent styles in themselves. What likewise owes to this trial and error is how effectively these styles should be possible by anyone.
Coming up next are a few well-known strategies utilized in Tie-Dye
Pinpoint center Tie-Technique
Twisting Tie-Dye Technique
Shibori Technique ( A Japanese Form of Tie-Dye)
Ombre Tie-Dye Technique
Folded Tie-Dye Technique
Striped Tie-Dye Technique
Sunburst Technique and some more.
The most effective method to TIE-DYE At Home ( DIY TIE-DYE)
In this blog, we will drill down the means of one of the most well-known strategies of Tie-Dye, so you can without much of a stretch DIY and wear it off to roads accepting your new veil look!
This is the way you can get it done:
1. Dead center Technique
Pinterest
Take a plain shaded T-shirt (ideally a white T-shirt). Ensure it's sodden and normal fiber texture and lay it on a table.
For the Bull's Eye Technique, pick the piece of the texture which would go about as the focal point of the dead center.
Presently squeeze and pull the picked piece of the texture (which would be the focal point of the dead center) upwards and secure the opposite finish of the texture with our other hand.
Presently tie an elastic band around 1-2 crawls from our picked focus. Then, at that point, tie elastic groups after each 1-2 inch of the texture and keep doing it till the end. It ought to resemble a long cylinder.
Presently take your picked color tones and spurt them well in the picked regions, for the ideal look.
2. Twisting Or Swirl Technique
Pinterest
Take the texture and lay it level on the table.
Presently we squeeze the focal point of the texture and begin contorting the texture into a roundabout movement.
Proceed with this until all of the texture is assembled and resembles a wedge-formed ball.
Secure the winding with three elastic connections to support the wedge impact.
Presently add wanted colors onto the texture.
Flip the texture and rehash the method involved with spurting the color into the texture.
3. Shibori Tie-Dye Technique
shibori splash-color
For the Shibori Technique, lay the texture on the table, and make accordion folds onto the texture, from the base edge to the top piece of the texture in even creases.
Presently again overlap the texture( again into accordion folds) from one finish to the next, till the texture transforms into a piece of folds.
Take three elastic ties and fold them over the texture in confound headings, firmly getting the folds in a befuddle course.
Presently spurt the ideal tones into the texture on the two closures and let it dry for the prints to be striking and apparent.
4. Ombre Tie-Dye Technique
ombre splash-color steps
Pinterest
Lay the texture on the table and ensure it's sufficiently sodden.
Spurt the ideal tone from the top finish of the texture.
Presently take an enormous wet brush and utilize lower strokes to mix the shading downwards to make a mix and a shading immersion. Use tone and water are appropriately utilized in getting the legitimate mix
When the ideal mix for the principal the shading is done, presently similar advances are rehashed for the other picked colors.
When the texture has been colored, hang the texture and let it dry for the shirts for men shadings and examples to be adequately splendid
5. Folded Tie-Dye Technique
Bring the moist texture into the work area and scrunch the texture to a folded hill. Keep the folds free or tight as per the style liked. Tight folds will give a more characterized and fresh look.
Presently secure the folds of the hill with elastic ties and spurt color all around the texture.
Keep the texture inside a plastic or a sack for the texture to stay soggy while the color dries.
The Crumpled Tie-Dye Fabric is fit to be utilized.
6. Striped Tie-Dye Technique
the most effective method to splash-color stripes
Pinterest
Lay the moist texture and make creases of the texture in even or vertical lines, according to the stripes wanted.
Presently once the texture is creased, secure the creases of the texture. Add however many elastic groups and space them as wanted.
Whenever this is done, spurt the picked shadings and let the texture dry for 6-8 hours.
Presto, DIY Striped Tie-color Fabric is prepared.
7. Sunburst Tie-Dye Technique
Lay the Damp fabric on the table and squeeze a little piece of the material upwards to 1-2inch separately.
Presently secure an elastic band firmly around the squeezed piece of the material. This is the sunburst.
For updates, visit my site.
डाई टाई करने के लिए सबसे प्रभावी तरीका - चरणों के साथ डाई टाई करने के विभिन्न तरीके
मान लें कि हमें 2020 के सबसे महान फैशन पैटर्न में से एक के बारे में बात करने की आवश्यकता है, फिर, उस बिंदु पर, यह टाई-डाई होना चाहिए । यह पैटर्न जो अमेरिका में प्रसिद्ध था, 1960 के दशक में 'फ्लावर चाइल्ड' और साइकेडेलिक पंथ के एक टुकड़े के रूप में वापस आ गया, ने एक जंगली पलटाव किया है ।
बड़े नाम, फैशन हाउस, प्रभावशाली - यह काफी बड़ी संख्या में एकमुश्त शीर्ष पिक रहा है । क्या अधिक है, क्योंकि महामारी और परिणामस्वरूप
लॉकडाउन, यह जनता के बीच और भी अधिक प्रसिद्ध हो गया है, यह देखते हुए कि यह कैसे प्रभावी रूप से डाय-एड हो जाता है । आफ्टरकेयर को देखें, देखभाल के साथ स्पलैश-रंग के कपड़ों को कैसे धोना है । आप इसी तरह स्प्लैश-कलर प्रक्रियाओं को ब्लैंच के साथ स्प्लैश-कलर के चारों ओर लागू कर सकते हैं ।
इस ब्लॉग में, हम अभी तक इस महत्वपूर्ण फैशन प्रवृत्ति में ज्ञान के अधिक बिट्स नहीं दे रहे हैं, इसके अलावा, आपको अपने घर पर इस प्रक्रिया को करने के लिए सबसे अच्छे तरीके से एक अत्यंत सरल अनुदेशात्मक अभ्यास दें
स्पलैश-रंग तकनीक
टाई-मरने की बढ़ती प्रमुखता के साथ, इसमें कुछ रणनीतियाँ और विधियाँ हैं, जो अपने आप में कुछ उत्कृष्ट शैलियों को लाती हैं । इसी तरह इस परीक्षण और त्रुटि के कारण यह है कि इन शैलियों को किसी के द्वारा कितनी प्रभावी ढंग से संभव होना चाहिए ।
आगे आ रहा है टाई-डाई में उपयोग की जाने वाली कुछ प्रसिद्ध रणनीतियाँ हैं
पिनपॉइंट सेंटर टाई-तकनीक
घुमा टाई-डाई तकनीक
शिबोरी तकनीक (टाई-डाई का एक जापानी रूप)
ओम्ब्रे टाई-डाई तकनीक
मुड़ा हुआ टाई-डाई तकनीक
धारीदार टाई-डाई तकनीक
Sunburst तकनीक और कुछ और अधिक.
घर पर टाई-डाई करने का सबसे प्रभावी तरीका ( डाय टाई-डाई)
इस ब्लॉग में, हम टाई-डाई की सबसे प्रसिद्ध रणनीतियों में से एक के साधनों को ड्रिल करेंगे, इसलिए आप बिना किसी खिंचाव के बहुत कुछ कर सकते हैं और इसे अपने नए घूंघट रूप को स्वीकार करते हुए सड़कों पर पहन सकते हैं!
यह वह तरीका है जिससे आप इसे पूरा कर सकते हैं:
1. मृत केंद्र तकनीक
Pinterest
एक सादे छायांकित टी-शर्ट (आदर्श रूप से एक सफेद टी-शर्ट) लें । सुनिश्चित करें कि यह सोडा और सामान्य फाइबर बनावट है और इसे एक मेज पर रखना है ।
बैल की आंख तकनीक के लिए, बनावट का टुकड़ा चुनें जो मृत केंद्र के केंद्र बिंदु के रूप में जाएगा ।
वर्तमान में बनावट के चुने हुए टुकड़े को निचोड़ें और खींचें (जो मृत केंद्र का केंद्र बिंदु होगा) ऊपर की ओर और हमारे दूसरे हाथ से बनावट के विपरीत खत्म को सुरक्षित करें ।
वर्तमान में हमारे चुने हुए फ़ोकस से 1-2 क्रॉल के आसपास एक इलास्टिक बैंड बाँधें । फिर, उस बिंदु पर, बनावट के प्रत्येक 1-2 इंच के बाद लोचदार समूहों को टाई और अंत तक इसे करते रहें । यह एक लंबे सिलेंडर जैसा दिखना चाहिए ।
वर्तमान में अपने चुने हुए रंग टन ले लो और उन्हें आदर्श रूप के लिए चुने गए क्षेत्रों में अच्छी तरह से उछाल दें ।
2. घुमा या ज़ुल्फ़ तकनीक
Pinterest
बनावट लें और इसे टेबल पर स्तर दें ।
वर्तमान में हम बनावट के केंद्र बिंदु को निचोड़ते हैं और बनावट को एक गोल चक्कर आंदोलन में बदलना शुरू करते हैं ।
इसके साथ आगे बढ़ें जब तक कि सभी बनावट इकट्ठी न हो जाए और एक पच्चर से बनी गेंद जैसा दिखे ।
पच्चर प्रभाव का समर्थन करने के लिए तीन लोचदार कनेक्शन के साथ घुमावदार को सुरक्षित करें ।
वर्तमान में बनावट पर वांछित रंग जोड़ें।
बनावट को पलटें और बनावट में रंग को निचोड़ने के साथ शामिल विधि को फिर से दबाएं ।
3. Shibori टाई डाई तकनीक
shibori छप-रंग
शिबोरी तकनीक के लिए, मेज पर बनावट बिछाएं, और बनावट पर अकॉर्डियन सिलवटों को बनाएं, आधार किनारे से बनावट के शीर्ष टुकड़े तक भी क्रीज में ।
वर्तमान में फिर से बनावट को ओवरलैप करें( फिर से अकॉर्डियन सिलवटों में) एक खत्म से दूसरे तक, जब तक कि बनावट सिलवटों के एक टुकड़े में बदल न जाए ।
तीन लोचदार संबंधों को लें और उन्हें भ्रमित शीर्षकों में बनावट पर मोड़ो, दृढ़ता से एक बेफडल कोर्स में सिलवटों को प्राप्त करना ।
वर्तमान में दो क्लोजर पर बनावट में आदर्श टन उछाल और यह हड़ताली और स्पष्ट होने के लिए प्रिंट के लिए सूखी.
4. ओम्ब्रे टाई-डाई तकनीक
ओम्ब्रे स्पलैश-रंग कदम
Pinterest
मेज पर बनावट बिछाएं और सुनिश्चित करें कि यह पर्याप्त रूप से सोडेन है ।
बनावट के शीर्ष खत्म से आदर्श स्वर उछाल।
वर्तमान में एक विशाल गीला ब्रश लें और मिश्रण और छायांकन विसर्जन करने के लिए छायांकन को नीचे की ओर मिलाने के लिए निचले स्ट्रोक का उपयोग करें । वैध मिश्रण प्राप्त करने में टोन और पानी का उचित उपयोग किया जाता है
जब प्रिंसिपल के लिए आदर्श मिश्रण छायांकन किया जाता है, तो वर्तमान में इसी तरह के अग्रिमों को अन्य चुने हुए रंगों के लिए फिर से तैयार किया जाता है ।
जब बनावट रंगीन हो गई है, तो बनावट को लटकाएं और इसे पुरुषों के लिए शर्ट के लिए सूखने दें शेडिंग और उदाहरण पर्याप्त रूप से शानदार होने के लिए
5. मुड़ा हुआ टाई-डाई तकनीक
नम बनावट को कार्य क्षेत्र में लाएं और बनावट को एक मुड़ी हुई पहाड़ी पर स्क्रब करें । पसंद की शैली के अनुसार सिलवटों को मुक्त या तंग रखें। तंग सिलवटों को अधिक विशेषता और ताजा रूप दिया जाएगा ।
वर्तमान में लोचदार संबंधों के साथ पहाड़ी की सिलवटों को सुरक्षित करें और बनावट के चारों ओर रंग डालें ।
रंग सूखने के दौरान बनावट को नरम रहने के लिए प्लास्टिक या बोरी के अंदर रखें ।
टूटी हुई टाई-डाई कपड़े का उपयोग करने के लिए फिट है ।
6. धारीदार टाई-डाई तकनीक
छप करने के लिए सबसे प्रभावी तरीका-रंग धारियों
Pinterest
नम बनावट को बिछाएं और धारियों के अनुसार समान या ऊर्ध्वाधर रेखाओं में बनावट की कमी करें ।
वर्तमान में बनावट बढ़ने के बाद, बनावट के क्रीज को सुरक्षित करें । हालांकि कई लोचदार समूहों को जोड़ें और उन्हें वांछित स्थान दें ।
जब भी यह किया जाता है, उठाए गए शेडिंग को घुमाएं और बनावट को 6-8 घंटे तक सूखने दें ।
हाथ की सफ़ाई, उपकरण धारीदार टाई रंग कपड़े तैयार किया जाता है ।
7. Sunburst टाई-डाई तकनीक
मेज पर नम कपड़े बिछाएं और सामग्री के एक छोटे टुकड़े को 1-2 इंच तक अलग से निचोड़ें ।
वर्तमान में सामग्री के निचोड़ा हुआ टुकड़ा के चारों ओर एक लोचदार बैंड को मजबूती से सुरक्षित करें । इस sunburst.
अपडेट के लिए, मेरी साइट पर जाएँ ।
0
Sign in to leave a comment.